Showing posts with label brownies. Show all posts

Tuesday, September 20, 2016

Vegan Avocado Brownies

Vegan Avocado Brownies
2 ripe avocados, mashed well
1/4 cup coconut oil
3/4 cup granulated (white) sugar
1 teaspoon baking soda
1/2 teaspoon salt
1 cup whole wheat flour
3/4 cup strong coffee

Mix all ingredients together well in order given. Spread batter into greased pie  pan or square pan and bake at 350◦F for 15-20 minutes. Great warm and can even be frosted while warm!

Sunday, September 18, 2016

Super Rich Cookie Brownies

These brownie cookie bars may be super rich and super sweet, but they are also completely vegan! It just goes to show vegans can eat rich and decadent treats as well.
Brownie Base
2 cups whole wheat flour
2 cups granulated (white) sugar
3/4 cup unsweetened cocoa powder
1 teaspoon baking powder
1 teaspoon salt
1 cup oil
1 cup water
1 teaspoon vanilla extract
Caramel Hazelnut Filling
Maple Cookie Mix
1/3 cup flaked almonds

Preheat oven to 350◦F. Mix all brownie ingredients together and spread in a 9x9 inch pan.
Heat together hazelnut paste and sugar to a boil. Spread over brownie as evenly as possible.
Top with spoonfuls of cookie batter, which will spread out during baking.
Top with almonds.
Bake for 25 minutes until set.

Thursday, February 26, 2015

Dark Chocolate Mocha Brownies

Dark Chocolate Mocha Brownies
6 Tablespoons oil
2 large eggs
1/2 cup coffee
1 teaspoon vanilla extract
1/2 cup sugar
1 cup flour (white or whole wheat)
1/2 teaspoon baking powder
2 cups dark chocolate chips, melted

Preheat oven to 350◦F. Grease or line an 8x8-inch square pan.
In a large bowl, beat the eggs and oil/ Beat in the coffee and vanilla. Beat in the sugar. Stir in the flour and baking powder, then fold in the chocolate. Bake for 30-40 minutes until set but still moist. So fudgey and yummy - they need no icing.

These have a slightly different taste and texture for a brownie - dark and delicious with a hint of coffee. They have a fudgey middle with a firm, cake-like exterior. 

Friday, December 19, 2014

Fudgey Cranberry Dark Chocolate Brownies

This is one of the ultimate brownie recipes for brownie and chocolate lovers (me). Even those who are not in love with brownies will enjoy these. Since they are not mixed much, and ingredients are folded in, this creates a very fudgey and dense brownie. Yet these brownies definitely hold up well. This batch makes a big panful of tall brownies, so you get a lot from one batch. They contain some dried cranberries to give them a little festive feel, but these can be omitted or replaced with chopped nuts, or chocolate chips for a double chocolate brownie. The cranberries do not impart a strong flavor or texture though, they sort of "melt" into the chocolate. I often use whole wheat flour for chocolaty items such as brownies because you cannot detect the difference and it makes them slightly more nutritious. These need no icing, but an icing colored with cherry juice would add even more festive color to these and make them sweeter. 

Fudgey Cranberry Dark Chocolate Brownies
300g dark chocolate, chopped, use as dark as you wish, depending on your personal preference (I used a mix of 90%, 72% and caramel 60%)
200g butter, cubed
1/4 cup dark chocolate syrup, optional
8 large eggs
1 1/2 cups granulated (white) sugar (may want to scale this up or down depending on the type of chocolate used)
1 Tablespoons vanilla extract
1 1/2 cups whole wheat flour
2/3 cup unsweetened cocoa powder
2 teaspoons baking powder
pinch salt
2 cups sweetened dried cranberry, dusted lightly in flour

Preheat oven to 350◦F. Grease or line a 9x13 inch pan.
Bring a small pot halfway full of water to a boil, then reduce heat to simmer. Place the chocolate and butter in a heat-proof bowl that will fit the pot, and melt, stirring constantly with a rubber spatula. Once melted, stir in the chocolate syrup and cool slightly.
In a large bowl, beat the eggs until smoothly blended. Beat in the sugar until thick and dissolved, do not overbeat. Beat in vanilla. Temper this mixture with some of the chocolate, then fold all of the chocolate in.
Fold in the flour, cocoa, baking powder, and salt. Then fold in the cranberries. Do not overmix.
Spread batter in prepared pan. Bake for about 30 minutes, until edges begin to pull away from the sides of the pan. 

Friday, October 31, 2014

Mint Chocolate Halloween Brownies

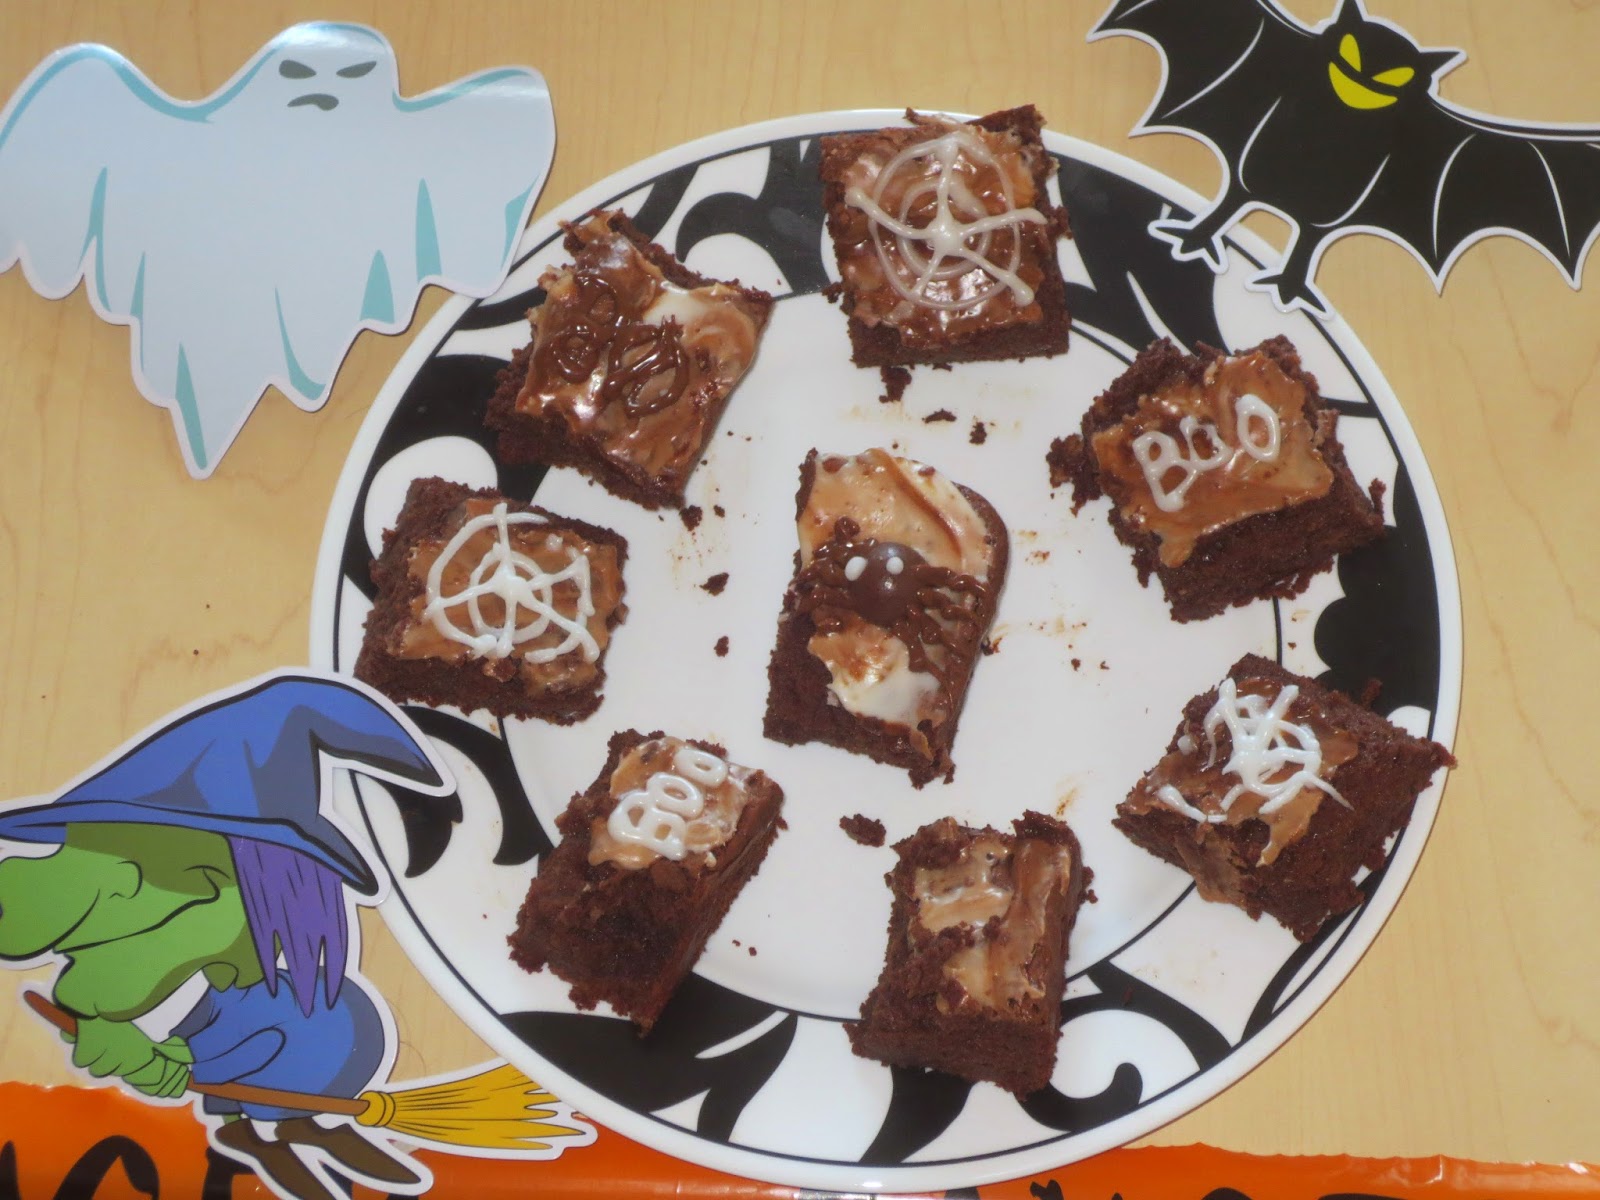
I'm not expecting very many trick-or-treaters tonight. That's why I simply made one pan of brownies to give to everyone who comes to my door. I whipped up a pan of mint chocolate brownies. I wanted to try something a little different, as I do not often pair mint and chocolate together. This gave them an entire new depth of flavor. These are the really fudgy, chocolaty brownies too - my favrotie. They don't even need icing unless you want to decorate them, as I did. Next, once they were cool, I spread them with a thin layer of simple icing. Then I decorated them quickly a few different ways, as they were still slightly warm and I could hear hungry trick-or-treaters prowling around. I probably should have baked the brownies yesterday, but I did not get the chance, so I just made and decorated them today. 
I did a few different decoration techniques - spiders using milk chocolate balls and melted milk chocolate, as in my peanut butter cookies from earlier in the week; BOO piped in both melted chocolate and white icing, and some more cobwebs piped in white icing. 

My idea of a jack-o-lantern this year? I couldn't really drag home a big pumpkin, so I bought a mini one at a farmer's market over a month ago, and kept it in the crisper in the fridge to keep it fresh. It was much too small to carve, and I didn't have any paint, so I simply grabbed a black sharpie and wrote "TAKE A BROWNIE" in the creepiest writing I could. It is tradition on my blog to post a picture of my food-related jack-o-lantern each year, so here it is!!!
Happy Halloween Everyone!

Thursday, October 30, 2014

Halloween Cobweb Brownies

Here is another Halloween recipe edition. It is simply a basic brownie recipe with the cream cheese swirl topping. There are plenty of recipes like this around, and any one of them will work. It is the procedure that changes slightly. Instead of putting dollops of the brownie batter alternately with the cream cheese batter into the pan; pour all of the brownie batter into the pan, then pour the cream cheese batter on top. Then use a butter knife to swirl the two batters together into a cobweb design. Then sprinkle black and orange Halloween sprinkles over top. This is a picture of the brownies before they were baked. 
They don't look much different once they are baked, and they taste just like any other cream cheese brownie - with a Halloween twist!

Monday, August 18, 2014

Raspberry Cheesecake Swirl Brownies

What to do with more leftover raspberry filling? Make it into swirl brownies of course! Cream cheese swirl brownies are delicious, and the addition of a little fruit makes them even tastier. These are reminiscent of the strawberry version I made here {Strawberry Cheesecake Brownies}. The brownie base is a dark chocolate vegan brownie base, that uses all whole wheat flour, but you cannot even tell!
Raspberry Cheesecake Swirl Brownies
1/2 cup whole wheat flour
1/2 cup unsweetened cocoa powder
1/4 cup packed light brown sugar
2 Tablespoons granulated (white) sugar
1/4 teaspoon baking powder
pinch salt
1/2 cup milk of any kind
1/3 cup oil
1/2 Tablespoon vanilla extract
1 Tablespoon ground flaxseed
1/3 cup miniature chocolate chips
1/2 recipe raspberry cream cheese filling (see yesterday's post)

Preheat oven to 330◦F. Line an 8x8 inch square pan.
In a large bowl, stir together the flour, cocoa, sugars, powder, and salt. 
In a separate small bowl, stir together the milk, oil, vanilla, and flax.
Stir the wet ingredients into the dry ingredients, then stir in the chips.
Spread a thing layer (using about one third of the batter) into the bottom of the pan.
Dot spoonfuls of the filling over top (about one third of filling).
Repeat, alternating layers, placing spoonfuls of each on top. Then gently swirl the mixture with a butter knife.
Bake for 25 minutes, until the edges are just set, and center is no longer liquidy but only slightly jiggly. Cool completely, then refrigerate until cold. Squares will firm upon cooling. 

Tuesday, July 08, 2014

Oreo Brookies

This is the finished product from the brownie base and cookie topping I have featured in the past two days' posts. What is a brookie, you say? Well, it is a combination of a brownie and a cookies. Much like a panookie (pan baked cookie), a pazookie (pizza cookie), a doughcano (doughnut volcano), or a cronut (croissant doughnut). Brownies and cookies are two favorite and popular sweets. You can make brownie cookies and you can make cookie brownie bars. You can also put both into one convenient square with cream-filled chocolate wafer sandwich cookies (otherwise known as Oreos) in the middle for a really decadent sweet treat that really delivers on chocolate flavor. 

This is a really sweet treat that makes a lot of servings because they are tall and need to be cut into fairly small bites. They are certainly an indulgence. To make them, simply prepare the brownie base as directed, place Oreo cookies over top of this, carefully spread with the cookie dough, and bake again as directed.
I bet these are absolutely excellent enjoyed while still warm with a scoop of vanilla ice cream and a drizzle of hot fudge sauce if you are really looking to splurge! 

They remind me of these They remind me of these {Cookie Dough Brownies} which I made a few months ago, only this time there is an Oreo layer and the cookie is baked. Nevertheless, that recipe also featured three posts of brownie layer, cookie layer, and finished treat. 

Sunday, July 06, 2014

Brookie Brownie Layer

This is going to be the base layer for some three-layer, delicious chocolaty bars I will be making. This is a simple, sweet decadent brownie layer. It could be made on its own as well, and frosted as desired for brownies. 

Brookie Brownie Layer
4 large eggs, beaten
1 1/4 cups unsweetened cocoa powder
1 Tablespoon vanilla extract
1 teaspoon baking powder
1 teaspoon salt
1 cup butter or hard margarine, melted
2 1/4 cups granulated (white) sugar
1 1/2 cups all-purpose (plain) flour
Preheat oven to 350◦F. Line a 9x13 inch rectangular baking pan with foil.
In a large bowl, beat together the eggs and cocoa. Beat in the vanilla, baking powder, and salt. Stir together the butter and sugar, then add to mixture. Stir in the flour.
Spread batter evenly in prepared pan and bake for about ten minutes if making brookies or approximately 30-40 minutes if just making brownies. Brownies should be just set and beginning to pull away from the sides of the pan. A toothpick inserted in the center should come out with fudgey, moist crumbs attached. 

Wednesday, June 25, 2014

Bite-Sized Grad Caps

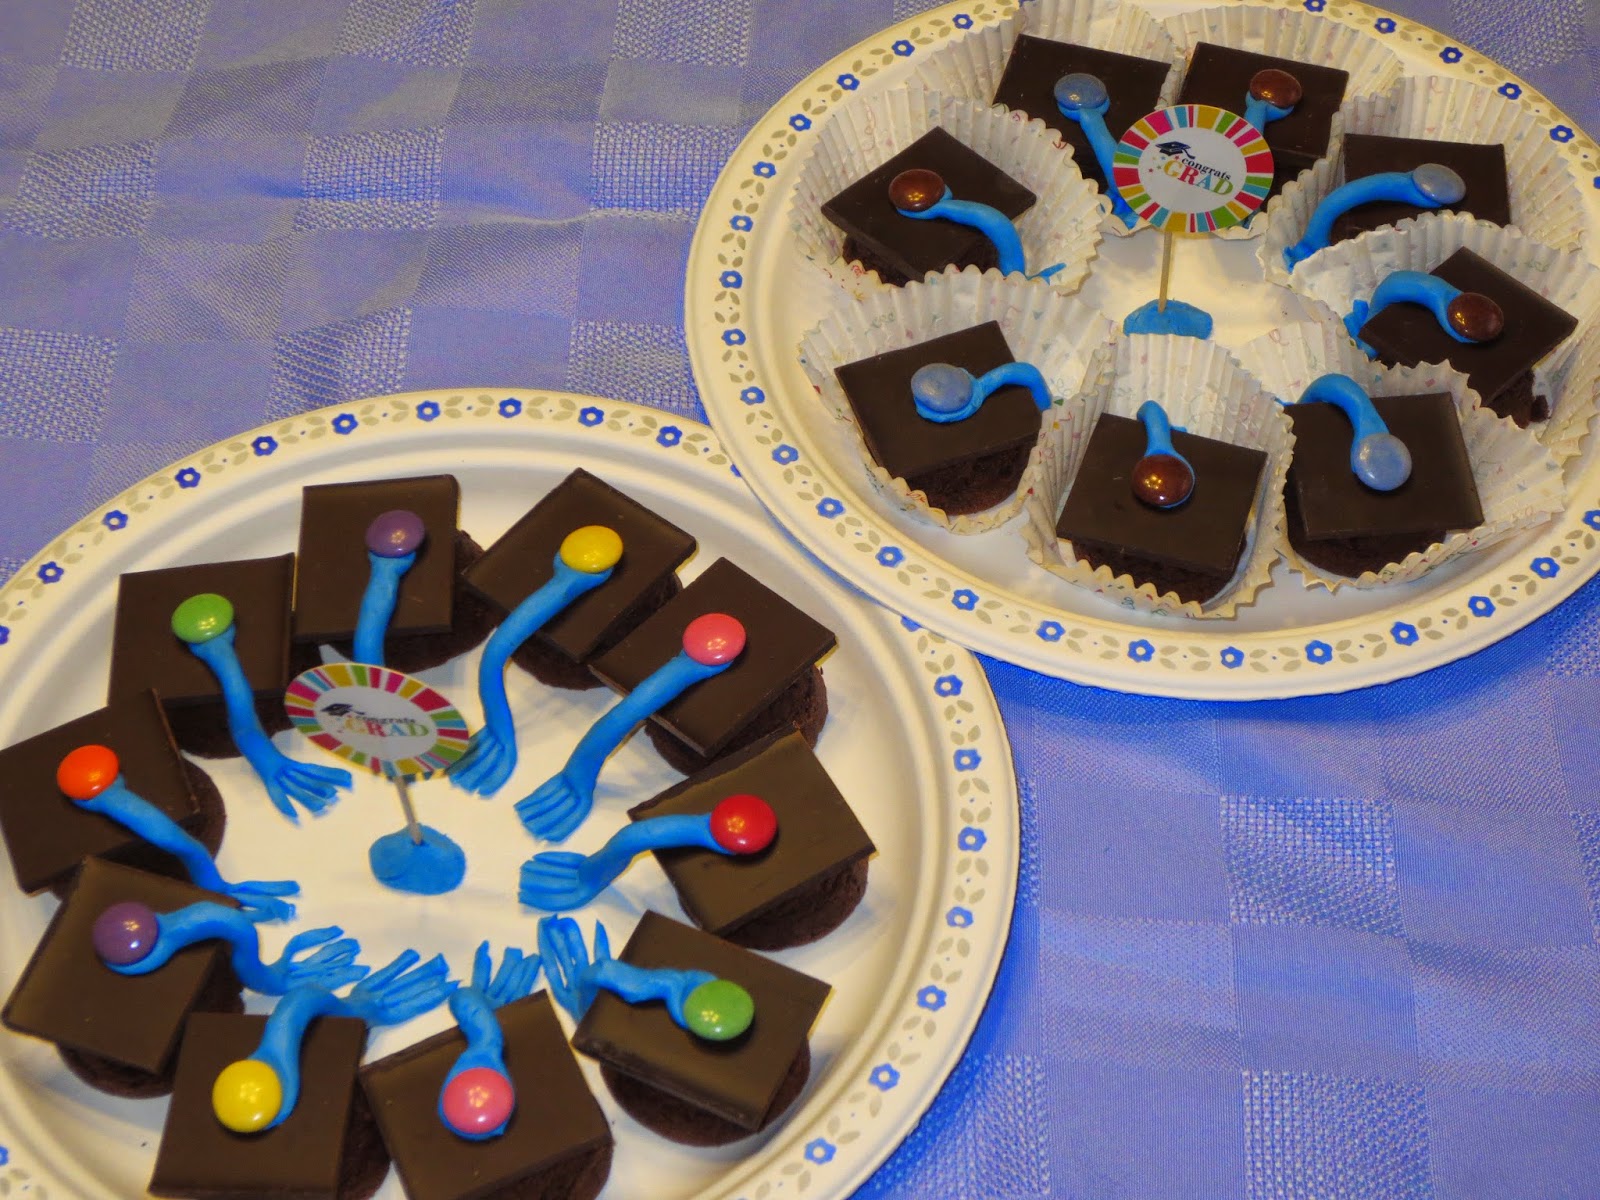
These have got to be one of the cutest graduation related desserts there are around. That's why I just had to make (and feature) them again. I did feature these last year (see {Brownie Graduation Caps}), and this year I basically did the exact same thing. However, on two of the plates I did use many different color candies for the tops instead of just matching colors, and even if they do not match school colors I think they are quite attractive-looking. I also placed some of the caps in celebratory graduation paper muffin liners so they are easier for guests to pick up and eat. I had some decorative graduation toothpicks on hand to stick in the center of the plates with a little bit of extra candy clay as well. Since there isn't really any baking required to make these, there is little prep work and the assembly is quick once the tedious work of forming tassels is complete. Of course it always helps to have an assembly line set up - thanks to my parents for helping out! These are the perfect individual-sized, chocolaty but not messy desserts for parties.

Congratulations to all graduates of 2014! 

Wednesday, May 07, 2014

Specific Heat Capacity of Chocolate

Good ol' physics. So many people questioned why I would take physics when all of my interest lies in cooking and baking. "What are you going to calculate? The velocity of your cake as it hits the floor? Will you have enough time to rescue it?" First of all, I don't plan on dropping any cakes. Second of all, whether physics is used in baking or not (it actually is, just not extensively), I can take physics if I would like to, it doesn't have to apply to my field of interest, as long as it interests me personally. 

I recently did a physics-related experiment in thermodynamics, though I suppose it could also be argued as more of a chemistry experiment in thermochemistry. Anyways, I was attempting to find the specific heat capacities of different types of chocolate. My prediction was that the darker the chocolate, the higher the specific heat capacity would be, and therefore it would take more time or energy to melt darker chocolate. 

The specific heat capacity of a substance is the quantity of energy (in joules) required to change the temperature of one gram of a substance by 1°C. I tested the specific heat capacity of four different types of chocolate in three trials each: 50% cocoa, 70% cocoa, 85% cocoa, and 90% cocoa (90% is my favorite). I found the specific heat capacity by recording the temperature change of 10.0 grams of each type of chocolate using a digital instant-read thermometer as it melted in a double boiler with the water below held at a constant 91.0°C over a period of three minutes. Then I used the formula q = cmΔT, where q is the heat provided by the double broiler, c is the specific heat capacity of the chocolate (the unknown), m is the mass of the chocolate, and Î”T is the temperature change of the chocolate.

The result? Why don't I wait and share that tomorrow....

Tuesday, May 06, 2014

73.75% Cocoa Fudge Brownies

73.75% Cocoa Fudge Brownies
3 large eggs
1 1/2 cups granulated (white) sugar
2 teaspoons vanilla extract
pinch salt
1 1/4 cups all-purpose flour
3/4 cup butter or hard margarine, melted
3 squares (10 grams each - not the baking squares which are 28g each): 50%, 70%, 85%, and 90% cocoa chocolate, melted together
*alternatively, 1 baking square (28g) of each type of chocolate could be used instead

Preheat oven to 350◦F. Line an 8x8 inch square pan with parchment paper.
In a large bowl, beat the eggs until frothy. Beat in the sugar, then the vanilla and salt. Stir in the flour until well combined. Stir in the butter, then fold in the chocolate gently until mixed. Spread batter evenly in prepared pan. Bake for 35 minutes - no longer, brownies should still be moist. Do not overbake.
Frost if desired. I like {Glossy Chocolate Frosting}.
There is of course, a little story behind these brownies. I don't just go naming them "73.75% cocoa fudge brownies" for no reason. I am sure you realized the types/amounts of chocolate called for in this recipe are a little odd. I'll explain tomorrow. 

Wednesday, March 26, 2014

Double Chocolate Cake Brownies

Brownies are pretty easy to make when you use a brownie mix. But they don't taste quite like homemade brownies, and what if you don't even have a brownie mix? I would think more people would have a cake mix on hand than a brownie mix (though maybe I am wrong) and a cake mix can be cleverly manipulated so it doesn't taste much like a brownie mix or a cake mix. This way you have tasty homemade brownies that are so quick and easy to make. No, I am not normally one for using mixes and taking shortcuts, but I thought this cake mix-turned brownie idea sounded interesting, and it is definitely a time saver, not to mention a good way to use up spare cake mixes instead of making cakes.

Cake Mix Brownies
1 package (two layer size) chocolate cake mix (chocolate fudge, devil's food, etc, doesn't matter)
2 large eggs
1/2 cup butter or hard margarine, melted
2 cups chocolate chips

Preheat oven to 350◦F. Grease or line a 9x13 inch rectangular pan.
Combine the cake mix, eggs, and butter until mixed, batter will be stiff. Stir in chocolate chips. Spread batter in prepared pan. Bake for 25 to 30 minutes, or until a toothpick inserted in the center comes out clean. Do not overbake. 

Frost them, drizzle them with melted chocolate, or dust with icing sugar if you'd like.

Monday, March 17, 2014

Cookie Dough Brownies

This recipe uses the divine chocolate brownie recipe from yesterday's post, and the cookie dough recipe that will be featured in tomorrow's post. There is a secret to the cookie dough topping, but I will wait until tomorrow to divulge that. To assemble these brownies, I spread about half the recipe of cookie dough on top (which is why I had extra for the pi pies from a few days ago). Of course this cookie dough was originally intended as a dip, which is why it is a bit softer in consistency than regular cookie doughs. However, instead of devouring it as a dip (or by the spoonful, though I definitely could have) I decided to make it into something new. 
These brownies definitely are not overly sweet, they are more for dark chocolate lovers, and those who do not enjoy sickly sweet desserts, or want something a bit healthier. In order to make the brownies a little bit sweeter, more special, and more attractive, I simply melted a little semi-sweet chocolate and gave it a quick drizzle over top. These cookie dough brownies combine two favorite flavors, brownies and chocolate chip cookie dough, as well as three different appearances of chocolate. (Maybe next time I will try a double chocolate chip cookie dough). The cookie dough is a bit of a different recipe, so it contains no raw egg and is perfectly safe to consume raw. 

Sunday, March 16, 2014

Devilishly Divine Brownies

Devilishly Divine Brownies
1 cup all-purpose flour (use whole wheat if you want to be really healthy)
1 cup unsweetened cocoa powder
1/2 cup packed light brown sugar
1/4 cup granulated (white) sugar
1/2 teaspoon baking powder
1/4 teaspoon salt
1 cup almond milk (can substitute regular milk)
2/3 cup canola oil (or melted coconut oil)
1 Tablespoon vanilla extract
2 Tablespoons ground flaxseed
2/3 cup miniature semi-sweet chocolate chips (omit at own risk) 
NOTE: These brownies are vegan without chocolate chips or with vegan chocolate chips.

Preheat oven to 330◦F. Line a 9x13 inch rectangular pan with parchment paper.
In a large bowl, whisk together the first six dry ingredients.
In a separate medium bowl, whisk together the milk, oil, vanilla, and flax. 
Stir liquid ingredients into dry ingredients. Stir in chocolate chips.
Spread mixture evenly into prepared pan.
Bake for exactly 16 minutes. They may seem a little underdone, but they should be. They will firm up upon cooling.
Cool then refrigerate. They may be enjoyed as is, but I bet you'll prefer them as they appear pictured below. Details in tomorrow's post!

Tuesday, October 15, 2013

Heavenly Hash Brownies

These heavenly hash brownie squares should be reminiscent of the ice cream flavor. Contrarily  they are delicious warm from the oven, so make a great winter alternative to a summer treat. I actually left out the almonds, so it is more like simply marshmallow brownies, and not true heavenly hash, but still gooey, chocolaty, and delicious!
Heavenly Hash Brownies
3/4 cup melted butter or margarine
1/2 cup unsweetened cocoa powder
2 cups granulated (white) sugar
4 large eggs
1 teaspoon vanilla extract
1/2 teaspoon almond extract
1/2 teaspoon salt
1 cup all-purpose (plain) flour, divided
1 cup semi-sweet chocolate chips
1 cup toasted slivered almonds
1 cup miniature marshmallows

Preheat oven to 350◦F. Grease or line a 9x13 inch pan.
In a large bowl, stir together the butter and cocoa until smooth. Beat in sugar, then eggs, vanilla, almond extract, and salt.
Add 3/4 of the flour and quickly stir for a few strokes. Then sprinkle chips, nuts, marshmallows, then remaining flour on top and mix until well blended. Spread batter in prepared pan and bake for about 35 minutes. 

Thursday, June 27, 2013

Oreo Peanut Butter Brownie Cups

If you really like oreo cookies, peanut butter, and brownies, then you will certainly love this chocolaty combination! Not exactly my favorite combination, though oreo cookies are one of the few store-bought cookies I actually enjoy (maybe because it is hard to replicate them at home). However, my friend really likes these three foods, so I made these especially for her. I saw the idea online. They are quite quick and easy to make, especially if you use a brownie mix (which I certainly didn't). I just whipped up a batch of my master brownie recipe, which normally makes an 8x8 inch square pan full (see Brownies: Master Recipe). 
There isn't really an official recipe for this, but here are the steps:
Spread a layer of peanut butter on the top of twenty four oreos (chocolate creme-filled sandwich cookies). 
Place two oreos together, peanut butter sides facing up. 
Place these twelve stacks in twelve muffin cups lined with paper liners.
Prepare a brownie mix (enough for an 8x8 inch pan) and spoon a layer into each muffin cups.
Bake at 350◦F for about 20 minutes. 
Makes 12 chocoalty, peanut buttery brownie cups chock full of oreo goodness!

Tuesday, May 07, 2013

Brownie Graduation Hats

This is another dessert I made for the graduation party. I think they are pretty cute, and they were not very difficult to make either! They are simply brownies made to look like graduation caps. A few years back, I made something similar to these, except they were cupcakes. I turned the cupcakes upside-down, placed a chocolate-dipped graham cracker on top, and used fruit leather to make the tassels. They were also quite cute, but it was hard to get the cupcakes and crackers to match. They were also slightly difficult to eat, and the graham cracker became soggy, so they didn't store well. I also knew I was making a cake already for the party, so I didn't want to have both cake and cupcakes, I wanted a different dessert.

This year a quick internet search produced this idea. These are cute little brownie graduation hats. They are fairly simple to make, the most difficult part being the tassels. As I mentioned before, I used candy clay tinted royal blue to make these. The base is simply what is referred to as a "two-bite" brownie, a small round brownie. Yes I used store-bought, but for a few good reasons. #1 I can't make brownies that uniformly shaped like a hat, #2 I needed to make several other dishes and this would save me time and work, #3 I needed to prepare them in advance, #4 Two-Bite brownies are also sold in gluten-free packages, so I was able to have one dessert for a guest who can't have gluten.
I simply attached a square of dark chocolate to the brownie with a small dab of extra candy clay. I tried to choose a square that matched the brownie color as closely as possible, and ended up going with 70% cocoa content. Then I stuck the tassel on top and attached it with a candy-coated chocolate piece, I sorted through the bag and used only the brown and blue ones, to match the hats.

The original recipe called for coated the brownies first, either in a chocolate ganache or a chocolate candy coating. I was planning on doing this, but when testing it out, discovered that they looked really good without it, and it would just end up being more of a hassle and difficult to store. I think they may even look better without, and are less messy and just as tasty! However, if you want, you can coat the brownies with ganache if you want the brownies and chocolate to match in color exactly, or want a more "polished" look to the brownies. Finally, you can use any color candy clay you want, as long as you have food coloring, to match the colors of the actual graduation caps or school colors. 

Monday, April 29, 2013

Message On A Brownie

What do you make when you don't have time for a cake, but want to convey a message on food? Well, a quick, easy, and equally as effective option is brownies. Cookies work too, but I find brownies, or another type of square for that matter, to be quicker, because you simply bake them in a pan and then cut them up - no rolling, forming or cutting shapes out involved. Brownies are one of the better options for squares though, because they have a smooth, even texture and appearance on top, and they do not need a lot of icing, but are definitely good with icing. With these brownies, I did not put an entire layer of chocolate frosting on top, as they did not need it (though it is certainly a possibility). But I did use some plain vanilla icing to pipe on the letters I wanted.

I baked a batch of the brownies from the recipe featured in yesterday's post. Then I cut them into squares, organized them on a good-sized platter, and piped letters on the brownies to spell out my message. To do this, I just used a quick vanilla icing and my piping bag fitted with a plain open tip, but a plastic bag with a hole snipped from the corner would work just as well. This idea works well with long and short messages. For short messages, just pipe on a letter per brownie, and use any extras for spaces or shapes to add to the message. For longer messages, cut the brownies a bit larger and use one brownie per word. This is a good alternative to cake as it is easier, quicker, and less messy to serve and easier to eat. It is also good for those who are not great at cake decorating or if you are looking to make a dessert other than cake.
Most viewers probably don't really understand my message. I guess it is what's referred to as an inside joke. However, it is basically another spin on that "Keep calm and...." phrase.

Sunday, April 28, 2013

Chip Brownies

Brownies are a classic. There are many different brownie recipes out there, using different types of chocolate  and slightly different ingredients, but they all have the same concept. This is a really easy, rich and decadent version that makes a large batch. They need no icing, and you can make them different every time by using a different type of chips. Or if you like nuts, add some of those as well. The recipe comes from a Hershey's cookbook. 

Chip Brownies
4 large eggs
1 1/4 cups granulated (white) sugar
1/2 cup (1 stick) butter or hard margarine, melted
2 teaspoons vanilla extract
1 1/3 cups all-purpose (plain) flour
2/3 cup unsweetened cocoa powder
1 teaspoon baking powder
1/2 teaspoon salt
1 2/3 cups chips of choice (chocolate, milk chocolate  dark chocolate, white, butterscotch, peanut butter, toffee, etc.) or use a mixture of different chips

Preheat oven to 350◦F. Grease or line a 9x13 inch rectangular baking pan.
In a large bowl, beat the eggs until foamy. Gradually beat in the sugar. Beat in the butter and vanilla until blended. Stir in dry ingredients, then chips. Spread batter in prepared pan. Bake for 25-30 minutes.
Publications International Limited. "Hershey's White Chip Brownies." Recipe. Hershey's Classic Recipes, Lincolnwood Illinois: Publications International, Limited, 2000. 37.