
Wednesday, November 30, 2011
Shortbread Cookies
Here is another addition to the growing stock of Christmas cookies in the freezer: Shortbread Cookies. Shortbread cookies are one of my very favorite types of cookies, if they are done right. I love how they are so rich and buttery and melt-in-your-mouth. However, some shortbread recipes can turn out dry and bland. I have never tried to make the traditional Scottish shortbread that is pricked all over and baked in a fluted tart pan, but I have tasted it, and it is good! I have also made brown sugar shortbread, which has a subtle caramel flavor and is also delicious.
 This shortbread recipe came from my great grandmother, and is a family secret, so unfortunately I cannot share it. I like to make these shortbread cookies fairly thick, and cut them into Christmas shapes such as bells, stars, and trees. A small dash of sprinkles is all these cookies need, a sweet icing would overpower their delicate flavor too much. They are always a popular choice among our Christmas guests.
Tuesday, November 29, 2011
Cheese-Crusted Meatball Pie
This delicious recipe came from one of my many cookbooks, Betty Crocker's "Baking For Today". This book includes recipes for everything from breads, to cookies, to main courses, to cakes, to appetizers, to perfect pies. I have made several recipes from this book before, and they all turned out nicely. So for supper, I decided to try Cheese-Crusted Meatball Pie. This dish consists of meatballs, sauce, and a flaky crust made with cheddar cheese on top. It was very good, and fairly easy to make. The secret to the flaky crust is to heat the sauce first, which also allows the pie to heat through on the inside before the crust overbrowns. The crust is a little crumbly and hard to roll out perfectly, so my pie has a very rustic look to it. But that's okay, it still tasted very good. I also had a little bit of crust leftover, so I just slid it on a baking sheet and baked it along side the pie.
 Cheese-Crusted Meatball Pie
MEATBALLS
1 pound lean (at least 80%) ground beef
1/4 cup dry bread crumbs
1/2 cup chopped onion
1/4 teaspoon salt
1/2 cup milk
1 jar (1 pound 10 ounces) tomato pasta sauce (any variety)
CHEESE PASTRY
1 cup white all-purpose flour
1/2 teaspoon salt
1/2 cup shredded cheddar cheese (2 ounces)
1/3 cup plus 1 tablespoon butter or shortening
2 to 3 tablespoons cold water
Heat oven to 425◦F. In medium bowl, mix beef, bread crumbs, onion, salt and milk. Shape mixture into 18 meatballs (I made smaller meatballs and got a lot more). Place meatballs in 15x10x1-inch pan. Bake 15 to 18 minutes or until meat thermometer inserted in center of meatballs reads at least 160◦F and meatballs are no longer pink in center.
Meanwhile: In one quart saucepan, heat pasta sauce to boiling, stirring occasionally. Reduce heat to medium-low; keep warm.
Make cheese pastry: In medium bowl, mix flour, salt and cheese. Cut in butter, using pastry blender (or pulling 2 table knives through ingredients in opposite directions), until crumbly. Sprinkle with cold water, 1 tablespoon at a time, mixing with fork until all flour is moistened and dough almost leaves side of bowl (1 to 2 teaspoons more water can be added if necessary). On lightly floured surface, gather dough into a ball; shape into flattened round. Roll into 10-inch square.
Place meatballs in 8-inch square glass baking dish. Top with hot pasta sauce. Cut slits in pastry; place over meatball mixture and tuck under edges. Bake 25 to 30 minutes or until pastry is golden brown.
Crocker, Betty. "Cheese-Crusted Meatball Pie." Recipe. Baking For Today, Hoboken, New Jersey: Wiley Publishing, 2005. 122.
Monday, November 28, 2011
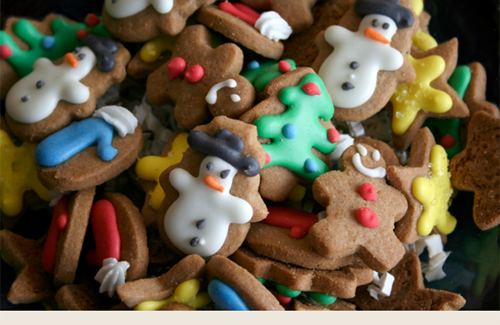
Gingerbread Cookies

Sunday, November 27, 2011
Gingerbread House

The standard kit comes with pre-baked gingerbread pieces in the shape of a house: front, back, two sides, two roof halves, and a chimney; as well as a little snowman, boy, and tree figure. The kit comes with a bag of royal icing, and bags of peppermints, gumdrops, gumballs, and other little candies in a rainbow of colors. We assign a family member to decorate a different part of the house each. Then we put the pieces together and put the house on display. The house is purely for decoration, we never it eat. We build it in late November and leave it on display until long after Christmas, sometimes until it's nearly Easter time! The kit is not high quality or great tasting; the gingerbread is full of preservatives, and the candies are pure sugar, and not to our liking. I have considered baking the gingerbread pieces myself, but decided it simply was not worth it, since we just end leaving the house out in the open before finally throwing it out. It would be such a waste of homemade, and it is cheaper to buy the kit anyway. However, on the same day we build the house, we also decorate homemade gingerbread cookies. These taste great, and we can decorate them to suit our personal tastes! Here is the house we built today.
Saturday, November 26, 2011
It's Beginning To Look A Lot Like Christmas....
Countdown until Christmas: 29 days! What other sentence could bring so much excitement, worry, anxiety, and nerves? Shopping days are crawling to an end, Christmas cards need to be mailed soon, and goodies need to be baked. Everywhere you shop, you can find candy canes, chocolates, gumdrops, peppermints, fudge, bark, cookies, toffee, truffles, brittles, marzipan, fruitcakes, and gingerbread. There are just so many different Christmas goodies to name, where do I even start?
There are cookies: shortbread, sugar, gingerbread, cherry, Santa's whiskers, gingersnaps, butterballs, and melting moments.
There are cakes: fruit cakes, yule logs, buches de noel, and figgy puddings.
There are breads: Christmas tree bread, panettone, and stollen.
Then there is dinner: turkey, stuffing, mashed potatoes, carrots, turnips, peas, brussels sprouts, sweet potatoes, ham, cranberry sauce, fresh bread, green beans, and gravy.
There is also: mincemeat pie, eggnog, bread pudding, and ciders.
Mmm, mmm! The holidays are here, enjoy!
 PHOTO CREDIT:"PPN2-3x_christmas_candy_party_plate" http://www.bonbonsconnexion.com/en/home.html.Bonbons Connexion Candy, n.d. Saturday, November 26, 2011
There are cookies: shortbread, sugar, gingerbread, cherry, Santa's whiskers, gingersnaps, butterballs, and melting moments.
There are cakes: fruit cakes, yule logs, buches de noel, and figgy puddings.
There are breads: Christmas tree bread, panettone, and stollen.
Then there is dinner: turkey, stuffing, mashed potatoes, carrots, turnips, peas, brussels sprouts, sweet potatoes, ham, cranberry sauce, fresh bread, green beans, and gravy.
There is also: mincemeat pie, eggnog, bread pudding, and ciders.
Mmm, mmm! The holidays are here, enjoy!

Friday, November 25, 2011
Chocolate-Vanilla Pinwheels

Chocolate-Vanilla Pinwheels
1/2 cup butter or hard margarine, softened
1/2 cup granulated sugar
1 egg
1 tsp. vanilla
3 Tbsp. milk
1 3/4 cups all-purpose flour
1/2 tsp. baking powder
1/8 tsp. salt
2 Tbsp. cocoa
1 Tbsp. butter or hard margarine, softened
Cream first amount of butter and sugar together. Beat in egg, vanilla and milk.
Stir flour, baking powder and salt together and add. Mix into a ball. Divide into 2 equal portions.
To 1 portion add cocoa and remaining butter. Mix well. Roll out each portion between sheets of waxed paper to 1/8 inch thick. Make them the same size in a rectangular shape. Remove top papers. Invert white layer over chocolate. Remove top paper. Roll as for jelly roll, removing bottom paper as you roll. Wrap and chill overnight. To bake slice thinly. Place on ungreased cookie sheet. Bake in 375◦F oven for about 6 minutes. Makes 4 dozen.
TIPS: The rectangular dough shapes should be approximately 7x12 inches. Roll dough from the short end. Slice about 1/3 inch thick, although you may not get 4 dozen out of it. Dough should not stick to waxed paper too much, but you may want to sprinkle the waxed paper with a light coating of flour as a precaution. I baked mine for 8 minutes, which was the perfect amount of time.
Paré, Jean. "Pinwheels." Recipe. Cookies, Edmonton Alberta: Company's Coming Publishing Limited, 1989. 64.
Thursday, November 24, 2011
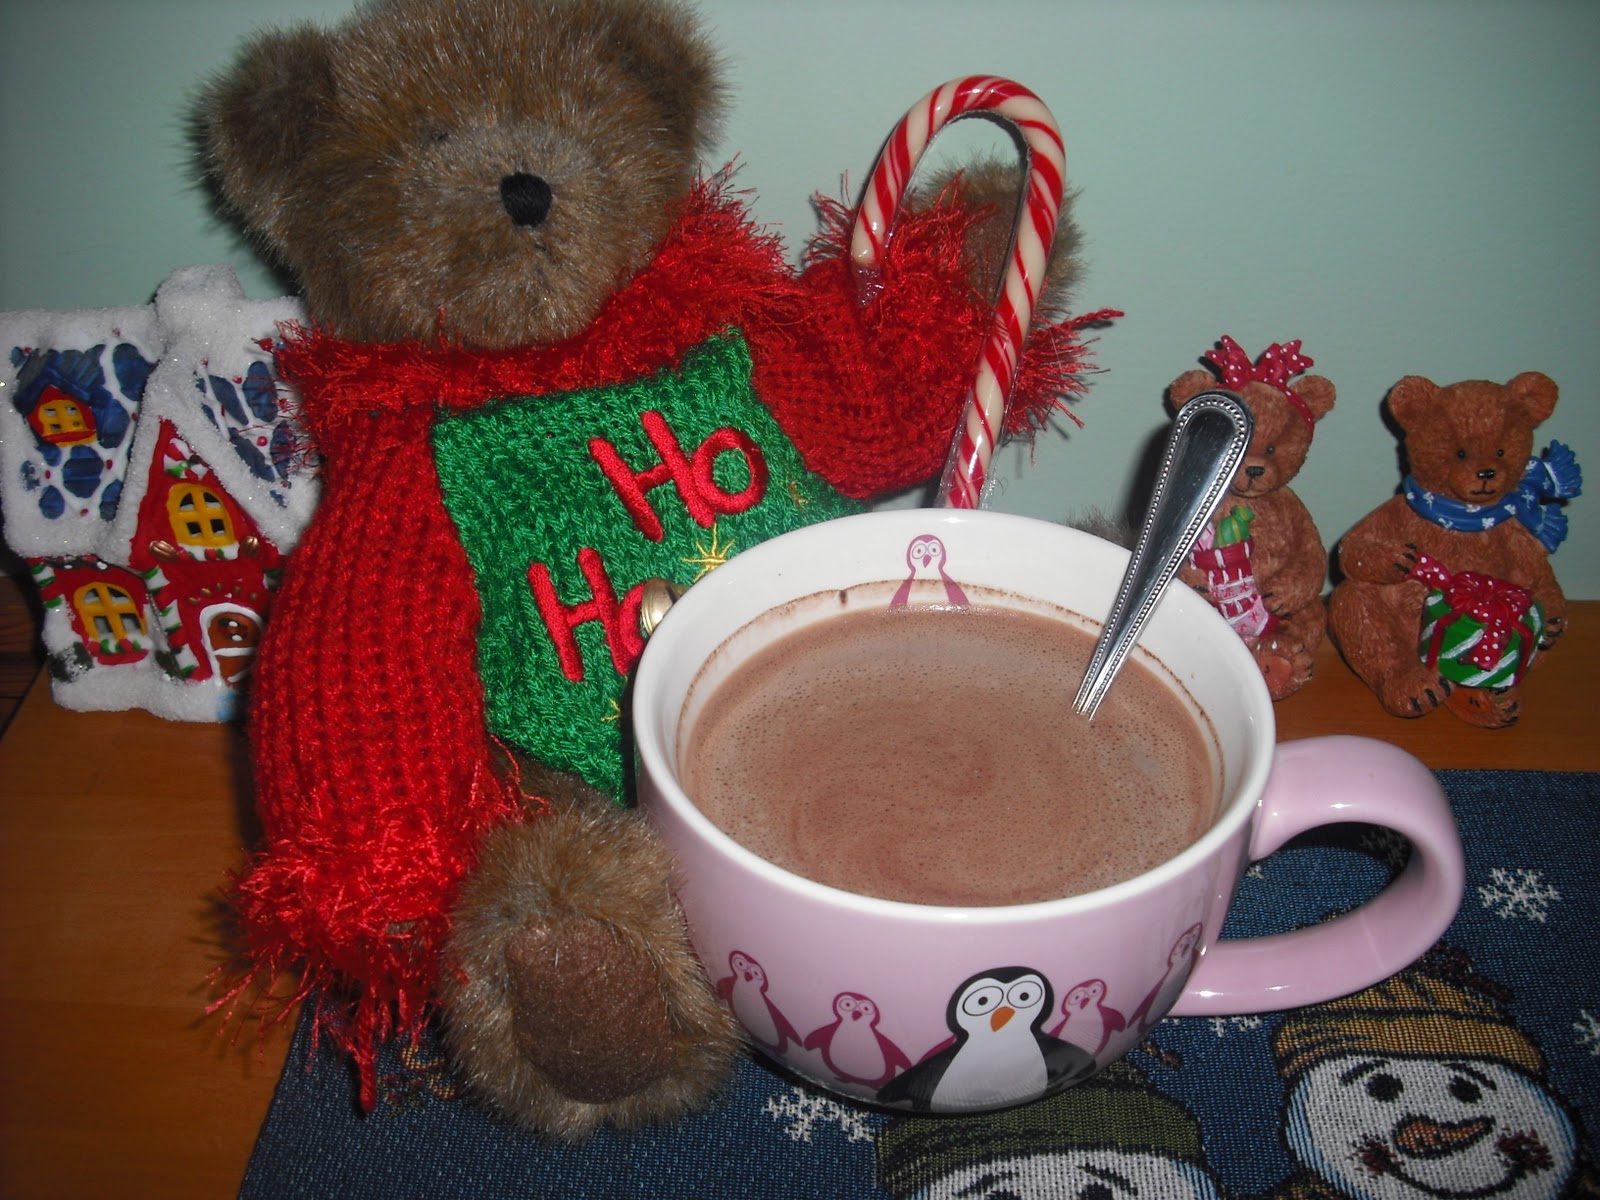
Hot Cocoa
Basic Microwave Hot Cocoa For One
2 teaspoons granulated sugar
1 teaspoon unsweetened cocoa powder
pinch salt
2 teaspoons cold milk
additional milk
In a mug, mix the sugar, cocoa, and salt. Stir in the two teaspoons of cold milk until smooth. Add more milk to fill the cup. Microwave on HIGH (100%) for 1 to 1 1/2 minutes, until hot. Stir to blend.
Rich and Indulgent Microwave Hot Cocoa For One
Follow the same procedure as above, using 2 tablespoons each of cocoa and sugar. Add 1/4 teaspoon of vanilla extract.
Slimmed Down Microwave Hot Cocoa For One
Follow the same procedure as above, replacing sugar with the equivalent of a no-calorie sweetener. Use fat-free milk.
GREAT ADDITIONS AND TOPPINGS: Of course, hot cocoa is very popular served with marshmallows and candy canes. Adding little chocolate bars or chocolate chips is also very good. Hot cocoa is delicious garnished with whipped cream, chocolate or caramel sauce, sprinkles, a dusting of icing sugar or cocoa, or a maraschino cherry.
Additional flavorings for hot cocoa include vanilla extract, instant coffee, ground cinnamon, mint extract, orange extract, maple extract, or a splash or liquor.
Hot chocolate is great for dipping Christmas cookies!
Wednesday, November 23, 2011
Chocolate Bars
 Here is another one of those "just for fun" posts. Today, I am going to list as many different names of chocolate bars as I can. Here I go...
Kit Kat, Aero, Coffee Crisp, Caramilk, Mr. Big, Snickers, Mars, 3 Musketeers, Milky Way, Cookies and Cream, Hershey's, Eat More, Skor, Crispy Crunch, Twix, Wunderbar, Dairy Milk, Crunchy, Galaxy, Almond Joy, Butterfinger, Mr. Goodbar, Oh Henry
Here are some others that are not chocolate bars, per se, but they still count...
Kinder Surprise, Rolo, Reese, Smarties, M&Ms, York Peppermint Patties, Maltesers, Cherry Blossom, Glosettes, Toffifee
Kinder Surprise, Rolo, Reese, Smarties, M&Ms, York Peppermint Patties, Maltesers, Cherry Blossom, Glosettes, Toffifee
Among these chocolate bars, there are many different varieties and flavors of each type as well. There is certainly a lot to choose from. Can you think of any more?
PHOTO CREDIT: "all" http://www.epicureansanswer.com/favourite-things/the-10-best-chocolate-bars/.Epicures Answer, n.d. Tuesday, November 22, 2011
Tuesday, November 22, 2011
Tuna Casserole
 For whatever reason, the words "Tuna Casserole" seem to take with them a negative connotation. Not in this case though. Our tuna casserole is delicious, and we look forward to the days when we have it for supper. Although, our tuna casserole is probably quite a bit different from the standard definition of tuna casserole. It consists of pasta, vegetables, tuna and cheese. The idea for the recipe came from an online recipe website. This tuna casserole makes excellent leftovers, as it keeps well and reheats well in the microwave. It is quick, easy, and convenient. Here is the recipe.
Tuna Casserole
1 box (225g) macaroni and cheese mix
2 Tbsp. milk
2 Tbsp. Italian dressing
1 bag (3 cups) frozen vegetable blend (broccoli, cauliflower, and carrot sticks)
2 cans ( 120g each) flaked light tuna, packed in water
3/4 cup marble cheese, cubed
4-8 thin slices marble cheese
Cook pasta according to package directions and drain. Add cheese mix, milk, and dressing. Stir to combine. Stir in vegetables, tuna, and cubed cheese. Bake, covered at 350◦F for 30 minutes. Top with cheese slices, bake another 5 minutes or until cheese is melted.
Note: This can be baked in a deep casserole dish, a shallow baking pan, or even directly in the pot the pasta was mixed in, for minimal cleanup.
Monday, November 21, 2011
Chocolate Cupcakes with Buttercream Swirls

Here are some more cupcakes I made for the birthdays of two aquatints. I made twenty chocolate cupcakes with vanilla icing, and a friend of mine made twenty vanilla cupcakes wit chocolate icing. We shared the forty cupcakes in celebration of the birthdays. These are the cupcakes I made. I simple whipped up some chocolate cake batter and made my signature vanilla buttercream. Then I used an open star tip to pipe overlapping, circular swirls around the cupcakes, piling the icing on higher towards the center, and finishing off with a peak. As you can see, twenty cupcakes fit perfectly in my container. Had I needed to make one more, I would have had to use another container! Surprisingly the container held the cupcakes just right - the icing did not become squished on any sides, and the cover was just high enough so that the peaks of the cupcakes did not squish. The black and white patterned wrappers go perfectly with the black bottoms and white tops of these cupcakes, and the white bottoms and black tops of the other cupcakes. Simple and classy was the aim here, no sprinkles, bright colors, or other adornments. Just sweet and simple.
Sunday, November 20, 2011
Brown Sugar Cookies
This is an excellent quick and easy cookie recipe that uses just a few ingredients and a simple procedure. These are different, yet incredibly original cookies. They are sort of like chocolate chip cookies without the chocolate. They are a great plain cookie option or an option when allergies are a concern. These cookies are incredibly soft and moist and keep well. The recipe is from Company's Coming "Cookies".
 Brown Sugar Cookies
1 cup butter or hard margarine, softened
1 cup brown sugar, packed
1 egg
1 tsp. vanilla
2 cups all-purpose flour
1 tsp. baking soda
1/8 tsp. salt
Cream butter and sugar together well. Beat in egg and vanilla.
Stir flour, soda and salt together and add. Mix well. Drop by teaspoonfuls onto greased cookies sheet. Bake in 350◦F (180◦C) oven for 6 to 8 minutes. Makes 4 dozen.
Paré, Jean. "Brown Sugar Cookies." Recipe. Cookies, Edmonton Alberta: Company's Coming Publishing Limited, 1989. 29.
Saturday, November 19, 2011
Helpful Conversions
 In cooking and baking, different measurements are used depending on the source you are using. These measurements refer to ingredient amounts, pan sizes, and temperatures, and can be metric or imperial, or by dimensions or volume. All of these conversions are merely approximations and rounded values. It is recommended that when cooking and baking, you refer to the same set of measures for everything in the recipe, as the equivalents are not exactly equal, but if you use all of the same measurement for your recipe, it will turn out, whether you are using metric measurements or imperial. For example, use all imperial measures, do not measure some ingredients imperially and some ingredients metrically.
Oven Temperatures: Fahrenheit to Celsius to Gas Mark
300◦F = 150◦C = 2 (very low)
325◦F = 160◦C = 3 (low)
350◦F = 180◦C = 4 (moderate)
375◦F = 190◦C = 5 (moderate)
400◦F = 200◦C = 6 (hot)
425◦F = 220◦C = 7 (hot)
Baking Pan Measures: Imperial to Metric to Volume
8 inch square = 20 cm square = 2 L
9 inch square = 23 cm square = 2.5 L
8 inch round = 20 cm round = 1.2 L
9 inch round = 23 cm round = 1.5 L
9x13x2 inch rectangle = 21x33x5 cm rectangle = 3.5 L
10x15x1 inch jelly roll = 25x40x2 cm jelly roll = 2 L
9x5x3 inch loaf pan = 23x13x7 cm loaf pan = 2 L
Ingredient Measures: Imperial to Metric
1 cup = 250 mL
1/2 cup = 125 mL
1/3 cup = 80 mL
1/4 cup = 60 mL
1 Tbsp = 15 mL
1 tsp = 5 ml
1/2 tsp = 2 mL
Weights
1/2 ounce = 14 grams
1 ounce = 29 grams
2 ounces = 57 grams
4 ounces = 113 grams
8 ounces = 227 grams
16 ounces = 454 grams (one pound)
As you can see above, eight ounces is equal to approximately 227 grams. However, we generally say that one cup (250 mL) is equal to eight ounces, and that grams and milliliters are equal in weight. This shows that these measurement conversions are not precise. Also note that I did not list the conversion of measurements to exact weights (which is considered the most accurate way to measure ingredients correctly), because every ingredient has a different density - that is the weight of the ingredient compared to the amount of it, so every item would need a different conversion.
I have come to be familiar with many of these conversions over the years, but I did not memorize all of them. Some I had to look up on some of my handy charts and guides. These guides are commonly found in cookbooks, on the internet, and even in individual recipes.
PHOTO CREDIT: "cuisipro_stainlesssteel..." http://sweetkd.wordpress.com/2011/03/02/to-weigh-or-not-to-weigh-that-is-the-question.Cooking Therapy, n.d. Saturday, November 19, 2011
Friday, November 18, 2011
S'more Pull Aparts
Here is an intriguing recipe I came across in a bread recipe booklet. Since there was some leftover cottage cheese from our lasagna supper, I decided to make these S'more Pull Aparts which interestingly use 3/4 cup of cottage cheese. The cottage cheese keeps these rolls, similar to cinnamon rolls, incredibly moist and tender. The dough also uses buttermilk, and can easily be mixed up in a food processor. The dough is then kneaded briefly, spread with melted butter, and sprinkled with graham cracker crumbs, milk chocolate chips, and ground cinnamon. Once rolled up and cut, the twelve rolls are placed in a springform pan, brushed with more melted butter, and baked for 20 minutes. Then they are sprinkled with miniature marshmallows and more chocolate chips and baked for 5-10 more minutes. The only change I would suggest is to use a bit less graham cracker crumbs and more chocolate chips, but that's just my personal taste! The dough is very nice and easy to work with, easy to cut too, although a little bit of the filling may seep out. A very yummy way to enjoy a different twist on s’mores in the off-season, while enjoying a cinnamon roll too!

S'more Pull Aparts
¾ cup cottage cheese
1/3 cup buttermilk
2 Tablespoons unsalted butter, softened
1 teaspoon vanilla extract
2 cups white all-purpose flour
1 Tablespoon baking powder
½ teaspoon salt
¼ teaspoon baking soda
FILLING
1/3 cup unsalted butter, melted, divided
1 cup graham cracker crumbs
¾ cup milk chocolate chips
1 teaspoon ground cinnamon (optional)
TOPPING
1 ¼ cups miniature marshmallows
¼ cup milk chocolate chips
Preheat oven to 400◦F. Line a 9-inch springform pan with parchment paper.
In a food processor, combine the cottage cheese, buttermilk, butter, and vanilla, process until very smooth. Add remaining dry ingredients, pulse together just until dough looks like a mass of small beads, beginning to clump together (I mixed the cottage cheese, buttermilk, and butter in the food processor, but did the rest by hand, as my food processor was not large enough).
Transfer dough to a lightly floured work surface and knead for one minute until smooth. Roll dough out to a 12x15-inch rectangle.
Brush surface with two tablespoons of the melted butter, leaving a ½ inch border all around. Combine the graham cracker crumbs and two tablespoons of melted butter, sprinkle over dough. Sprinkle with chocolate chips and cinnamon.
Starting at long end, roll up dough jelly roll style, pinch seam to seal. Cut dough into twelve equal-sized pieces with a serrated knife. Arrange in prepared pan. Brush with remaining melted butter.
Bake for 20 minutes. Remove from oven and sprinkle with marshmallows and chocolate chips. Return to oven for 5-10 minutes until lightly browned. Cool for 10 minutes, then unmold. Serve warm, or reheat in the microwave.
"Easy S'mores Pull Aparts.” http://www.robinhood.ca/recipedetails.aspx?rid=4891. Robin Hood, n.d. Friday, November 18, 2011.
"Easy S'mores Pull Aparts.” http://www.robinhood.ca/recipedetails.aspx?rid=4891. Robin Hood, n.d. Friday, November 18, 2011.
Thursday, November 17, 2011
Fudge
Does anyone have a foolproof recipe for chocolate fudge? I have tried a few different recipes; some failed and some were okay, but I have yet to find the "perfect" chocolate fudge recipe. Right now, I prefer to buy other people's homemade fudge because it is likely to taste better than my own fudge. There are also many other types of fudge, but I have yet to try those recipes. There is divinity fudge, white fudge, maple fudge, brown sugar fudge, butterscotch fudge, peanut butter fudge, white chocolate fudge, peppermint fudge, and many, many others. There are two main techniques of making chocolate fudge.
1. Quick Fudge, Cheater Fudge, Microwave Fudge, or Condensed FudgeThis fudge uses chocolate chips and a can of sweetened condensed milk melted together with other ingredients, and is then refrigerated to set.
2. Old Fashioned Fudge, Candy Fudge, or Boiled Fudge
This fudge combines butter, sugar, cocoa, and other ingredients on the stovetop. The mixture is boiled and must be watched carefully with a candy thermometer, and stirred and poured only when it reaches specific temperatures.
I have tried to make both of these types of fudge before. The first one did not set properly, and was not of the proper consistency at all, although it did taste quite good. The second kind turned out, but the top had a bubbly appearance, the texture was slightly off, and the taste just wasn't exactly what I was looking for. Here is a picture of the second type of fudge.

Wednesday, November 16, 2011
Four Methods Of Mixing
There are four main methods of combining ingredients in order to make most baked goods. The three ways are : 1) Creaming fat and sugar, 2) Wet bowl and dry bowl, 3) Cutting in fat, and 4) Beaten egg whites. I am going to give a short description of each of them, and what they are most commonly used to make.
1) Creaming fat and sugar: This method begins with a substantial amount of a fat (most commonly butter, but also hard margarine and shortening) that has been softened at room temperature. If needed, the fat is softened by itself first, and then the sugar is added. The ratio of sugar to butter is often around 1:1 or 2:1. Brown and granulated sugar are most common, but confectioners' and superfine sugar are also used. The mixture is then creamed (beaten together) for a few minutes - usually until light and fluffy, but sometimes until creamy. This step may be done by hand or using an electric mixer, the latter being much faster and more opt to produce better results. This extremely important step is often overlooked, and is not given the proper amount of beating time, resulting in poorer quality baked goods. This method really gives volume, stability, and a light and fluffy texture to baked goods. Often, eggs will be added one at a time after the butter and sugar is sufficiently creamed, followed by vanilla and/or other flavorings. This method is most commonly used for cookies, some squares, and butter cakes.
2) Wet bowl and dry bowl: This method involves measuring (and often sifting) all of the dry ingredients into one bowl, whisking together until smooth, and whisking all of the liquid ingredients into another bowl until smooth. Then the liquid ingredients are added to the dry ingredients (often into a well made in the center of the dry ingredients), and is stirred until just moistened. Overmixing can cause these baked products to become tough and full of air pockets. This method is most commonly used for muffins and loaves.
3) Cutting in fat: This method begins with combining all of the dry ingredients, and then cutting in cold, cubed fat (commonly butter, shortening, or hard margarine) using a pastry blender, two knives, a fork, or your fingers. This mixture is combined according to individual recipe directions, but commonly until the size of peas or coarse crumbs - a few larger flakes of fat are preferable, it makes for a flakier product. Then a little liquid is added, usually ice water or milk, and the mixture is stirred with a fork very lightly. This type of dough benefits from minimal handling. A light touch in mixing and rolling is best. Often this dough must chill before rolling and/or baking.This method is commonly used for pie crusts, biscuits, and other doughs.
4) Beaten egg whites: This method is pretty self-explanatory. Egg whites are beaten until they form soft or stiff peaks, depending on the recipe. Sugar is often gradually beaten into the egg whites to help increase their rise and stability. In order to get the best volume, you should ensure egg whites have absolutely no trace of yolk, and let them come to room temperature (they are much easier to separate when cold). (For more tips on beating egg whites, see my post from). The remaining ingredients (mostly dry) are then sifted and carefully folded into the egg whites, in order to prevent them from deflating which may result in a baked product with poor rise. This method is most commonly used for meringues and some cakes.
Well, these are the four main methods of mixing. In order to achieve baked goods with the best quality, you should always mix according to individual recipe directions.
Tuesday, November 15, 2011
Still Tasty?
I have discovered the ultimate internet tool to determine if your food is still safe to eat. It is stilltasty.com, "Your Ultimate Shelf Life Guide". This handy search engine has all the answers - just type in the food you are wondering about, click the most appropriate option, and read about your storage options and how long the food keeps. It's that simple! This website lists everything from canned spinach to fresh lobster to olive oil to homemade banana chip muffins. For most food options, several different categories are listed. Usually these categories include options such as canned, jarred, bottled, commercially purchased, and homemade. There are also options for whether the product has been opened or not. In addition to this handy search engine, the site also offers guides to food storage, tips on freshness, and answers to frequently asked questions. I find this site very useful, and it has never steered me wrong! So, check it out, it may save you from wasting a lot of food. Just remember the golden rule: When in doubt, throw it out!
Monday, November 14, 2011
Turkey Soup With Oat Dumplings

Sunday, November 13, 2011
Cupcakes

Saturday, November 12, 2011
Chocolate Butterscotch Ripple Squares
Yummy! This would be the one word I would use to describe these squares. If I could describe them in a sentence, it would go something like this: ooey, gooey, chewy, rich chocolately, butterscotch bundles of goodness. No need to elaborate. I found this recipe in an old baking booklet I picked up at a grocery store way back when.
 Chocolate Butterscotch Ripple Squares
1 package (300g) butterscotch chips
1 can (300mL) sweetened condensed milk
2 Tbsp. unsalted butter
2 1/4 cups packed brown sugar
2 large eggs
1 cup unsalted butter, melted
1 1/2 tsp. vanilla extract
1 1/2 cups white all-purpose flour
2/3 cup rolled oats
1/3 cup unsweetened cocoa powder
1 cup chopped nuts, optional (I didn't include them)
Preheat oven to 350◦F. Line a 9x13 inch pan with parchment paper.
In a medium saucepan over low heat, melt the chips, milk, and 2 Tbsp. butter, stirring until smoothly melted. Set aside.
In a large bowl, mix the sugar, eggs, melted butter, and vanilla together until smooth. Add the remaining ingredients, mix well. Spread half of the dough in prepared pan, pour butterscotch mixture over. Dot with remaining dough, spread carefully with a knife to cover. Bake for 30-35 minutes or until just set.
Friday, November 11, 2011
St. Martin's Day Cake
Every year on November 11th, my mother makes a special St. Martin's Day Cake to celebrate the feast of St. Martin, because my father's name is Martin. St. Martin is the patron saint of soldiers and one of the patron saints of France. So we celebrate this day with "Pizza Di San Martino" (St. Martin's Day Cake), although we call this cake raisin bread; since it definitely has the texture of bread, and is made the same way as bread, with yeast and two risings.
 The description for this bread says, "This is a recipe for a coffeecake served in the Abruzzi region of Italy on the feast of St. Martin." My mother found the recipe in the cookbook "Cooking With The Saints" written by local Ernst Schuegraf, who is also a family friend. This is a large book with recipes for every saint you can imagine, along with background information and descriptions about all of the saints. It includes five recipes for Saint Martin: St. Martin's Day Cake, along with St. Martin's Day Croissants, St. Martin's Torte, Crabmeat St. Martin, and St. Martin's Day Duck.
I really enjoy this St. Martin's raisin bread. It makes a delicious breakfast, light lunch, or snack; and is good with butter, cheese, or nothing at all. It has a subtle orange flavor and is chock full of plump raisins. It is delicious fresh from the oven, room temperature, or toasted. It is not particularly difficult or time-consuming to make, in fact, it doesn't even require kneading. The recipe makes two, and we like to freeze one for later, it holds up in the freezer very nicely. Happy Feast of St. Martin!

I really enjoy this St. Martin's raisin bread. It makes a delicious breakfast, light lunch, or snack; and is good with butter, cheese, or nothing at all. It has a subtle orange flavor and is chock full of plump raisins. It is delicious fresh from the oven, room temperature, or toasted. It is not particularly difficult or time-consuming to make, in fact, it doesn't even require kneading. The recipe makes two, and we like to freeze one for later, it holds up in the freezer very nicely. Happy Feast of St. Martin!
Thursday, November 10, 2011
The Start Of Christmas Baking
Tomorrow marks Remembrance/Veterans Day, and following that, stores and businesses will be hauling out and displaying their Christmas decorations, if they haven't already! Christmas is by far the holiday that is celebrated and prepared for the earliest. It is still 45 days away! Christmas shopping begins, and so does Christmas baking. Many people bake large batches of a variety of baked goods for their Christmas guests (and themselves, too). It is a very smart idea to start early, so you don't get caught up in the last minute Christmas rush. Freezers are the prime tool for this job. Most cookies, squares, muffins, and cakes hold up well for a month or so in the freezer if properly wrapped, even iced and decorated goodies! Fruitcakes and panettones on the other hand, can be made now, wrapped tightly, and stored in a cool, dry place to "ripen" for improved flavor. Many Christmas candies can also be made now and stored at room temperature, as can jarred goods such as jellies, jams, relishes, and marmalades. Homemade dry mixes, such as cakes, cookie, muffin, biscuit, and got chocolate mixes, are very much appreciated as gifts. I have even given a dry mix for a mushroom risotto dish, which turned out really well. This way, people who are busy or inexperienced in baking can quickly and easily enjoy homemade goods. Other great gift ideas include themed baskets, such as a hot chocolate theme filled with hot chocolate dry mix, mugs, candy canes, and marshmallows; or an Italian inspired basket, with a risotto mix, dry pasta, an Italian cookbook, jars of pasta sauce, and some Italian-themed oven mitts. Freshly prepared homemade casseroles, breads and soups also make great gifts for earlier in the Christmas season.
I plan to start preparing my Christmas gifts and baked goods very soon, and my mother has already made her fruitcakes. Happy Holidays!
 PHOTO CREDIT: "blogosphere_gingerbread." http://vitalitychiropractic.blogspot.com/2010/12/4th-annual-christmas-baking-contest.html.Vitality Chiropractic Wellness Center, n.d. Thursday, November 10, 2011
I plan to start preparing my Christmas gifts and baked goods very soon, and my mother has already made her fruitcakes. Happy Holidays!
Wednesday, November 09, 2011
Bread Baking Tips
Making bread can become an easy and enjoyable process with a little practice, patience, and pointers. Common problems that arise during the bread-making process are: insufficient risings, improper timings, and poor finished products. Here are some bread baking tips to ensure your bread turns out scrumptious!

· Ingredients: Use the proper amount and type of yeast, warm water of 100◦F-110◦F (use a thermometer), sugar to feed the yeast, a little salt for flavor, and sometimes oil for moistness. Water temperature is crucial; too cold and the yeast will not activate, too hot and the yeast will die.
· Procedure: Most recipes using regular (not quick-rise) yeast require proofing of the yeast first. Allow the yeast to sit for a sufficient amount of time to activate before proceeding with the recipe. All wet ingredients should be added now. Then mix the flour in slowly, a little bit at a time, until the dough pulls away from the sides of the bowl and forms a ball. Then knead in enough remaining flour until the dough is smooth and elastic, using just enough flour so the dough does not stick. Remember, you can always add more flour, but you can never take it away.
· Risings: Dough should be allowed to rise in a warm, but not too hot, draft-free spot. The ideal location (unless you have an actual proofer) is in the oven with the light on and the door shut tightly. The oven should be set to 200◦F and allowed to rest there for no more than 10 minutes, then shut off before putting the dough inside. The dough should be covered according to the recipe. Often greased plastic wrap, waxed paper, and tea towels are used. A tea towel dampened with hot water will improve rising and keep the dough moist. Do not peek until the minimum amount of rising time is up. The dough had risen sufficiently if it is doubled in bulk.
· Baking: Bread is generally baked for a fairly long amount of time in a moderate oven. If the top browns too quickly before the inside is fully cooked, it should be covered with foil. Proper shaping of the dough is important for even cooking. To test bread for doneness, toothpicks are not used. Sometimes the sound of the bread when tapped, and the feel of the bread are good indicators. The most accurate method however, is to insert an instant-read thermometer into the center of the bread.
There you have it! Some general tips that apply to most types of breads. Happy bread baking!

Tuesday, November 08, 2011
Fish Cakes
These are what my mother made for supper for me tonight. They may not look like much, but they taste outstanding! My mom created this recipe herself. I believe the story goes something like this: she didn't know what to cook for supper one night, didn't have a whole lot of ingredients on hand, and came up with this idea. And I am certainly glad that she did! These make an excellent quick and easy meal. These fishcakes can also easily be kept warm or be reheated the next day. They are composed primarily of canned flaked tuna, chopped onion, mashed potatoes, dry breadcrumbs, and seasonings. They can make a nice meal with a variety of different side dishes, or they can be a side dish or even an appetizer themselves. Here are some of Mom's miniature fishcakes.


Monday, November 07, 2011
Bannock

Bannock Modern
2 cups all-purpose flour
1 cup whole wheat flour
1 1/2 Tbsp. baking powder
3 Tbsp. brown sugar, packed
1 tsp. salt
1/4 cup butter or hard margarine
1 1/4 cups milk (or water)
Measure first 5 ingredients into medium bowl. Cut in butter until crumbly.
Add milk. Mix until dough forms a soft ball. Poll or pat int 3/4 to 1 inch thick round on greased baking sheet. Bake in 375◦F oven for about 40 minutes. To cook in greased frying pan, cook about 15 minutes per side. Makes 1 loaf.
I made a few changes to the recipe. I used all whole wheat flour, and added a little ground flax seed as well for added health benefit. I used liquid honey in place of brown sugar, and I used water but added an egg for a bit of extra richness and nutrition. It turned out to be delicious!
Paré, Jean. "Bannock Modern." Recipe. Breads, Edmonton Alberta: Company's Coming Publishing Limited, 1996. 91.
Subscribe to:
Posts (Atom)