
Wednesday, October 31, 2012
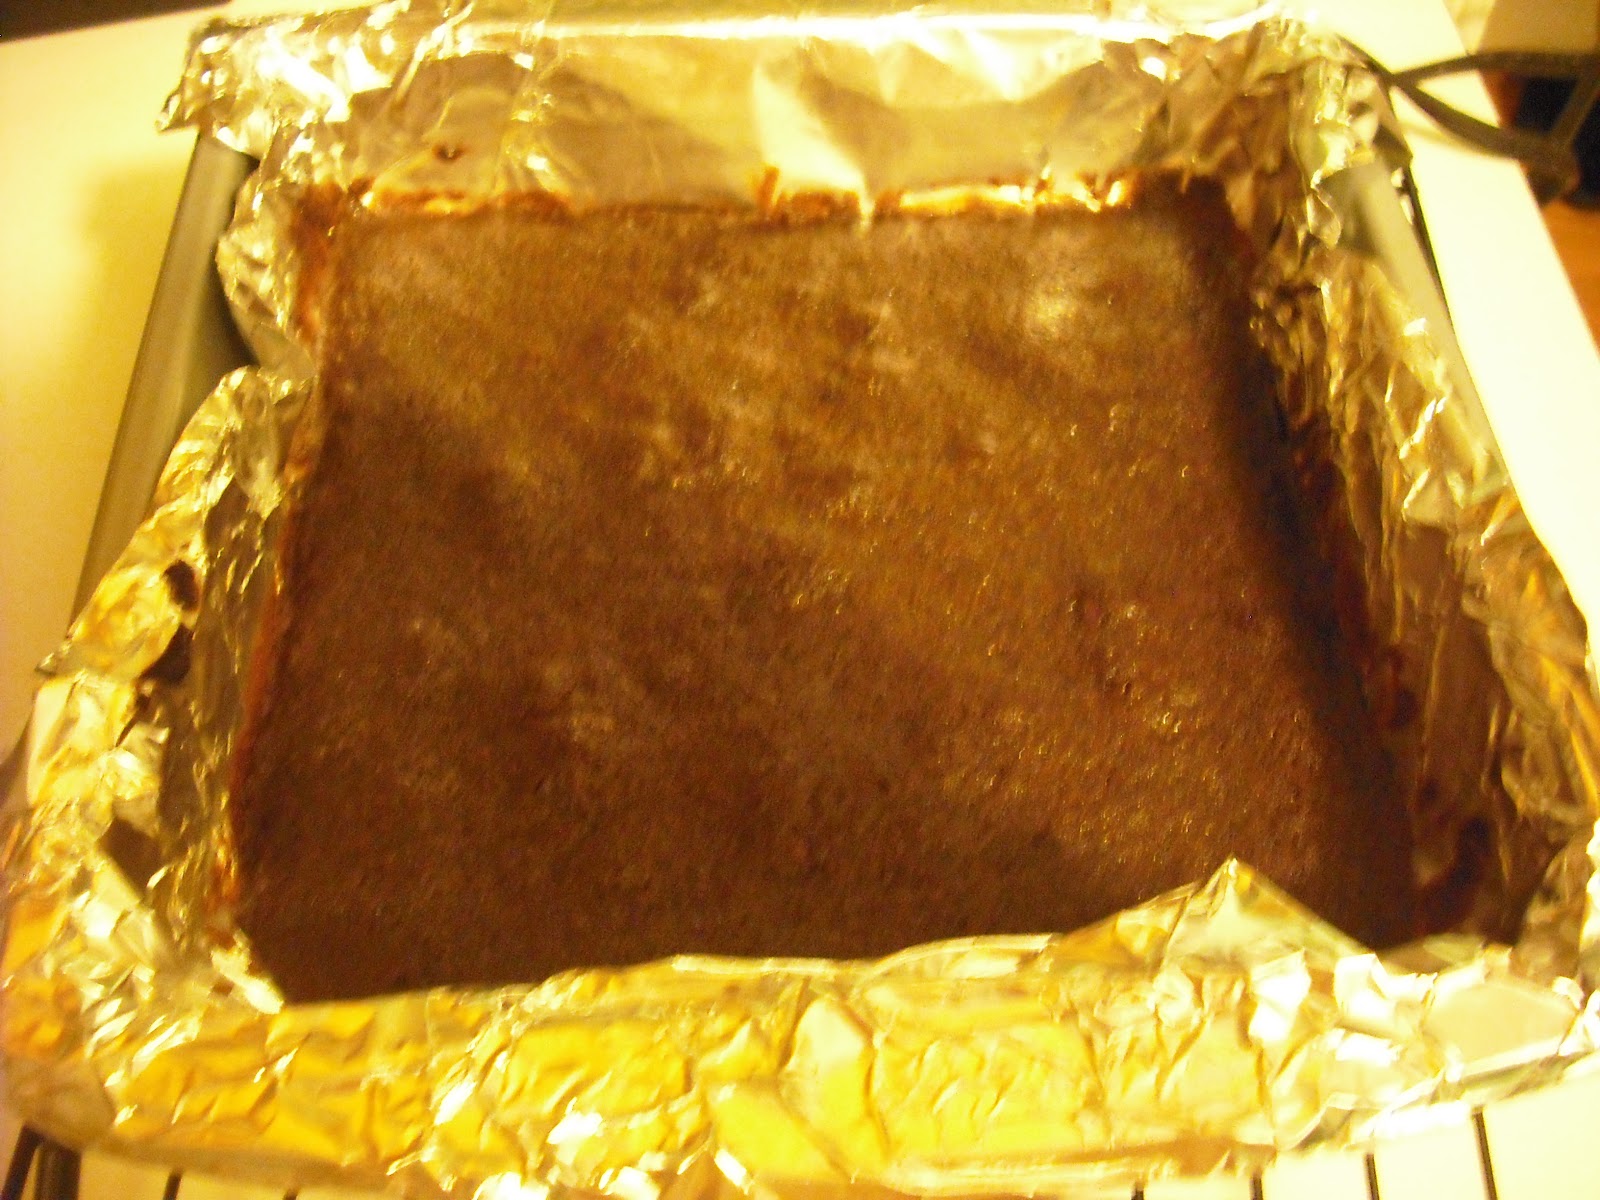
Ghostly Brownies
Tuesday, October 30, 2012
Collector's Cocoa Cake
This is a cake I made for a Halloween dessert I will feature tomorrow. I just needed a simple, one layer chocolate cake. I would have gone with my usual chocolate cake recipe, but it doesn't halve well, and I really only wanted one layer.I found this recipe in my giant Hershey's recipe binder. It actually made two round cakes, but I was brave and halved the recipe, which worked well. I discovered after it was baked that I halved every ingredient, but I forgot to use one egg instead of two. This didn't seem to matter though. It actually made a really high-rising cake that took a little longer to bake, but it was good!
Here is the original recipe.
Collector's Cocoa Cake
3/4 cup butter or hard margarine, softened
1 3/4 cups granulated (white) sugar
2 large eggs
1 teaspoon vanilla extract
2 cups all-purpose flour
3/4 cup unsweetened cocoa powder
1 1/4 teaspoons baking soda
1/2 teaspoon salt
1 1/3 cups water
Preheat oven to 350◦F. Grease and flour two 8 or 9 inch round baking pans.
In a large bowl, beat the butter and sugar until fluffy. Add the eggs and vanilla, beat for one minute. Stir together the flour, cocoa, baking soda, and salt, add alternately with water to butter mixture, beating until well blended. Pour batter into prepared pans.
Bake for 30-40 minutes (depending on pan size) or until a toothpick inserted in the center comes out clean.

West Side Publishing. "Collector's Cocoa Cake." Recipe. Hershey's Classic Recipes, Lincolnwood Illinois: Publications International, Limited, 2009. 72.
Monday, October 29, 2012
Cake Truffle Eyeballs

Sunday, October 28, 2012
Peanut Butter Bran Flakes
Peanut Butter Bran Flakes
1 cup natural wheat bran
1 cup large flake rolled oats, ground in the blender until it resembles flour
1/4 cup whole wheat flour
1/4 cup sugar or equivalent sweetener: honey, molasses, maple syrup
1/2 teaspoon baking powder
1/2 teaspoon salt
2/3 cup natural smooth peanut butter
2/3 cup water
1/2 cup milk
Preheat oven to 350◦F. Line a large baking sheet with parchment paper.
In a large bowl, mix the dry ingredients together. Blend in the peanut butter (using your hand works the best). Add the liquid and stir. Let it rest for a minute or two to soak up the liquid.
Spoon the batter onto the prepared baking sheet. Place another piece of parchment on top and use a rolling pin to flatten the mixture out evenly. Remove the top sheet of parchment and bake for 15 minutes.
When cool enough to handle, break into flakes onto the baking sheet and bake for an additional 20 minutes, or until of desired crispness, stirring after 10 minutes.

Here is another cereal recipe I had to try. It is kind of a combination of two I have made before: bran flakes and peanut butter oatmeal. These flakes are certainly peanut buttery, so if you like that, then you'll love these! They are crunchy, hearty, and delicious.
Saturday, October 27, 2012
Haunted House Cake

To decorate the cake like I did, I first outlined the door and windows in orange icing (thanks to my dad for making the perfect-colored orange icing, it certainly is not easy to make orange icing). I made an orange rope border all along the house and the roof. Then I added the Halloween decor. I added two pumpkins and two jack-o-lanterns at the bottom, I added some cobwebs around the windows, one with a spider, I added a bat (which did not show up the greatest, considering it is a brown bat on a brown house), I added two ghosts, I wrote Boo!, and I wrote Happy Halloween on the roof. This is a relatively simple haunted house cake. There are many ways in which it could be made much scarier, or creepier, or gruesome or it could even be made more cute. I didn't want to add too much detail to my cake, as sometimes I tend to overdo the cake and make it worse rather than better. So this time I kept it simple. Other decorations such as candies could be used on the cake as well, but maybe it is better to make a cake like that after Halloween, to use up all of the eyeball gumballs, and gummy worms, and spider candies, and candy ghosts.
Friday, October 26, 2012
Make-It-Your-Own Whole Wheat Bread
I call this Make-It-Your-Own Whole Wheat Bread, because it is an easy and simple basic bread recipe that you can vary to your liking. It can be a basic sandwich bread, or a sweeter snacking bread. You can try adding in some different, new ingredients to experiment. And if need be, you can refrigerate the dough for later.
Make-It-Your-Own Whole Wheat Bread
2 packages instant yeast
1/2 cup warm water
1 cup warm milk (or 1 cup warm water + 1/3 cup dry milk powder)
1 Tablespoon granulated sugar or honey
1/4 cup molasses
1 tablespoon oil or shortening
1 1/2 teaspoons salt
5 cups whole wheat flour*
In a large bowl, dissolve the yeast in the water. Add remaining ingredients, except for three cups of the flour. Gradually stir in remaining flour. Once a dough forms, knead for 5-10 minutes. Let dough rise for 40-50 minutes, until doubled. Divide in two and place in 9x5 inch loaf pans. Let rise for an hour, or until doubled. Bake for 30 minutes at 400◦F.
*Variations: Flour can be all white, all whole wheat, or a mixture of the two. Bran, flaxseed, and/or wheat germ can be used in place of some of the flour.
Seeds can be sprinkled on top of the loaf before baking.
One egg may be added to the dough for extra nutritional value.
For a sweeter bread, add up to three additional tablespoons of honey, 1 teaspoon of ground cinnamon, and one cup or raisins or dried cranberries.
One cup of nuts may be added to the dough.
Make it ahead: Double the amount of yeast. After the first rising, put the dough in the pans and refrigerate overnight. Before baking, bring dough to room temperature and let it rise until doubled.
Thursday, October 25, 2012
Carrot Fries
The other night to go along with our supper, my mother decided to try something a little different and make carrot fries. It sounds kind of gross, I know, but they were actually delicious. I am used to her making sweet potato fries, which I really love. They are kind of like regular fries, but sweeter of course, and mom doesn't make them as crispy, which I like, although you can make sweet potato fries very crispy too. Carrot fries look just like the sweet potato fries, and have the same texture, but they do taste a little different. To make sweet potato fries, my mother simply adds a little olive oil and sometimes ground black pepper. To make the carrot fries, she used a little olive oil and brown sugar. The brown sugar really made the fries good. Nice and sweet, with a nice flavor. Recipes for carrot fries often recommend using honey, and maple glazed carrots is also a popular recipe, so carrots with brown sugar made perfect sense. If my mom had not told me otherwise, I would have gone along thinking the carrot fries actually were sweet potato fries, since the brown sugar made them so sweet. My father thought is was squash or something. There are actually quite a few recipes out there for vegetable fries of all different kinds - beets, turnip, squash, kale, you name it. There are also vegetable chips on the market, which are actually pretty good, though these often contain a lot of salt. The idea behind vegetable fries is to be a healthier alternative to potato fries, or a more exciting way to eat more vegetables. Most times, vegetable fries are actually baked, and not deep-fried, which would kind of defeat the purpose. Baking vegetables as fries is so easy, just cut them into matchsticks and throw them in the oven with your main course!


Wednesday, October 24, 2012
Browned Butter Frosting

You can add some cinnamon, ginger, or cloves to this frosting, or use orange juice instead of milk to enhance the flavor of the bars even further. You could also use a cream cheese frosting on these bars instead, which would also be good.
Browned Butter Frosting
1/3 cup unsalted butter
2 cups icing sugar
1/2 teaspoon vanilla extract
2-4 Tablespoons milk
In a small saucepan over medium heat, melt the butter. Cook, stirring often, for about two minutes longer, or until butter is golden brown and begins to smell nutty, be careful not to burn the butter. Pour into a bowl and add remaining ingredients. Beat, adding more milk if necessary, to achieve a spreading consistency. Immediately spread over Spicy Orange Pumpkin Bars.
I found the consistency was too greasy, because the proportion of butter to icing sugar was too high, and I also did not think there was quite enough icing to frost the entire pan. So I added another 1/2 cup of icing sugar. I ended up using 3 Tablespoons of milk. This is a rich, buttery frosting, that is quite sweet.
Tuesday, October 23, 2012
Spicy Orange Pumpkin Bars
It is fall, and a good time for pumpkin and spice treats. Here is a new one I am trying. They smelled absolutely delicious coming from the oven, but I waited until they were cooled and frosted to try them. I will feature the frosting recipe tomorrow. These squares are quite moist and spicy, with a nice balance of orange and pumpkin flavors.
2 cups all-purpose (plain) flour
1 1/2 cups granulated (white) sugar
2 teaspoons baking powder
1 teaspoon baking soda
1/4 teaspoon salt
1 1/2 teaspoons ground cinnamon
1/4 teaspoon ground ginger
1/4 teaspoon ground nutmeg
1/8 teaspoon ground cloves
2 teaspoons finely grated orange zest
1/2 cup oil
1/2 cup orange juice
1 cup canned pumpkin puree
2 large eggs

Using an electric mixer, beat all ingredients together on low speed for 30 seconds, then on medium speed for two minutes. Pour into prepared pan. Bake for 25-30 minutes until a toothpick inserted in the center comes out clean. Cool and frost with Browned Butter Frosting.
Monday, October 22, 2012
Quick Lunch Pizza

As I probably said before, I tend to use the same pizza recipe every time I make pizza. However, I do have different recipes for panzerottis, pizza stromboli, and pizza rolls, all of which are excellent, trust-worthy recipes. My pizza dough recipe I actually got from cooking class in school years ago. because it is used by young students in an environment that isn't always ideal, it is quite a forgiving and no-fail recipe. I love this crust recipe, it is soft, fluffy, and tasty, and rises very high. It can be used for a thin crust pizza, but I prefer the rising thick crust. I usually use half whole wheat flour in the dough, for a more nutritious and hearty dough. This pizza I made here was a bit of a last minute decision, so I just made do with the topping ingredients I had on hand. Those were tomato sauce, chopped onion, green olives, sliced mushrooms, and mozzarella cheese. I didn't have any meat, which was fine with me since I prefer vegetarian pizzas, but it was not your typical veggie filled pizza either. Oh well, I thought it was quite good, and I had the one leftover piece for lunch today. This pizza also keeps and reheats well.
To make this pizza, I mixed up the dough early and put it in the oven, which had been preheated to 200◦F for 10 minutes to warm it. I left the dough there for two hours until I was ready to use it. By this time, the dough was nice and high, but a little sticky. This dough actually does not need any rising time, since it uses instant yeast and will rise in the oven, although it does well with some time to rest and rise. I made one round twelve inch pizza in my pizza pan, and made a small crust around the edges.
Sunday, October 21, 2012
Cocalattas

Cocalattas
1/2 cup melted butter or hard margarine
3/8 cup granulated (white) sugar
3/8 cup packed brown sugar
1 teaspoon coconut extract (or vanilla if you don't have it)
1/2 teaspoon baking soda
1/2 teaspoon salt
1 large egg
1/2 cup shredded coconut (I used sweetened)
1 1/8 cup all-purpose flour
1/2 cup semi-sweet chocolate chips (milk would work too)
In a large bowl, mix the butter and sugars. Add extract, soda, salt, and egg, mix well. Stir in coconut. Stir in half of the flour and the chocolate chips. Add the remaining flour. Let the dough rest for ten minutes.
Preheat oven to 350◦F. Line baking sheets with parchment paper, or just leave ungreased.
Drop dough by tablespoons onto prepared cookie sheets. Bake for 12- 15 minutes until lightly browned. Cool for three minutes, then remove from cookie sheet to cool completely Makes 2-3 dozen. Recipe can easily be doubled.
Fluke, Joanne. "Cocalattas." Recipe. Cherry Cheesecake Murder, New York: Kensington, 2006. 35-37.
Saturday, October 20, 2012
Whole Wheat Biscuits
Whole Wheat Biscuits
1 cup all-purpose (plain) flour
1 cup whole wheat flour
4 teaspoons baking powder
1 Tablespoon granulated (white) sugar
3/4 teaspoon salt
1/4 cup cold butter or hard margarine, cut into pieces
1 cup milk
 Preheat oven to 450◦F.
In a large bowl, mix the dry ingredients. Cut in the butter until crumbly. Add milk and stir with a fork until soft dough forms Transfer dough to a lightly floured surface and knead gently eight to ten times. Roll or pat dough 3/4 inch thick. Cut into two inch rounds with cookie cutter, or into squares or triangles so no re-rolling is necessary. Arrange on ungreased baking sheet. Place close together for soft sides and further apart for crisper sides. Bake for 12-15 minutes until light brown. Makes 10-12.
My variations: I used 1 1/2 cups whole wheat flour, 1/4 cup natural bran and 1/4 cup ground flaxseed in place of the 1 cup of all-purpose flour. I only baked them at 425◦F, and used two baking sheets stacked together so the bottoms would not get too brown. Recipe comes from Company's Coming "Muffins & More".
Paré, Jean. "Whole Wheat Biscuits." Recipe. Muffins & More, Edmonton Alberta: Company's Coming Publishing Limited, 1983. 95.
1 cup all-purpose (plain) flour
1 cup whole wheat flour
4 teaspoons baking powder
1 Tablespoon granulated (white) sugar
3/4 teaspoon salt
1/4 cup cold butter or hard margarine, cut into pieces
1 cup milk

In a large bowl, mix the dry ingredients. Cut in the butter until crumbly. Add milk and stir with a fork until soft dough forms Transfer dough to a lightly floured surface and knead gently eight to ten times. Roll or pat dough 3/4 inch thick. Cut into two inch rounds with cookie cutter, or into squares or triangles so no re-rolling is necessary. Arrange on ungreased baking sheet. Place close together for soft sides and further apart for crisper sides. Bake for 12-15 minutes until light brown. Makes 10-12.
My variations: I used 1 1/2 cups whole wheat flour, 1/4 cup natural bran and 1/4 cup ground flaxseed in place of the 1 cup of all-purpose flour. I only baked them at 425◦F, and used two baking sheets stacked together so the bottoms would not get too brown. Recipe comes from Company's Coming "Muffins & More".
Paré, Jean. "Whole Wheat Biscuits." Recipe. Muffins & More, Edmonton Alberta: Company's Coming Publishing Limited, 1983. 95.
Friday, October 19, 2012
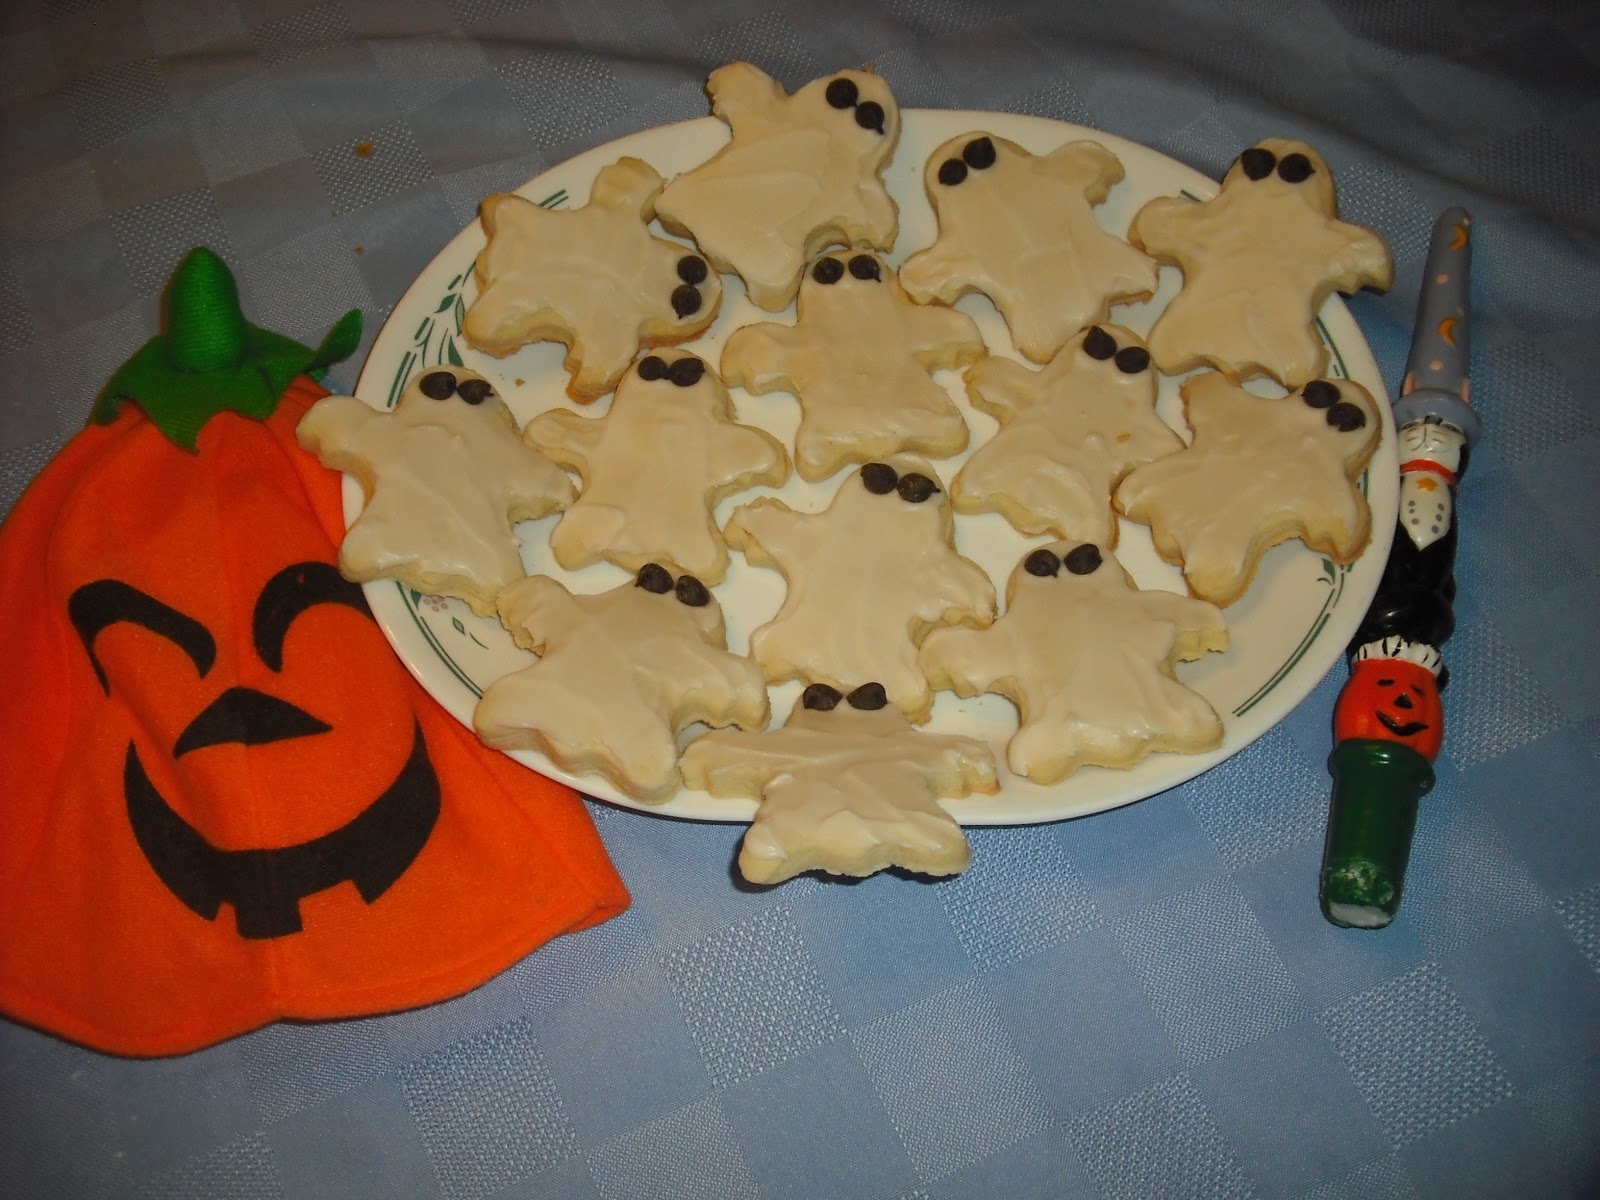
Ghost Cookies
Thursday, October 18, 2012
Mom's Quick Soup
This is a quick soup my mother whipped up today for lunch tomorrow using ingredients she had on hand. It is certainly nothing special or difficult to make, but it sure is tasty. She simply took the vegetables she had on hand and made them into soup with some pasta - no meat, because there was no leftover meat on hand. The vegetables featured in this soup are: onion, carrots, peas, and potatoes There are some fettuccine noodles boiled in chicken broth - and there you have some tasty soup! Quick, easy, nutritious, and something good to warm you up on a chilly Fall day. My grandmother is a big fan of soup, she could eat it everyday. My mother enjoys soup on occasion, but not everyday. I also really like most soups, but I would not want it everyday. I guess you know who the real soup fans are when they eat hot soup on a hot summer day, which my grandmother is known to do, and I have also done on occasion. Soups are an easy, quick, tasty, and hearty meal to have anytime really!


Wednesday, October 17, 2012
Coffee Squares

1/2 cup butter or hard margarine, softened
1 1/2 cups packed brown sugar
1 large egg
1 1/2 cups all-purpose (plain) flour
1/2 teaspoon baking soda
1/2 teaspoon salt
1 teaspoon vanilla extract
1/2 cup strong warm coffee
1/2 cup semi-sweet chocolate chips
Preheat oven to 350◦F. Line a 9x13 inch rectangular baking pan with parchment paper.
In a large bowl, cream the butter and sugar. Beat in the egg. Add remaining ingredients except the chocolate chips. Spread evenly in prepared pan. Sprinkle with chocolate chips. Bake for 30 - 35 minutes. Cool and cut into squares.
This is a quick and easy recipe I found online. I was looking for a squares recipe that was a bit different, but one made with common ingredients that anyone would love. Of course, the addition of a bit of chocolate makes these squares extra good. The smell of these baking is irresistible! They come out, soft, moist, and tasty They are a not-too-sweet square that you can just gobble up. They certainly turned out much better than the last squares I made...
Tuesday, October 16, 2012
Banana Loaf
This is the banana loaf (or banana bread) that my mother sometimes makes instead of the usual banana chip cake or banana chocolate chip muffins. Surprisingly I think this one is my favorite of the three, even though it does not contain any chocolate Maybe it is because she does not make it as often, so it is something different and it remains special. Banana bread is one of those special baked items that just reminds you of home. I cannot imagine eating store-bought banana bread. Banana bread is a great comfort food, and I cannot think of anyone I know who does not like banana bread. Every family has a slightly different recipe for banana bread that they like the best. I have, of course, tried banana bread made by others, but I always think my mother's is the absolute best. Most times, I just like my banana bread plain, enjoyed with a glass of milk for an afternoon snack. However, many people enjoy banana bread with butter, and it is extra delicious with peanut butter or chocolate hazelnut spread. It is always welcomed packed in a school lunch, and can be good for breakfast and even sandwiches too! My absolute favorite part of banana loaf is the top. I always save the top for last. It is the moistest, and softest, and tastiest part of all. I actually prefer banana bread that is a few days old to fresh banana bread, because the top becomes even better with age. Though I must admit, banana bread warm from the oven when the crust is still crispy isn't too bad either.


Monday, October 15, 2012
Maple Coconut Squares
Well, it isn't exactly maple syrup season, but I made maple squares none the less. These squares are easy to do, and they are very rich, so cut them small! I did have some problems with these squares though. They still seemed very liquidy after 20 minutes, so I baked them probably about 20 minutes longer. They firm upon cooling. The middle of the squares seemed like it turned out right, but the edges were very runny. Even though I lined the pan, the bars still really stuck to it too. I put them in the fridge, since maple syrup is perishable, but they became really hard. They are just cuttable, but they must be heated in the microwave to eat or they are too hard. They taste ok - very sweet and mapley. Not sure what happened with these squares, but oh well. Here is the recipe if you want to try to yield better results yourself.
 Maple Coconut Squares
CRUST
1 cup all-purpose (plain) flour
1/2 cup packed brown sugar
1/4 teaspoon salt
1/4 cup cold butter, cut into pieces
1 large egg, beaten
FILLING
1 cup packed dark brown sugar
1 cup pure maple syrup
1 large egg, beaten
2 Tablespoons all-purpose (plain) flour
1/2 cup shredded coconut
1/2 teaspoon baking powder
pinch salt
Preheat oven to 425◦F. Line an 8x8 inch square baking pan with parchment paper.
CRUST: In a medium bowl, stir first three ingredients. Cut in butter until crumbly. Mix in egg. Press into prepared pan. Bake for eight minutes, reduce oven temperature to 350◦F.
FILLING: In a medium saucepan, bring the sugar and syrup to a boil. Reduce heat to low and simmer for five minutes.Let cool for ten minutes. Add remaining ingredients. Pour over crust. Bake for 20 minutes.
Sunday, October 14, 2012
Good And Grainy Bread
Good And Grainy Bread
1 cup fat-free or lowfat milk
2 Tablespoons hard margarine
2 Tablespoons liquid honey
2 1/3 cups whole wheat flour
1/2 cup quick-cooking rolled oats
1/4 cup natural wheat bran
1 Tablespoon ground flax seeds
1 1/2 teaspoons salt
1 1/2 teaspoons quick-rising (instant) yeast (1 package)
In a small saucepan, heat together the milk, margarine, and honey until at 120◦F and margarine is melted. In large bowl, stir together all but 1/2 cup of the flour, and the remaining ingredients. Stir in milk mixture. Gradually stir in enough of the remaining flour to make a soft dough, mixing with hands if necessary.
Knead for 8 to 10 minutes until smooth and elastic. Place in greased bowl, turning to grease all over. Cover with plastic wrap; let rise in warm draft-free place until doubled in bulk, 30 to 60 minutes.
Punch dough down, shape into cylindrical loaf.
Bake at 375◦F for 40 to 50 minutes, or until loaf sounds hollow when tapped on the bottom.
 I found the basis for this recipe in a best breads cookbook. The recipe was quite wordy, so I cut it down here. This recipe can also be used to make rolls, and can be adapted for a bread machine. The original recipe called for shortening and skim milk powder. These ingredients are better to use when making bread in a bread machine, because they will not spoil, but I did not have either of these on hand, so I substituted margarine and milk (1/4 cup powdered milk can be replaced by using one cup milk instead of water). I also used all whole wheat flour instead of part all-purpose. This was a very good bread recipe - the dough came together very well, and was soft and easy to knead.
Baird, Elizabeth. "Good and Grainy Rolls or Bread." Recipe. Canadian Living's Best Breads & Pizzas, Mississauga, Ontario: Telemedia Communications Inc. 1998. 48.
1 cup fat-free or lowfat milk
2 Tablespoons hard margarine
2 Tablespoons liquid honey
2 1/3 cups whole wheat flour
1/2 cup quick-cooking rolled oats
1/4 cup natural wheat bran
1 Tablespoon ground flax seeds
1 1/2 teaspoons salt
1 1/2 teaspoons quick-rising (instant) yeast (1 package)
In a small saucepan, heat together the milk, margarine, and honey until at 120◦F and margarine is melted. In large bowl, stir together all but 1/2 cup of the flour, and the remaining ingredients. Stir in milk mixture. Gradually stir in enough of the remaining flour to make a soft dough, mixing with hands if necessary.
Knead for 8 to 10 minutes until smooth and elastic. Place in greased bowl, turning to grease all over. Cover with plastic wrap; let rise in warm draft-free place until doubled in bulk, 30 to 60 minutes.
Punch dough down, shape into cylindrical loaf.
Bake at 375◦F for 40 to 50 minutes, or until loaf sounds hollow when tapped on the bottom.

Baird, Elizabeth. "Good and Grainy Rolls or Bread." Recipe. Canadian Living's Best Breads & Pizzas, Mississauga, Ontario: Telemedia Communications Inc. 1998. 48.
Saturday, October 13, 2012
Chocolate Crumb Cake Bars

Chocolate Crumb Cake Bars
1 can (300 mL or 11 ounces) sweetened condensed milk
1 cup semi-sweet chocolate chips
1 teaspoon vanilla extract
1 box Devil's food cake mix, 2 layer size
1 large egg, beaten
1/4 cup cooking oil
Preheat oven to 350◦F. Line a 9x13 inch rectangular baking pan with parchment paper.
In a small saucepan, heat the milk, chocolate chips, and vanilla over medium heat, stirring until melted and smooth.
In a large bowl, crumble the cake mix, egg, and oil together. Reserve about 3/4 cup for the topping. Press remaining mixture into prepared pan.
Pour milk mixture evenly over crust in pan. Scatter reserved crumbs over top. Bake for about 25 minutes.
Friday, October 12, 2012
Crunchy Homemade Oatmeal

2 cups large flake rolled oats
3 Tablespoons natural smooth peanut butter
2 Tablespoons dark brown sugar
2 teaspoons ground cinnamon
1 teaspoon ground ginger
1/4 teaspoon ground cloves
1/4 cup milk
1/4 cup water
Preheat oven to 400◦F. Line a baking sheet with parchment paper.
In a large bowl, crumble the oats with the peanut butter (use your fingers!)
In a small cup or bowl, combine the sugar and spices, stir into oat mixture. Stir in milk and water, until mixture comes together. Spread out on prepared baking sheet. Bake for ten minutes. Let cool and harden before stirring.
This is the easiest, quickest, and biggest batch of cereal I have made yet. It could also easily be doubled, because most cereal recipes need to be baked in several batches anyway, so I would just divide the dough in half and bake it in two batches, since the baking time is relatively short. I like the peanut butter flavor in this, and the spices really add a lot too. The peanut butter really comes through. Next time, I think I'll experiment and try almond butter instead. This cereal is crunchy and tasty. It is pictured here with some clementine slices, a piece of bread with peanut butter, and a tall glass of milk - a great breakfast!
Thursday, October 11, 2012
Cherry Chocolate Cream Squares
These are the squares I recently made in order to use up the leftovers I had from the Black Forest Gateau I made. Also, I wanted a little taste of Black Forest myself, since I did not get to try the cake myself. I came up with this recipe myself. Actually, it isn't much of a recipe, I simply baked a chocolate base I recently made for another recipe, and topped it with cherries and cream. The base is very fudgey and rich, so I knew I couldn't go wrong! I like the combination of chocolate, cherries, and cream.
 Cherry Chocolate Cream Squares
1/4 cup + 1 Tablespoon hard margarine or butter, melted
3 Tablespoons unsweetened cocoa powder
1 large egg
1 teaspoon vanilla extract
1/2 cup granulated (white) sugar
1/3 cup all-purpose (plain) flour
pinch salt
the thickening goo from a can of cherry pie filling (with no actual cherries in it)
1/2 cup sweetened whipped cream
chocolate flakes, if desired
Preheat oven to 400◦F. Line an 8x8 inch square baking pan with foil and lightly grease foil.
In a medium mixing bowl, mix the butter and cocoa until smooth. Add remaining ingredients, mix well. Spread evenly in prepared pan. Bake for ten minutes.Cool completely.
Once the base has cooled, spread evenly with the cherry pie filling, then the whipped cream. The whipped cream can also be piped on in stars or other designs if you prefer. Top with chocolate flakes as desired.
Wednesday, October 10, 2012
Turkey Cake

Tuesday, October 09, 2012
Thanksgiving Dinner
Like many families this weekend, our family enjoyed a hearty Thanksgiving dinner. We had the traditional turkey dinner with all of the trimmings. Our meal included: a whole roasted turkey, peas, carrots, sweet potatoes, mashed potatoes, stuffing, cranberry sauce, gravy, and baugette. For dessert, we did not have a pumpkin pie, or any type of pie at all for that matter. We did not have a pumpkin cheesecake or pumpkin cake either. Actually, none of us really had room for dessert after our meal, but we did have room for sweets as a snack later on. My mother made pumpkin chocolate chip loaf, and a few days later she also made pumpkin chocolate chip muffins. They are basically the same thing, but muffins bake quicker. Both are moist, have a nice pumpkin flavor, and are chocolatey enough for us! We also had two types of chocolate squares, oatmeal chocolate chip cookies, and a chocolate cake shaped like a turkey (I'll feature that tomorrow) around at some point this weekend. Now we will have a turkey noodle soup to use up the leftover turkey and vegetables, and enjoy it with homemade biscuits!


Monday, October 08, 2012
Be Thankful
This Thanksgiving weekend, I have plenty to be thankful for. Since this is a blog about food, I will likely end up focusing primarily on food in this post, but I must keep in mind that I have many other things to be thankful of as well. I feel lucky enough having enough to eat to keep me sustained, but yet I am fortunate enough to have the access to a wide variety of ingredients I can use to create almost any dish I can imagine! I always come home to a house well stocked with food: cupboards, pantry, fridge, and freezer are always full. There is always plenty of variety of food in the house to choose from. There is an abundance of nutritious foods, including fresh fruits and vegetables, meat, milk, eggs, peanut butter, bread, cheese, pasta, and more, as well as a few treats such as cookies, chips, and chocolate. I always have plenty of ingredients on hand to whip up a batch of whatever I desire. We always have flour, oats, sugar, chocolate chips, butter, baking powder, cocoa, and more on hand. I cannot remember a time when I arrived home to find there were no fresh baked goods in our house. Whether there are cookies, muffins, cake, or all three, we always have something baked in this house. I can purchase most of my ingredients at a local grocery store, unless I need something really exotic. Baking supplies can get pretty expensive, especially when you insist on using real vanilla and pure butter. But I am lucky enough to have the tools and ingredients to create many wonderful treats to share with family and friends.
When you go through the same routines every day, it is easy to forget how fortunate you really are. I may be grumbling because we only have semi-sweet chocolate chips and not milk, or because I used the last can of sweetened condensed milk last week to make squares, and I'll forget that many people don't have these things at all. They barely have enough to eat, and survive on just the basics, meanwhile I am complaining because I can't make triple chocolate chip cookies, or seven layer bars. Thanksgiving is a time to appreciate all that you have, and we often celebrate with a large feast.
I must also include that I am greatly thankful for my family, my friends, my shelter, my freedom, my health, all of my belongings, and much much more. I am also thankful that I have the time, internet access, and commitment needed to keep a daily blog. Here's to many more posts!
Sunday, October 07, 2012
Black Forest Gateau
Ingredients:
Three chocolate genoise cake layers (see October 5th post)
CHERRIES
1 can cherry pie filling
1 jar maraschino cherries with juice
WHIPPED CREAM FILLING
2 cups cold whipping cream (35%)
1/4 cup granulated (white) sugar
1 teaspoon vanilla extract
CHOCOLATE FLAKES
4 Tablespoons granulated (white) sugar
2 Tablespoons water
1/2 cup semi-sweet chocolate chips
CHERRIES: Drain the cherry pie filling by scooping out the excess cherry "goop" and leaving primarily the actual cherries.
Drain the jar of maraschino cherries, reserving the juice. Pat the cherries dry.
WHIPPED CREAM FILLING: In a large bowl, beat the cream until soft peaks form. Gradually beat in the sugar until stiff peaks form. Beat in the vanilla.
CHOCOLATE FLAKES: In a small saucepan, heat the sugar and water to a boil. Remove from heat and quickly stir in chocolate chips until smooth. Use immediately. Spread out in a thin layer on a parchment lined baking sheet. Let stand for at least an hour until hardened. Break into flakes. Note: I did this in two separate batches, because I doubled the recipe, but didn't know if it would work well if I made the batches together.

- Place one cake layer on a flat surface.
- Moisten it by brushing it with a third of the juice from the jar of cherries. Using a pastry bag without a tip, pipe a circle of whipped cream around the rim of the cake. Fill the center with whipped cream, making it the same height as the circle you piped. Smooth it out using a small offset spatula. Spoon half of the cherry pie filling on top, leaving a half inch border all around.
- Gently center another cake layer on top and repeat above procedure.
- Repeat with third layer, but do not top with cherry pie filling (as you will have none left anyway).
- Fit the pastry bag with an open star tip and pipe 24 rosettes around the top of the cake. Top every second rosette with a maraschino cherry.
- Pipe a shell border along the bottom of the cake.
- Fill the top middle of the cake with chocolate flakes. Pile them on, and carefully arrange a few of the bigger flakes on top.
- Fix up any edges of the cake by smoothing out the whipped cream, scraping excess cream off, etc.
This is a very special recipe, so take note! This cake sold for $60!
Saturday, October 06, 2012
Schwarzwälder Kirschtorte

This cake is composed of three chocolate genoise layers moistened with cherry juice (instead of kirsch liquor). The layers are topped with sweetened whipped cream and cherry pie filling. I finished the top off with chocolate flakes, whipped cream rosettes, and maraschino cherries. I added a shell border at the bottom. I decided to leave the cake layers open, and not frost them entirely with whipped cream, even though this is not typical. I did this for several reasons: I did not have enough whipped cream, I liked how the cherry and whipped cream layers showed through, the layers turned out nice and neat, I did not want to do more harm than good, I did not have enough chocolate flakes to cover the sides of the cake, as is typical.
Tomorrow I will share the exact step-by-step directions on how to duplicate the version of this cake that I made. The cake is being auctioned off tonight, and I am very curious to see how much it will go for! I liked how the cake turned out so much, I featured it as my new profile picture.
Friday, October 05, 2012
Chocolate Genoise
Genoise cakes are similar to sponge cakes, however they differ by the fact that the eggs are not separated in genoise and genoise contains a little melted butter. I made three layers of chocolate genoise today to use as the base of the Black Forest Cake I will complete tomorrow. Genoise is a light and airy cake, and its texture works well for a black forest cake. It can also be soaked or brushed with a little liquor or juice to moisten and flavor it. It isn't very hard to make either.
Chocolate Genoise
6 large eggs, at room temperature
1 cup granulated (white) sugar
3/4 cup all-purpose (plain) flour
1/2 cup unsweetened cocoa powder
1/2 cup butter, melted and warm
1 teaspoon vanilla extract
Preheat oven to 350◦F. Grease three 8-inch round baking pans.
In a large bowl, beat the eggs until frothy. Gradually beat in the sugar until mixture is pale yellow and thickened.
Sift in the flour and the cocoa in two increments of each, gently folding after each addition. Gradually fold in the butter and vanilla. Divide batter equally among pans. Bake for 20 minutes or until a toothpick inserted in the center comes out clean.

Thursday, October 04, 2012
Filled Chocolate Bars
This is the completed product from the base I made yesterday. When I read this recipe first, I thought it sounded really good and easy, and actually I had been wanting to make it for awhile now. However, while I was making these squares, I was beginning to doubt this recipe even though it came from a very reliable source. Things were not working out the greatest. This story does have a happy ending, as the squares turned out very yummy! My only complaint is the recipe is too small, there are not enough squares. Here is how the squares were finished:
 Cut the base in half vertically, spread with vanilla filling, and place other half on top. The recipe just stated to cut the bars in half, so I assumed they meant horizontally otherwise you would end up with a very small batch of bars. However, the base was so thin there was no way it could be cut in half horizontally.
Vanilla Filling
1 Tablespoon margarine, melted
3/4 cup icing sugar
1 1/2 teaspoons milk
1/2 teaspoon vanilla extract
In a small bowl, mix all ingredients together until smooth, adding more sugar of milk if necessary to achieve a thick but spreadable consistency.
Spread the top of the bars with chocolate glaze. Place in the refrigerator and chill briefly (an hour or more) before cutting. Store in the fridge.
Chocolate Glaze
2 Tablespoons granulated (white) sugar
1 Tablespoon water
1/4 cup semi-sweet chocolate chips
In a small saucepan, heat the sugar and water to a boil. Remove from heat and quickly stir in chocolate chips until smooth. Use immediately.
Next time, I would double the base recipe and bake it in a 9x13 inch rectangular pan. That way, when I cut the base in half, I would still have a pan of squares the size of an 8x8 inch square pan. I would double the vanilla filling recipe as well, but not the chocolate glaze, because I had plenty leftover. The chocolate glaze is a different concept than most, very quick to make and does not crack when you cut the squares as plain melted chocolate would, as long as you do not chill the squares too long before cutting. These seem like a lot of work for a small batch, because it takes three steps, but each step is fairly quick. And the bars are worth the effort. Overall, a very scrumptious square!
Wednesday, October 03, 2012
Chocolate Bar Base
Tonight I made a quick chocolate bar base for bars I will finish making tomorrow. This is just a simple, easy brownie-type base for some chocolate squares that will be filled and iced. The base for these bars takes about fifteen minutes to make, twenty max. They are so easy, and if you want, you can use this base for brownies, ice cream sundaes, strawberry shortcakes or just eat it plain! It is so easy and simple to remember. Once this base cools, it will be cut in half horizontally, filled with a vanilla filling, and topped with a chocolate icing. Here is the recipe for the base:
Chocolate Bar Base
1/4 cup + 1 Tablespoon hard margarine or butter, melted
3 Tablespoons unsweetened cocoa powder
1 large egg
1 teaspoon vanilla extract
1/2 cup granulated (white) sugar
1/3 cup all-purpose (plain) flour
pinch salt
Preheat oven to 400◦F. Line an 8x8 inch square baking pan with foil and lightly grease foil.
In a medium mixing bowl, mix the butter and cocoa until smooth. Add remaining ingredients, mix well. Spread evenly in prepared pan. Bake for ten minutes.
Tuesday, October 02, 2012
Basic Baking Utensils
Here I have compiled a short, basic list of common baking utensils that most households are equipped with. This is not including pots, pans, equipment, or decorating items. You can make a great variety of different baked goods using just these items. However, they are not all completely necessary, and you could certainly get by without all of them.

- Measuring spoons: 1/4 teaspoon, 1/2 teaspoon, 1 teaspoon, 1 tablespoon.
- Dry measuring cups: 1/4, 1/3, 1/2, and 1 cup.
- Liquid measuring cups: up to 2 cups.
- Mixing spoons: wooden and plastic
- Mixing bowls: glass, plastic, and steel
- Whisk
- Spatula or flipper
- Rubber spatula
- Pastry blender
- Strainer, sieves, and slotted spoons
- Sharp knives
- Ice cream scoops
- Sifter
- Tongs
- Ladle
- Scissors
- Pastry brush
- Rolling pin
- Cutting board
PHOTO CREDIT:"plastic_utensils_lg" http://www.reluctantgourmet.com/cooking_utensils.htm. The Reluctant Gourmet, n.d. Monday, October 1, 2012.
Subscribe to:
Comments (Atom)