Showing posts with label Halloween. Show all posts

Saturday, November 01, 2014

Orange Poke Cake

I know Halloween is over again for another year, but this is another Halloween-ish treat I made recently that I did not get a chance to feature yet. This is a "poke cake" which is a term referring to a cake that is poured with gelatin after baking. The process is relatively simple: bake the cake, then cool slightly. You can remove it from the pan, or keep it in, depending on the type of pan. For this type of tube pan, I find it easier to remove the cake first. Pierce the cake with a fork at half-inch intervals. You want to make the holes fairly big so the cake can soak up the liquid. Next, prepare a package of gelatin (any flavor) using one cup boiling water to dissolve the gelatin, then 1/2 cup cold water. Beat for two minutes, then pour this mixture over the cake, allowing the cake to absorb it. Refrigerate the cake for a few hours so the gelatin sets a bit. This will not create pieces of gelatin within the cake, but rather streaks of flavor throughout the cake, which makes the cake very moist.

Now you can decorate the cake as you wish. Since the gelatin adds a lot of flavor and moisture, the entire cake need not be iced, so I simply added some swirls of icing, a bottom border, and decorated with pumpkin-shaped orange sprinkles. I used orange gelatin of course, and a white cake batter. 

Thursday, October 30, 2014

Halloween Cobweb Brownies

Here is another Halloween recipe edition. It is simply a basic brownie recipe with the cream cheese swirl topping. There are plenty of recipes like this around, and any one of them will work. It is the procedure that changes slightly. Instead of putting dollops of the brownie batter alternately with the cream cheese batter into the pan; pour all of the brownie batter into the pan, then pour the cream cheese batter on top. Then use a butter knife to swirl the two batters together into a cobweb design. Then sprinkle black and orange Halloween sprinkles over top. This is a picture of the brownies before they were baked. 
They don't look much different once they are baked, and they taste just like any other cream cheese brownie - with a Halloween twist!

Tuesday, October 28, 2014

Cobweb Cake

This is a quick Halloween cake I made the other day. All it is, is a simple white cake recipe baked in an eight inch round pan (well, actually I made two of these cakes). Then I used a simple, chocolate sauce to make the web. It either needs to be a thick chocolate sauce or a chocolate syrup so it will not run all over the place. Then I did the simple cobweb design. This "feathered" design is used to decorate many different cakes and squares, and isn't necessarily made to resemble a cobweb for Halloween. I used a squeeze bottle for the chocolate sauce and squeezed out circles, each one getting bigger. Then I used a knife to draw straight lines through the cake to create the web design. A simple and easy cake recipe. This is a simple chocolate and vanilla combination. Now that I look and think about it, the cake could have been flat-iced first before the chocolate sauce was put on for a sweeter cake and to make the design pop slightly more. Any flavor combinations could be used - white cake, chocolate fudge frosting, and icing sugar vanilla glaze; marble cake, vanilla frosting, and caramel sauce; or pumpkin cake, cream cheese frosting, and coffee sauce.

The only problem with using a squeeze bottle - the squeezes aren't always even. Especially when releasing the bowl and beginning a new circle, the sauce may come out in squirts, which is what you see on the left side. 

Monday, October 27, 2014

Peanut Butter Spider Cookies

Halloween is coming up, and I have been baking up some Halloween goodies. I found the idea for these spider cookies online, and I thought they were simply adorable! It is really just an easy peanut butter cookie recipe, you could probably use your favorite recipe. Then chocolate balls are placed in the middle. I used small milk chocolate balls, but you can use any flavor truffle chocolates as well, just adjust your cookie size according to the size of chocolate you have. Then just pipe on some eyeballs and legs! You could also use any type of chocolate you wish for the legs, and if you prefer, you can purchase candy eyeballs to use instead. The decorating of these cookies is the part that takes time, but they are fun to do and well worth the extra effort! 

Peanut Butter Spider Cookies
1/2 cup unsalted butter, softened
3/4 cup natural smooth peanut butter
1/2 cup granulated (white) sugar
1/3 cup packed light brown sugar
1 large egg
1 teaspoon vanilla extract
1 1/4 cups flour 
3/4 teaspoon baking powder
1/4 teaspoon baking soda
1 teaspoon salt
small milk chocolate balls, approximately 40
icing sugar
chocolate chips

Preheat oven to 350F. Grease or line cookie sheets.
In a large bowl, cream the butter and peanut butter, then cream in both sugars. beat in the egg and vanilla. Stir in remaining ingredients. Roll into small balls, using about two teaspoons of dough for each cookie. Place a few inches apart on prepared cookie sheets.
Bake for ten minutes. Remove cookies from oven and use a spoon handle or your thumb (though the dough is hot) to make a small indent in the middle of each cookie. Return to the oven for about six minutes until cookies are set.

Remove the cookies from the cookie sheet and allow to cool until they are just slightly warm. If the cookies are too hot, the chocolate will melt, but if completely cooled, the chocolate will not stick. Place a chocolate ball in each indent, then allow cookies to cool completely.

Mix a little icing sugar with a little water and place in a small plastic bag. Cut a small hole in the corner, and pipe two eyes onto each ball. Then melt some chocolate chips and place them in a small plastic bag. Use this chocolate to pipe eyeballs and eight legs onto each cookie. Allow chocolate to stand to set. Makes about 40-42 small cookies. 

Friday, November 01, 2013

Halloween Haystacks

I know, I am a day late. I actually made these cookies yesterday, but I had to share my jack-o-lantern yesterday. So here is today's post. Haystack cookies are popular, no-bake cookies. They are often cookies beginner bakers start with, since they are so quick and easy. From start to eating, they only require about 20 minutes. This batch makes about 30 cookies, depending on size, but could easily be doubled or halved. 

Shapes don't work put the greatest with this dough, since it isn't one that's rolled out and cut, but I attempted anyway. From top to bottom, these are supposed to be a spider, an owl, and a bat. It's the thought and creativity that count!
Halloween Haystacks
1/2 cup butter or margarine
1/2 cup milk
2/3 cup unsweetened cocoa powder
scant 2 cups granulated (white) sugar
3 1/2 cups rolled oats
1 1/2 cups unsweetened shredded coconut

Line a baking sheet with foil. 
In a medium saucepan, bring the butter, milk, cocoa, and sugar to a boil. Remove from heat and quickly stir in oats and coconut. Drop spoonfuls quickly onto prepared baking sheet. Chill until firm, they don't take long. Speed up the process by putting them in the freezer. 
For Halloween cookies: Drop the mixture on the sheet and spread into your favorite Halloween shapes!

Thursday, October 31, 2013

Cake Jack-o-Lantern

Happy Halloween! This is the jack-o-lantern I carved for this year. Of course I had to keep with the theme of the past few years, and the fact that I am a foodie, and carve something food-related. Not a scary face, or a cute design, but something that really suits me. This year it is a cake. Basically I carved two round cake layers, a top layer with a squiggly border, and four cherries on top. Though the cherries may also be interpreted as lumpy candles. However, if they are assumed to be cherries, you could say my cake is a Black Forest Cake! Ha, bet you though I would never mention Black Forest Cake again, considering how many times I have already featured it in my posts. Well, you were wrong. It is evident that my carving skills are not as great as my baking skills, but this occasion only comes around once a year, and it is fun to celebrate it. Last year I made an ice cream cone jack-o-lantern check it out here) and two years ago I made a cupcake jack-o-lantern (check it out here). 

Thursday, November 08, 2012

Halloween Candy

I really meant to post this just after Halloween, but I guess I have baked enough since then that I forgot about this post. Oh well, I'll post it now, as Halloween is still pretty fresh in our minds. I just wanted to discuss Halloween candy. We tend to buy quite a bit of Halloween candy because we get a lot of trick-or-treaters. Actually, we got less than usual this year, only 196. Last year we hit a record amount at 239. Last year we ran out of candy, something that has never happened before, so this year we had to make sure we had enough! Pictured below is the little table we set up to organize our Halloween treats on Halloween night. We have the treats organized into different types and categories and as you can see we have quite a lot. There are four boxes of fifty bags of chips, along with plenty of miniature chocolate bars and other candies. However, we mostly give out chips and bars. We have never bothered with something special, like candy or caramel apples, because we just get too many trick-or-treaters for that. We don't bother with heavy cans of pop or juice either, because those can get pricey. However, last year when we ran out of treats, we went digging in the cupboards. We came up with some slightly unusual treats, such as hot chocolate packets, granola bars, soft cookie packages, and juice boxes. Not all ideal choices, but we made do.Other popular Halloween choices include candy corn, popcorn, juice bags, chocolates, gummies, licorice, and hard candies. Hopefully you have made a dent in your Halloween stash by now. If we don't get all of ours eaten, I'll probably post some recipes that use candy and chips sometime soon!

Friday, November 02, 2012

Halloween Sugar Cookies

I was whipping up a batch of sugar cookies the other day, and I thought I would cut them into Halloween shapes since it was the day before Halloween. I chose this sugar cookies recipe because I had some leftover egg yolks in the fridge. This is why they are called rich sugar cookies and they look a little more yellow in color. Other than that, they are just like a standard sugar cookie recipe. I didn't bother decorating them in any way, though I could have used icing, melted chocolate, sprinkles, or candies. I cut the cookies into five different shapes: pumpkins, skulls, bats, cats, and witches.
Rich Sugar Cookies
2 1/2 cups all-purpose (plain) flour
1 cup icing sugar
1/2 teaspoon salt
1 cup cold butter, cut into small cubes
1 large whole egg
3 large egg yolks
1 teaspoon vanilla extract

In a large bowl, mix the flour, sugar, and salt together. Cut in the butter using a pastry blender or your fingers. 
In a separate small bowl, beat the eggs and vanilla. Add to flour mixture and mix it up until  a dough forms (use your hands). Divide the dough in two, flatten each half into a disc, wrap in wax paper, and refrigerate for at least two hours.
Remove dough from the refrigerator 10-15 minutes before rolling.
Preheat oven to 350F. Line baking sheets with parchment paper.
Roll each dough half out to about 1/4 inch thick. Cut out with cookie cutters. Bake for 15 minutes, or until cookies are lightly browned.

Thursday, November 01, 2012

Ice Cream Pumpkin

Here is the jack-o-lantern I carved for Halloween this year. Last year, I made a cupcake jack-o-lantern. It is a bit difficult to carve food into pumpkins, because it is tricky to think of a food that is easy to carve and will actually look like that food on a pumpkin. I have been thinking about what I could carve this year since last Halloween I finally settled on an ice cream cone. I have a triangular waffle cone at the bottom, two scoops of ice cream, and a cherry on top. I think I liked last year's cupcake better, but this doesn't look too bad. It is kind of neat all lit up. It isn't really scary, but not all jack-o-lanterns have to be. Let's just say that if I made an actual ice cream sundae, it would look much better than this one (and it would taste better too)!

Wednesday, October 31, 2012

Ghostly Brownies

Happy Halloween! Here are some ghostly brownies I made. I found the idea for this in a little recipe booklet I had. Well, I suppose technically this is actually a cake, but the original recipe called for brownies. Both work well. Basically to make these, bake a round pan of brownies or cake. Then whip up a batch of meringue  Spread some of the meringue on the cake, then pipe the rest on top in the shapes of ghosts. Add some chocolate chips for the eyes of the ghosts. Then bake the meringue at 350F for 10-15 minutes, until lightly browned. The meringue can be placed on the warm cake as soon as it comes out of the oven, then baked again in the pan. Or the cake can be made ahead. Really, any cake or brownie base can be used for this, even a store-bought or frozen one. If the cake is made ahead of time, you have the option of taking the cake out of the pan and putting it on a baking sheet. I found this way it was easier to top and easier to serve, but this will not work well with a warm cake. Keep in mind that since the cake is baked twice, even a moist cake will become slightly dry, especially if it is baked on a baking sheet. There isn't really a way to avoid this, just make sure you have plenty of meringue on the cake. I thought the ghosts on top were a very cute idea, and they are easy to do. They don't look quite as neat as they did in this recipe, especially since one of the ghosts on the side is falling off, but it does make a nice spooky Halloween dessert!

Saturday, October 27, 2012

Haunted House Cake

To get into the Halloween spirit, I made a Haunted House themed cake for a cake walk tomorrow. This cake was really fun to make, and the decorations are not hard to do. I first baked a 9x13 inch rectangular cake and cooled it. Then I cut off a rectangle, about 7 1/2 inches tall. From the small rectangle left over, I cut it in half diagonally to make a triangle for the roof (the other triangle can be used for whatever you like). I placed the cake pieces together (upside down so they were easier to ice) on a piece of card board covered in foil, and iced the top and the sides of the cake in chocolate fudge frosting. I did not bother to put icing between the roof and the top of the house, as it stayed in place anyway, and did not need it. Next came the fun part, the decorations! You can decorate a haunted house pretty much any way you want. You could print off a picture or follow a template, but I was just adding what I pleased as I went along. 
To decorate the cake like I did, I first outlined the door and windows in orange icing (thanks to my dad for making the perfect-colored orange icing, it certainly is not easy to make orange icing). I made an orange rope border all along the house and the roof. Then I added the Halloween decor. I added two pumpkins and two jack-o-lanterns at the bottom, I added some cobwebs around the windows, one with a spider, I added a bat (which did not show up the greatest, considering it is a brown bat on a brown house), I added two ghosts, I wrote Boo!, and I wrote Happy Halloween on the roof. This is a relatively simple haunted house cake. There are many ways in which it could be made much scarier, or creepier, or gruesome  or it could even be made more cute. I didn't want to add too much detail to my cake, as sometimes I tend to overdo the cake and make it worse rather than better. So this time I kept it simple. Other decorations such as candies could be used on the cake as well, but maybe it is better to make a cake like that after Halloween, to use up all of the eyeball gumballs, and gummy worms, and spider candies, and candy ghosts.

Friday, October 19, 2012

Ghost Cookies

These are the cute ghost cookies my mother usually makes every year around Halloween time. She always makes a big batch of them, plenty for the family, and some to send to others too. She used to make enough to send in to everyone in my class at school, and sometimes my brothers' classes too.A few lucky trick-or-treaters, the ones we really knew well, got a ghost cookie too.These cookies also freeze really well, so she can make them ahead of time if need be. They are simply the really tasty sugar cookie recipe she also uses for Christmas cookies. It is an excellent cookie recipe that is just sweet enough, not dry, and not bland. She cuts them with a ghost cookie cutter, bakes them, and cools them. Then she frosts them with a simple white icing, and adds two semi-sweet chocolate chips for the eyes. They are simple, but very cute, and also very tasty. I always look forward to these around Halloween time.

Tuesday, November 01, 2011

Spooky Shepherd's Pie


For supper last night I had to make something appropriate to the occasion. So I whipped up this Spooky Shepherd's Pie with mashed potatoes in the form of ghosts. I got the idea online, but I didn't follow their recipe, I made pretty much our usual Shepherd's Pie. I didn't go through the extra step of baking the pie in the oven either, it works just as well simply in a skillet on the stovetop. I cooked up my meat and vegetables and mixed them all  with cream of mushroom soup. Then I mashed and seasoned some potatoes, and piped them on top to resemble ghosts. The original recipe had called for the use of instant mashed potato flakes (but if you remember my thirteenth post, then you know I certainly wasn't going to use them). I am wondering if boxed potatoes are easier to pipe then real potatoes? I just used a simple zip-top bag with a large hole cut out of one corner, but I did have a bit of trouble piping them. They just don't have the same consistency of buttercream icing (not to mention being piping hot). Oh well, they turned out looking okay. I gave them peas for eyes, and piped the rest of the potatoes around the edge of the pan. A delicious and frightful meal!

Monday, October 31, 2011

Happy Halloween!

Happy Halloween to all of you ghosts and goblins out there! I hope you all get the chance to indulge in some candy, chips, and chocolate. I prefer to save these ingredients for baking, as they make excellent cookies and bars (ever hear of potato chip bars?). Here is the jack-o-lantern I carved for tonight. In case you can't tell, it's a cupcake. What else would I carve? It is easy to see that my baking skills are a whole lot better than my pumpkin-carving skills. Of course, these big pumpkins aren't much good for eating, aside from the seeds, which I have saved for roasting (a nutritious snack after all of that candy). Happy Halloween!

Sunday, October 30, 2011

100th Post!

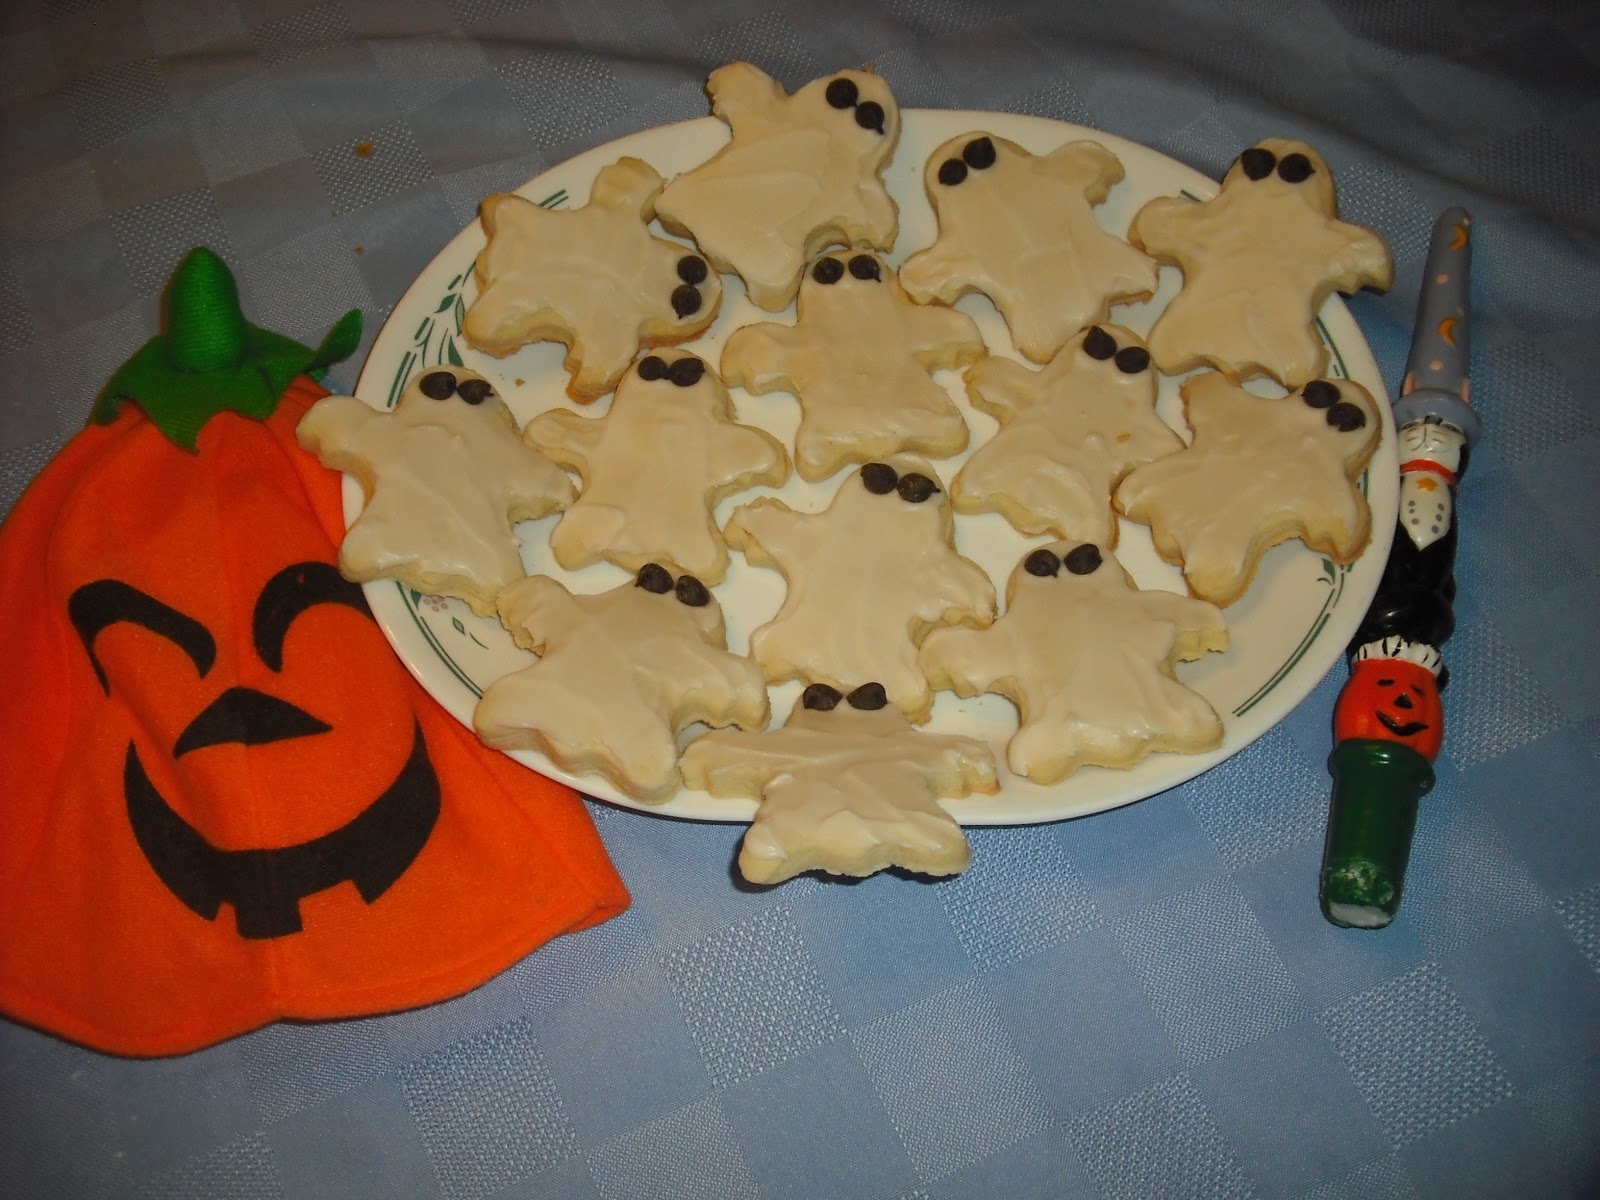
This is my 100th blog post! I have been successfully blogging for 100 days now! So far, it has been a blast, and I’m sure the fun will continue. To celebrate this milestone, I whipped up a small batch of “100 Day Truffles”. And since tomorrow is Halloween, I decorated half of them as ghosts and the other half with 100s.. This reminds me of the first few years of school, where the 100th day was cause for a huge celebration! There were collections of 100 things, and crafts shaped like 100s, and stories about the 100th day of school. Ahh, what fun! Now back to the truffles, they are simple chocolate truffles coated in vanilla glaze with milk chocolate piping. Simple, sweet, and good. They certainly aren’t anywhere near professional-looking, but hey, after 100 days, I have an excuse to slack off a little. Cheers to that! 

Saturday, October 29, 2011

Halloween Biscuits

Halloween is on Monday, so I decided to start getting into the spirit with supper tonight. I whipped up a batch of my favorite biscuits and cut them and decorated them with a Halloween theme. I had some ghost shapes with cheddar cheese bits as eyes. I had a few mummies, with mozzarella cheese strips as wrappings and bits of cheddar cheese as eyes. I also had some jack-o-lanterns made with cheddar cheese. These were fun and easy to make! Of course, you can make any Halloween shapes: bats, cats, spiders, witches, use your imagination!
All I did was use a ghost-shaped cookie cutter, and used my hands to make some rounds. I baked the biscuits until just about cooked through, and then put the cheese decorations on. I lowered the oven temperature just a bit, and baked them for a few more minutes. I love these biscuits, they are light, fluffy and rich. A perfect companion to any meal.

Sunday, October 23, 2011

Witch Cake

Well, along with my Halloween Cupcakes, I've also got a Halloween Witch Cake to show you. I baked a simple white cake in a 9x13 inch pan, cut it into four basic shapes, and reassembled the shapes to resemble a witch's head. I didn't come up with this on my own - I found the idea online. Then I frosted the cake and piped on icing decorations. I made this for a cake walk for a fundraiser. 
I guess if I had made the witch's face green, she would look more like a witch and less like a clown, but I don't particularly like to eat green icing, so I left it a pasty white. I also did not use the traditional Halloween colors, black and orange, on either this cake or the cupcakes. This is because I only have a simple kit of liquid food coloring bearing just four colors: red, blue, yellow, and green. I don't really have use for a complex set containing a variety of different colors. From experience, I know that orange is a very difficult color to achieve, especially with large quantities of icing (you'd think they would include a vial of orange instead of green, as green is quite simple to make). Black is also nearly impossible, although I did manage to make grey once. I know you can buy paste food colorings in black and orange, but they contain a lot of dye. I usually don't even use colors as vivid as the witch's hair, in order to use as little food dye as possible. You can also buy tubes of premade orange and black icing, but they don't taste nearly as good as homemade. So that's my Halloween witch! And you never know, I may use the same idea and make a clown cake someday!

Saturday, October 22, 2011

Halloween Cupcakes

Today I whipped up a batch of Halloween Cupcakes. I used a basic white cake recipe and a simple icing. I made some mummies, by piping long strips with my basketweave tip; some eyeballs, by drawing an eye and piping red squigglys, and some simple "BOOs". They were quite fun and quick to make. Here I have them displayed on my cupcake rack with a jack-o-lantern puppet and a skeleton toy on a Halloween tablecloth. Halloween is just around the corner!

Tuesday, October 18, 2011

Pumpkin Carrot Cake

I came across this recipe recently and both my mother and I were delighted to give it a try! It sounded like such a heavenly fall delight. Delicious, moist spice cake with soft pumpkin flavour and the added benefit of grated carrot for taste and moistness. Add a simple cream cheese frosting, and you're all set! Baking in a bundt pan makes for an attractive-looking cake. After tasting this creation, you may never use a boxed cake mix again! The combination of pumpkin, carrot, spice, and cream cheese is utterly divine, and the cake is so tender, sweet, and moist. Delicious!

Because this is a bundt cake, it really doesn't require much decoration. Just spread the frosting on as best you can, and make a little swirl pattern with the back of a spoon, if desired. However, the recipe also gives a suggestion for feeding a large Halloween crowd. Make two of these cakes, tint the frosting orange, stack the two cakes together and frost to resemble a pumpkin. For the finishing touch, coat a flat-bottomed ice cream goblet with green frosting for the pumpkin stem. It makes a very cute-looking cake.

Monday, October 03, 2011

Pumpkin

Well, squash season is here, Halloween is approaching, and pumpkins are beginning to appear all around! 

I love pumpkin! 

Here are some recipe and cooking ideas featuring pumpkins.

  • Pumpkins are great fun to carve, stencil, decorate, or paint for Halloween. The big pumpkins that are sold for decorating purposes are not great for eating. The flesh is much too tough and stringy, but the seeds are perfectly fine for roasting and eating.
  • The tiny pumpkins sold under names such as "pie pumpkins" and "sugar pumpkins" are good for eating. The flesh is much softer and smoother, and can be prepared just like any other squash. Fresh, cooked pumpkin can be used in both savoury and sweet dishes.
  • Pumpkin can be microwaved, baked, boiled, broiled, grilled, steamed, fried, or sauteed. It can be chopped and incorporated into a variety of casseroles, soups, and stir-fries. It can also be used in sauces, gnocchi, risottos, and quiches.
  • Cooked and pureed pumpkin is equivalent to canned pumpkin puree (pure canned pumpkin that is, some canned pumpkin contains other squashes or spices as well). It is a bit more work to use fresh pumpkin rather than just opening a can, but for some recipes the fresh taste is completely worth it.
  • Pumpkin puree is excellent in a variety of baked goods. It adds nutrients and keeps things moist without lending a strong flavour. Pumpkin puree can be used in breads, muffins, cookies, cakes, biscuits, squares, pies, and loaves.
  • Fresh pumpkins may be stored in a cool, dry place for a month or two. Cooked, pureed pumpkin can be frozen in airtight containers for future use.
  • Pumpkin goes extremely well with raisins, chocolate chips, nuts, herbs, and spices.
  • My favourite ways to use pumpkin are: pumpkin chocolate chip loaf, pumpkin pie squares, pumpkin chocolate chip cookies, and pumpkin with pasta.
PHOTO CREDIT: "untitled." http://mommygoesgreen.com/2009/10/pumpkin-recycling/. Pumpkin Recycling, n.d. Monday, October 3, 2011