Easy Butter Pastry
1 1/2 cups all-purpose (plain) flour
1 Tablespoon granulated (white) sugar
1/4 teaspoon salt
1/4 cup unsalted butter
1/2 cup ice water
Mix together the flour, sugar, and salt. Blend in the butter until the mixture begins to clump together. Add the water and blend to form a dough. Gently knead into a ball.
At this point the dough can be wrapped and chilled to be used later, or used immediately.
You can use a rolling pin on this dough, but it's really not necessary. It's an easy dough that can just be pressed into the pan.
This is a blog of items I have baked, including recipes from the many cookbooks I own, my own created recipes, and recipes from other sources. I will write about what I have made and post a picture along with it! During stretches when I go without baking, I will write a brief article about some aspect of cooking, baking, ingredients, or preparation techniques.
Showing posts with label dough. Show all posts
Monday, October 23, 2017
Friday, October 20, 2017
Crescent Roll Biscuits
4 cups all-purpose (plain) flour
8 teaspoons baking powder
1 teaspoon salt
1 cup cold butter or hard margarine, cut into cubes
2 cups milk
2 egg yolks
1 Tablespoon milk
Stir together the flour, baking powder, and salt. Cut in the butter until crumbly. Stir in the milk to form a soft dough and knead briefly until it just comes together. Divide dough into four pieces.
Roll each piece into a thin circle on a lightly floured surface. Cut each circle into eight triangles.
Starting from the wide edge, roll each triangle toward its point. Arrange crescents on a sheet pan lined with parchment paper.
Beat together the egg yolks and milk and brush over the tops of the crescents. Bake at 425◦F for about 20 minutes until golden.
Tuesday, August 22, 2017
Lobster Ravioli 2.0
I made lobster ravioli again; the filling recipe and dough recipes were essentially the same but this time there were several differences in the dish.
#1 I made them at work, not home
#2 The pasta rolling machine broke, so I did most of the rolling by hand which resulted in more work, more time, more muscle, and a slightly thicker dough
#3 I didn't have the little ravioli molds this time, so I hand cut them and pieced them together with round cutters
#4 I paired the ravioli with a different sauce and different sides
Monday, June 12, 2017
Tart Dough
This tart dough I used for my apple tart. It isn't a flaky pie dough, nor a buttery shortbread crust, not a sweet sugar cookie dough. Is is somewhere in the middle of all three. It is easy to make and not so finicky as typical pie doughs. I prefer it to be rolled thick, but this recipe can also be rolled more thinly into two pie bases.
Tart Dough
Cream butter and sugar together well until light and fluffy. Beat in the egg. Stir in the flour. Roll into pie or tartlet crusts.
Bake at 350 ◦F for 10-20 minutes depending on size and thickness.
To avoid inflating, the crust may be weighed down with pie weights, but uncovered for the last five minutes of baking.
Bake slightly longer if the filling does not need to be baked.
Tart Dough
125 grams unsalted butter, softened
60 grams granulated (white) sugar
1 large egg
250 grams all-purpose (plain) flour
Saturday, May 13, 2017
Ricotta Ravioli
As mentioned in yesterday's post, I made homemade pasta dough and with it a couple batches of ravioli. Following is the recipe for the ricotta filling I used in the triangular-shaped vegetarian ravioli.
Herbed Lemon Ricotta Filling
1 container (475 grams)
1 Tablespoon chopped tarragon
zest of one lemon
1 teaspoon minced garlic
1 Tablespoon grated Parmesan cheese
cracked black pepper
salt
Mix all ingredients together. This is just a base recipe - any desired combination of herbs and spices may be used. I used lemon and tarragon as flavors to pair with the lobster ravioli I also made.
Ricotta Ravioli
Roll pasta dough into sheets using the thinnest setting, keeping sheets covered when not in use. If you have a handy ravioli tray, then the process will be easier. If not, you will need cutters of desired shape and size to cut the individual raviolis out by hand.
Drape one sheet over the ravioli tray, and gently press a small spoonful of filling in each cavity. I'm not sure exactly but I think I used about one teaspoon filling for each ravioli. Brush all the edges of dough with egg yolk or water. I just used water for this and used my finger and found no problems with the dough not sticking or the seal breaking. Gently drape another sheet over, then unmold the raviolis as directed. Place on a baking sheet dusted with flour. Repeat until either all the filling or all the pasta has been used up.
Ravioli can be cooked immediately, chilled for awhile before cooking, or alternatively frozen and cooked from frozen as required. Cook in boiling salted water for a few minutes until dough is cooked through,
Saturday, April 23, 2016
Dough Danish Turnovers
Thursday, April 14, 2016
Pie Dough Scraps
Remember the pate en croute from yesterday? It requires a big batch of pie dough because you have to roll it out to get the right shape, and then trim it to fit the pate. So there are a lot of scraps. Waste not want not - cut the leftover dough into strips and deep-fry them until golden and crisp. Then drizzle them with a little melted salted butter and add your favorite toppings....
1. Cinnamon Sugar - a classic
2. Crushed Maple Candied Walnuts
3. Grated Dark and White Chocolate
Just toss in the toppings, as little or as much as you like. Since the pie dough contains no sugar, savory applications would work as well. I recommend trying sesame seeds, spice mixtures, and parmesan cheese; or leave them plain and add dipping sauces such as barbecue, ranch, cheese, salsa, hummus, etc.
Wednesday, January 13, 2016
Flaky Vegan Pie Dough
3 cups all-purpose (plain) flour
1 teaspoon salt
1 teaspoon granulated (white) sugar
1/2 cup canola oil
1/2 cup cold water
Stir together the flour, salt, and sugar. Gradually stream in the oil, blending with a fork until incorporated. Add the water, one tablespoon at a time, just until the dough begins to stick together. It should be slightly crumbly rather than wet, and be able to be pressed into a ball. Press dough into a ball, flatten into a disk, wrap in plastic, and chill - I recommend the freezer for an hour or two, but if preparing a day in advance, you can just chill it in the refrigerator overnight so it doesn't become too hard.
It shouldn't be too firm to roll out once you remove it from the fridge/freezer - so no need to wait for the dough to warm up. Dust the work surface with flour, dust the top of the dough or the rolling pin with flour, and roll dough out as thinly as required, depending on the desired use. Baking time/temperature also depends upon the application of this dough.
The dough can be used for pie crusts, savory or sweet (add a touch more sugar). It can also be used for biscuits, pot pies, and the pinwheel bites I made using the filling featured in tomorrow's post!
Saturday, December 12, 2015
Gluten-Free Baklava
Gluten-Free Baklava
1/4 cup rice flour
1/2 teaspoon baking powder
pinch salt
1 teaspoon granulated (white) sugar
1 Tablespoon oil
1-2 Tablespoons milk
Mix all together to form a dough. It may require more flour or milk. This dough will not be as smooth and easy to work with as a biscuit dough containing gluten, but just do your best if it rips or tears. Press it out into a thin rectangle. Spread with baklava filling (ensure it has not been contaminated with the phyllo dough). Prepare as for regular baklava, though check it early - it may not need to bake as long. Ensure the syrup for the gluten-free baklava has been kept in a separate container to avoid contamination. Makes about four mini baklava rolls.
When making baklava the other week, I had someone with a gluten intolerance. So I made a miniature batch of baklava especially for them. It wasn't too much extra work to make up this quick dough, you just need to be wary of cross-contamination. Flaky phyllo pastry contains gluten and I haven't seen a reliable gluten-free version available out there. So these pastries are not quite the same as baklava but it gives the same idea and at least this way it is the same filling and syrup.
Monday, November 02, 2015
Vegetable Samosas
Vegetable Samosas
DOUGH
2 cups whole wheat flour
1/2 teaspoon salt
1/4 cup oil
1/4 cup cold water
FILLING
2 large potatoes, cut into fine cubes and boiled until just tender, drained and cooled
1 cup peas (frozen work fine)
1/2 red onion, finely diced
1/2 cup dal (any kind homemade or not)
1 hot chili pepper, minced
juice of one lemon
SPICE MIX (see tomorrow's post)
water
DOUGH: Rub together the flour, salt, and oil. Gradually mix in the water. Knead ten minutes. Spread with oil, wrap and let rest thirty minutes. Then divide into eight balls, roll each out to a six-inch circle and cut in half to form sixteen semicircles.
FILLING: Mix all together, the potato should break and mash a bit to bind everything. Season to taste.
Form each semicircle into a cone, sticking the two sides of dough together with water to moisten. Fill with a good two tablespoons of filling, or as much filling as you can to bring it to the top, but still be able to seal the pocket. Seal, moistening with water again to form a pyramid.
Place on a parchment-paper lined baking sheet and bake at 350◦F for about 20 minutes until golden brown. Serve with peanut dipping sauce, if desired.
This was my first time making, and eating, samosas. For my version, I made a whole wheat dough and baked them to be healthier. My filling is vegetable-based with plenty of spice. The filling ingredients can be varied of course, and although perhaps not traditional, meat or cheese could be added as well.
Labels:
dough,
filling,
onion,
peas,
potato,
samosa,
spice,
vegetables,
whole wheat
Sunday, October 11, 2015
Syrniki
Syrniki
1 cup cottage cheese
2 egg yolks
1 1/3 cups rice flour
1/4 teaspoon salt
1 Tablespoon granulated (white) sugar
2 Tablespoons unsalted butter
Squeeze the cottage cheese through a piece of cheesecloth to remove all the excess moisture. Then beat in the egg. Gradually mix in the flour, salt, and sugar until a stiff dough forms that is about the same texture as shortbread cookie dough. You may not need to use all the flour. Press the dough into a flat disc on a piece of plastic wrap, wrap, and refrigerate for at least thirty minutes, until firm. Alternately you could form the dough into a log and refrigerate.
Cut the dough into small pieces - I used a one inch heart-shaped cutter. Alternately you could just cut the dough in squares or slice it from the log. Heat the butter in a medium saucepan or frying pan over low heat until melted. Fry the pastries, about three minutes per side until golden. You can make them as crispy as you like. Drain the pastries on paper towel.
Traditionally these pastries are served with berry kissel or sweet berry sauce and sour cream. I added some sambuca to my berry sauce and also served them with lemon pastry cream to balance the flavors.
Tips and Tricks: If you have the time, the cottage cheese can be weighed down and drained overnight. You can replace the rice flour with all-purpose flour, I just used rice flour to make them gluten-free. Since this pastries are not baked, the change in flour really doesn't affect the texture of them.
Wednesday, May 13, 2015
Raspberry Cobbler
Raspberry is a different flavor for a cobbler. This one is simplified because it uses a prepared pie filling instead of fresh fruit, which creates a pleasing, moist and sweet sauce. This cobbler would be extra special is served with a caramel sauce or a lemon crème anglaise sauce.
Raspberry Cobbler
CAKE
2 cups all-purpose (plain) flour
1 cup granulated (white) sugar
4 teaspoons baking powder
1/4 teaspoon salt
1 cup milk
1/4 cup butter or hard margarine, softened
RASPBERRY
1-2 cans raspberry pie filling
Preheat oven to 350◦F.
RASPBERRY: Place the raspberry pie filling in a rectangular 9x13 inch or similar-sized pan. Place in the oven to warm up while preparing the dough. CAKE: Mix all ingredients together in a large bowl. Drop by spoonfuls over the warm filling. Bake for about 25 minutes until topping is cooked through. Best served warm, especially with ice cream or whipped cream.
Friday, May 08, 2015
Perfect Pizza Dough
This pizza dough recipe is really a cinch to make and makes a perfect pizza every time! There are two alternative ways to make it; you could use a food processor instead of a stand mixer, or you could do it by hand but then it won't be as much of a cinch and will require some kneading.
Perfect Pizza Dough
4 cups all-purpose (plain) flour
1 Tablespoon instant yeast
1/2 teaspoon salt
2 cups warm water
1/4 cup oil
In the bowl of a stand mixer, combine 3 cups flour, the yeast, and the salt. Attach the dough hook and mix on low, gradually streaming in the water, then the oil. Increase speed to medium, gradually add the remaining one cup of flour. Increase speed to high and mix until the dough forms into a ball.
Dough can be used immediately, but will benefit from resting. Form into a round ball and place in a greased bowl, turning once to grease top. Cover bowl with plastic wrap and place in a warm spot. This can be done for a few minutes or a few hours. This dough will make one large (12-15") or two small (8-9") pizza crusts. Alternately, it can be used for individual pizzas, calzones, and more. If you need to divide the dough, cut it, round each piece, and allow to rest for a few minutes before rolling it out.
My nine inch pizza crusts took about ten minutes to bake at 425◦F.
I would classify this neither as a thick or thin crust dough, it's somewhere in between. But to true pizza connoisseurs, I guess it would have to be a thick crust as it certainly isn't a paper-thin dough. It rises quite nicely if allowed to rest as well as in the oven. And has a pleasing chewy and crisp texture that can stand up to heavy toppings and rich sauces.
Friday, April 10, 2015
Turkey And Dumplings
VEGETABLES
oil
1 large onion, diced
3 medium carrots, diced
1 package (8 ounces/250 grams) button mushrooms, chopped
1 can peas (save liquid)
2 cups diced cooked turkey (or use chicken)
SAUCE
1/4 cup butter or hard margarine
1/4 cup all-purpose (plain) flour
1 can (370mL) evaporated milk
liquid from can of peas
garlic powder, to taste
ground black pepper, to taste
salt, to taste
DUMPLINGS
2 cups all-purpose (plain) flour
4 teaspoons baking powder
2 teaspoons granulated (white) sugar
1 teaspon salt
2 Tablespoons butter or hard margarine
1 cup milk
VEGETABLES: Heat the oil in a large pot over medium heat. Add the onion, carrots, and mushrooms, cover, and allow the vegetables to sweat, without browning, until just beginning to soften. Stir in the peas and the chicken.
SAUCE: Melt the butter in a medium saucepan over medium heat. Quickly whisk in the flour until smooth. Gradually whisk in the milk, then the pea liquid. Bring to a light boil and cook until thickened, then season to taste.
DUMPLINGS: In a large bowl, mix together the flour, baking powder, sugar, and salt. Cut in the butter until crumbly. Stir in the milk to form a soft dough.
ASSEMBLY: Stir the sauce into the vegetable mixture in the pot. Spread evenly. Drop the dumplings by spoonfuls onto the vegetable sauce mixture. Cover with a tight-fitting lid or cover and bake at 375◦F for about 30 minutes, without uncovering, until the dumplings are cooked. If you would like to give the dumplings a bit of a crisp top, turn the broiler on for a few minutes at the end of cooking - keeping an eye on the dumplings until they are golden.
Wednesday, April 08, 2015
Cinnabunnies
I made some cinnamon rolls for an Easter brunch this year. Cinnamon rolls are a well-loved, sweet breakfast or brunch treat. Of course, I wanted to have something Easter themed as well, so I shaped the cinnamon rolls into bunny heads. I didn't use my favorite cinnamon roll recipe, because the dough is quite soft to work with and only makes nine rolls. I used my second favorite, one hour, cinnamon roll recipe, which uses a firmer dough. However, pretty much any cinnamon roll recipe could be shaped this way. I sliced the dough into sixteen slices, and chose the eight prettiest slices to use as the bunny heads. Then I unrolled the remaining eight cinnamon rolls and folded them as shown, using a little melted butter to attach it to the bunny head. I then used chocolate chips for the eyes and small red candy-coated chocolates for the nose. Sliced almonds could be added as bunny teeth, if desired. Then I baked them on a cookie sheet as usual. I think they make a cute addition to an Easter brunch.
Wednesday, March 11, 2015
Curried Pine Nut Pasta
1 cup semolina flour
3/4 cup all-purpose (plain) flour
1/4 cup pine nuts, finely chopped (toast first for more flavor)
2 teaspoons curry powder
pinch salt
1 large egg
1/2 Tablespoon olive oil
2/3 cup cold water
In a small bowl, mix together the flours, nuts, curry, and salt.
In a separate small bowl, beat together the egg, oil, and water until combined.
Mound the dry ingredients on a wooden table or board. Make a hole in the center. (Alternately you can do this in a bowl, but it is not the traditional way of making pasta). Carefully pour the wet ingredients in the center, then gently work the flour in with your hands to form a stiff dough. Knead until smooth. Form into a ball, wrap well in plastic wrap, and let rest for at least an hour or so.
At this point, your pasta may be put through a pasta machine, or rolled out and cut by hand. Then it may be cooked for a few minutes in boiling salted water until tender, or dried for storage. Fill as desired. Fresh filled pasta can be refrigerated or frozen for later use. This pasta can be made into any pasta shape possible.
This isn't a traditional pasta formula - but my own recipe that gets more color from the curry powder. The use of some semolina flour makes the pasta firmer and gives more color as well. I will share the entire pasta dish I created with this pasta dough tomorrow.
Tuesday, February 17, 2015
Heart Biscuits
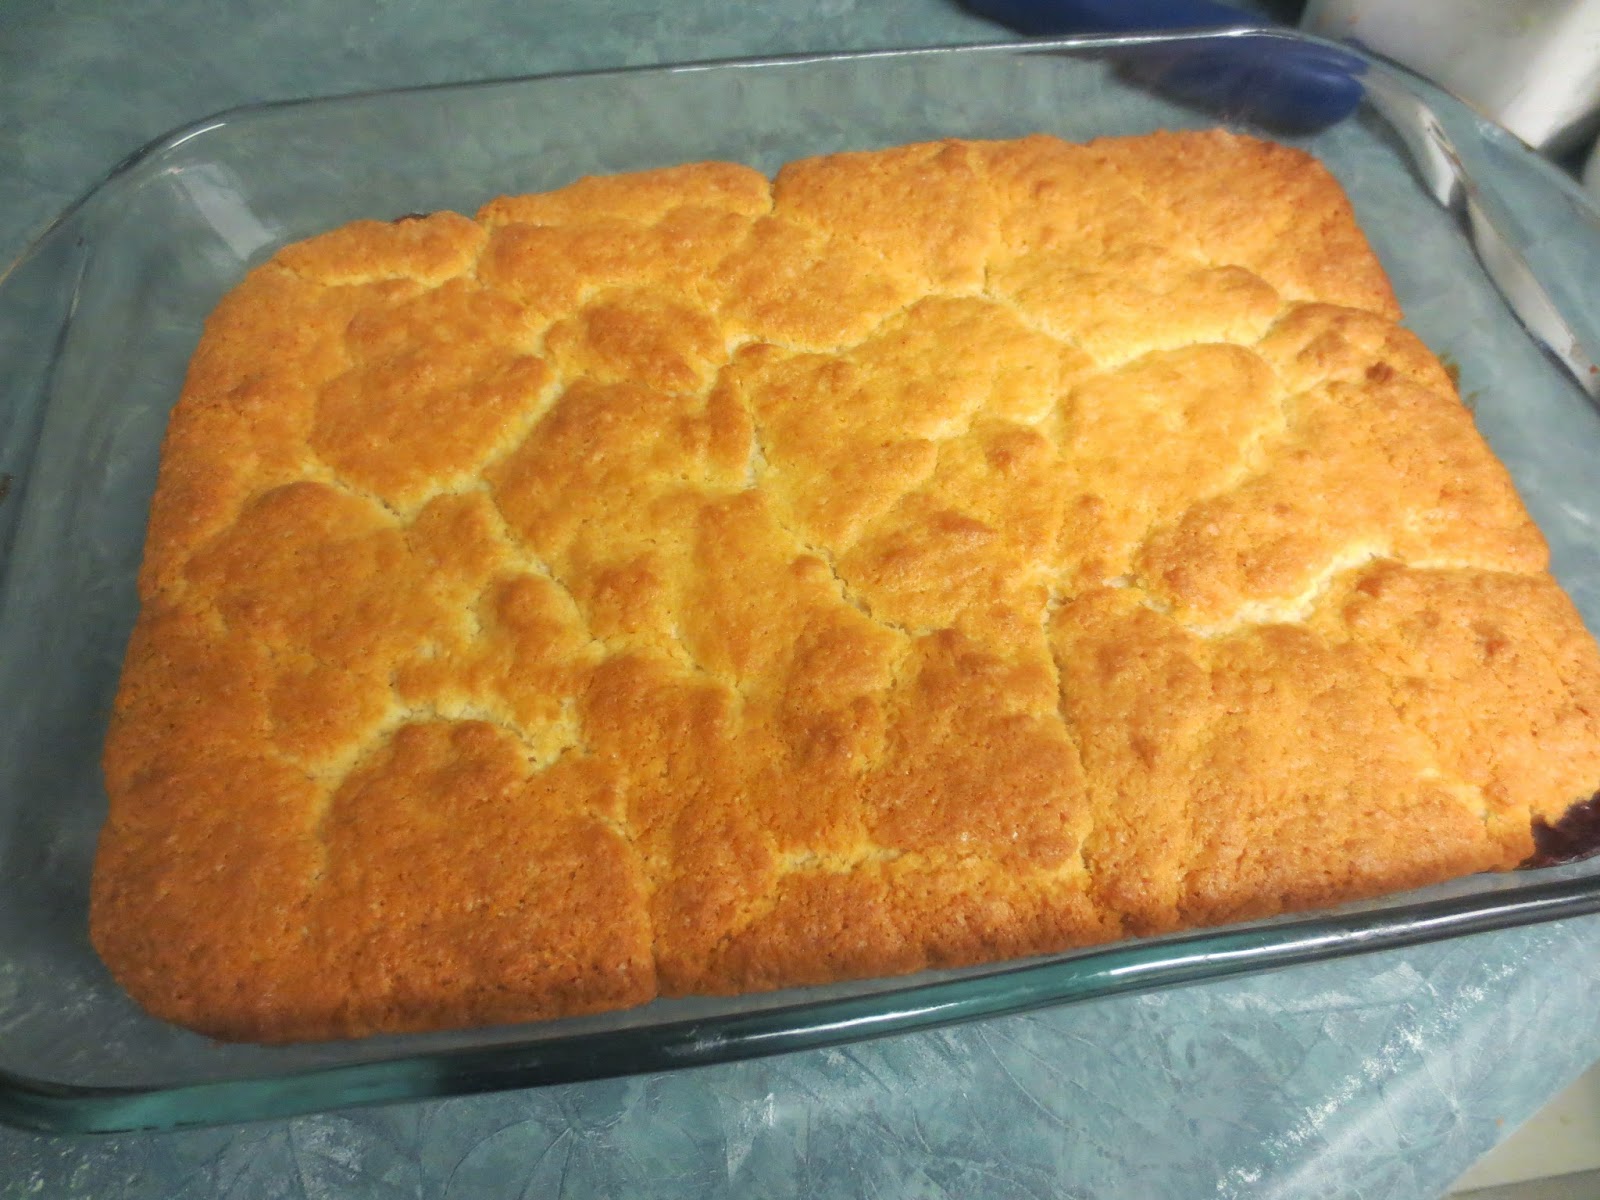
These biscuits are based from my go-to biscuit recipe I
devised myself. I haven’t found a tastier, easier biscuit to make and this
recipe never fails and can be manipulated in different ways. Here is the base
formula
Basic Biscuits
2 cups all-purpose (plain) flour
4 teaspoons baking powder
1 teaspoon salt
½ cup cold butter or hard margarine, cut into cubes
1 cup milk
Stir together the flour, baking powder, and salt. Cut in the
butter until crumbly. Stir in the milk to form a soft dough and knead briefly
until it just comes together. Roll or pat out to desired thickness and cut as
desired. Bake until golden.
Variations
Flour: Try whole wheat, a mix, ground oats, or adding in
other whole grains.
Sweet: Cut back on the salt and add up to two tablespoons of
granulated sugar to use dough for sweeter applications.
Fat: Both butter and margarine work well. Use a compound
butter for extra flavor, or cream cheese for extra richness.
Milk: I have had success with evaporated, powdered, and
fresh milk of varying milk fat percentages.
Baking: I have been able to bake these at temperatures
ranging from 350◦F to 425◦F – all work but the lower the temperature, the longer
they take. Higher temperatures also make the biscuits slightly crispier. I
always bake them on a parchment-lined baking sheet.
Preparation: I have prepared the dough ahead of time and
refrigerated before rolling and cutting. I have also prepared biscuits and
refrigerated those before baking. I have also mixed up the dry ingredients and
had the butter cubed and ready to go and the milk poured in advance.
Applications: Use for basic biscuits, crescent rolls, pizza
roll-ups, crusts for meats, croissants, shortcakes for desserts, turnovers,
toppings for casseroles and soups, and more. The dough holds filling really
well.Thursday, February 05, 2015
Miniature Nutella Croissants
Happy World Nutella Day 2015!! As you may have figured out by now, I am kind of a big fan of Nutella (chocolate and hazelnuts in spreadable form, need I say more). I particularly like to bake with it, and so every year I make several treats for the occasion. Just type "nutella" into the search bar of my blog, and you'll find entries from the last few years, as well as a number of Nutella creations I have made throughout the year.
Miniature Nutella Croissants
1 cup all-purpose (plain) flour
1 Tablespoon granulated (white) sugar
2 teaspoons baking powder
1/4 cup cold cubed butter
1/2 cup milk
Nutella
melted butter
more Nutella

In a medium bowl, stir together the flour, sugar, and baking powder. Cut in the butter until crumbly. Stir in the milk to form a soft dough, knead just until it comes together. Roll to a 1/4 inch think circle. Cut into eight triangular-shaped wedges. Spread each with Nutella, then roll up from straight edge to form a crescent. Don't be skimpy with the Nutella, but don't overfill or it will just ooze out in baking. Spread it evenly all over the dough. Freeze for at least one hour before baking.
Bake on a parchment-lined baking sheet at 425◦F for about 15 minutes until golden. Brush immediately with melted butter. Once cool, heat a little Nutella and a small amount of butter until slightly thinned, but do not overheat or it will seize up. Drizzle over the croissants.
Ok, so these are not authentic croissants. Croissant-making is a long and tedious process. This is a biscuit dough, but it is still rich and buttery and looks like a croissant. Plus with all that Nutella in there, you won't notice the difference, except maybe the flakiness. These are great warm, especially for breakfast, but are even better when spread with more chocolate!
Miniature Nutella Croissants
1 cup all-purpose (plain) flour
1 Tablespoon granulated (white) sugar
2 teaspoons baking powder
1/4 cup cold cubed butter
1/2 cup milk
Nutella
melted butter
more Nutella
In a medium bowl, stir together the flour, sugar, and baking powder. Cut in the butter until crumbly. Stir in the milk to form a soft dough, knead just until it comes together. Roll to a 1/4 inch think circle. Cut into eight triangular-shaped wedges. Spread each with Nutella, then roll up from straight edge to form a crescent. Don't be skimpy with the Nutella, but don't overfill or it will just ooze out in baking. Spread it evenly all over the dough. Freeze for at least one hour before baking.
Bake on a parchment-lined baking sheet at 425◦F for about 15 minutes until golden. Brush immediately with melted butter. Once cool, heat a little Nutella and a small amount of butter until slightly thinned, but do not overheat or it will seize up. Drizzle over the croissants.
Saturday, November 29, 2014
Berry Cobbler
Berry Cobbler
2 cans berry pie filling (use a single berry pie filling or a mix of berries, or mix two different cans)
1 tablespoon lemon juice
1 teaspoon almond extract
2 cups all-purpose (plain) flour
1/2 cup granulated (white) sugar
2 teaspoons baking powder
1/2 teaspoon salt
1/3 cup cold butter, cubed
1 cup milk
Preheat oven to 425◦F.
Mix the filling, lemon juice, and almond extract together in a 9x13 inch rectangular pan. Place in the oven to heat up while preparing topping.
Meanwhile, stir together the flour, sugar, baking powder, and salt. Cut in the butter until crumbly. Stir in the milk to form a soft dough. Drop by spoonfuls over the hot filling.
Bake for about 20-25 minutes until biscuit topping is golden.
Sunday, November 16, 2014
Blueberry Grunt
Blueberry grunt is a cross between blueberry cobbler and blueberry buckle. It supposedly gets its name from the noise it makes while cooking. Traditionally it is steamed, but I like to bake it to make it easier and neater to serve. You cannot go wrong with a sweet, thick blueberry filling, and a crispy, doughy biscuit topping. It is good warm or cold, but especially nice warm if you happen to have a scoop of vanilla ice cream hiding in your freezer.
Blueberry Grunt
FILLING
5 cups blueberries, fresh or frozen
1 cup granulated (white) sugar
1/2 cup water
1 teaspoon lemon juice
DOUGH
2 cups all-purpose (plain) flour
1/4 cup granulated (white) sugar
2 teaspoons baking powder
1/2 teaspoon salt
2 Tablespoons butter or hard margarine
1 1/2 cups milk
Preheat oven to 425◦F.
FILLING: In a medium saucepan over medium heat, bring all ingredients to a boil. Simmer while preparing dough.
DOUGH: In a medium bowl, stir together the flour, sugar, baking powder, and salt. Work in the butter, then stir in the milk to form a soft dough.
Pour the hot filling in a 9x13 inch pan. Place the dough in spoonfuls over top. Bake for about 20-30 minutes until dough is golden and cooked and fruit is hot and bubbly.
Subscribe to:
Posts (Atom)