English muffins are a nice breakfast treat. They can be easily split and toasted, and spread with butter, honey, jam, peanut butter, cream cheese, and more! They are even better when they are homemade, and this multigrain version is chock full of nutrients. English muffins are not difficult to make at all, though like most yeast breads, they take some time. It is important to give them enough time to rise, or the end result will be disappointing. English muffins are traditionally cooked on a griddle or skillet, though some versions are baked.
Multigrain English Muffins
3/4 cup warm water
1 Tablespoon liquid honey
1 teaspoon butter
1 package instant yeast
2 cups whole wheat flour
1/2 cup natural wheat bran
1/4 cup oat bran
1/4 cup old-fashioned oats
1/4 cup wheat germ
1 Tablespoon ground flaxseed
1 teaspoon salt
1/2 cup buttermilk
In a large bowl, dissolve the honey and butter in the water. Sprinkle the yeast over top and let stand for 10-20 minutes until bubbly. Stir to dissolve.
In a separate bowl, mix together the remaining ingredients except for the buttermilk. Stir the buttermilk into the yeast mixture, then gradually stir in the flour mixture. Briefly knead the dough until smooth, about three minutes. Allow to rise for one hour.
Knead the dough for a minute and a half, then lightly pat to 1/2 inch thick. Cut out rounds with a 2.5-3.5 inch cutter. Place on a lined baking sheet and allow to rise for at least 40 minutes more. The muffins can be coated in flour or cornmeal if desired to help prevent sticking.
Preheat a little oil in a frying pan or skillet over medium heat. Fry the muffins until browned, about 5-7 minutes per side (you may need to do this in batches).
Makes around 12-18 muffins, depending on size.
I have been wanting to try making pasta with carbonara sauce for quite some time now. It is quite a simple and basic dish, but the idea always intrigued me. A sauce made with eggs that are cooked once tossed with the hot pasta? Interesting! I didn't really follow a particular recipe for this one, but just sort of made it based on several different recipes I read. Therefore, I don't have any precise measurements - just eyeballed amounts based on taste preferences. I also made a vegetarian version - usually carbonara begins by frying up some bacon or pancetta, and using the flavorful oil in the sauce base, as well as the crispy meat in the finished dish. I omitted this, but I did add some breadcrumbs for a little extra flavor. Another change I made, since I am paranoid about food poisoning and proper cooking, was to bring the sauce to a boil, instead of removing the spaghetti from the heat and then stirring in the sauce. This not only ensures the eggs are properly cooked, but also thickens the sauce. I have given approximate measures, and the procedure below for about four servings, though amounts may be tailored to suit different amounts or tastes.
Ingredients
spaghetti (4 servings)
butter (1 Tablespoon)
olive oil (1 Tablespoon)
chopped onion (1/2 small)
dry breadcrumbs ( 2 Tablespoons)
whipping cream (200 mL)
eggs (2 large)
grated Parmesan cheese (3 Tablespoons, plus extra for topping)
salt (to taste)
ground black pepper (to taste)
Cook spaghetti according to package directions. Meanwhile, heat the butte rand oil in a small frying pan over medium heat. Sautée the onion until softened, but do not brown. Add the breadcrumbs and stir for a few minutes until aromatic.
Beat the cream, eggs, Parmesan, salt and pepper together in a small bowl.
Drain the spaghetti, return to pot, then immediately stir in the onion mixture and the cream mixture. Stir for a few minutes to coat, then turn heat to high and cover. Bring the mixture just to a boil, stir again, and serve topped with more Parmesan.
Keeping with the black forest theme (just for one more day, I promise) I would like to provide some recommended tips based on my experiences, what I had success with, and what I would change for next time.
Improvement #1 - Loose Cream - I didn't have this problem because I used cream stiffener. I used four packets of this cream stabilizer and beat the cream until stiff, stiff peaks formed.
Improvement #2 - Bleeding Cherries - I found the cherries I used to decorate the cake bled into the cream a bit. I would recommend washing the cherries and blotting them very dry, as well as adding them just before serving.
Improvement #3 - Dry Cake - I found the cake a little on the dry side, but this could definitely be improved by sprinkling all cake layers with some cherry schnapps, as the cake is a spongecake and that is what it is designed for. For a version with less alcohol, cherry juice could be used instead.
Improvement #3 - Sweet or Sour Cherries - My only recommendation here is to tailor it to your consumers. Sour cherries may be used in all cases, but you may or may not want to add sugar. Generally sweet cherries should only be used for American versions.
 Improvement #4 - Even Cake Layers - Slicing a cake horizontally can be difficult. Make sure the cake is cooled completely. Slice the top layer first - which should be very thin. Use a long, serrated knife, and rotate the cake while slicing slowly. Then slice the remaining cake in half.
Improvement #5 - Disappearing Cake - To prevent your cake from disappearing too quickly due to its deliciousness, try hiding it in the back of the fridge in a covered container labelled "Leftover Spinach Sautée".
Black Forest is a fairly common type of cake, but really there exists two distinct types: the sweeter American version (common in North and South America), and the more traditional German version (common in Germany and Europe). As of Sunday, I have made both types, and I noticed some significant differences. I am personally used to the American version, but I also had the privilege of hearing the opinion of someone who is used to the German version. I can't say I really have an overall preference, as there are many different variations within the two versions, but I may say generally the American version is prettier to look at, but the German version is tastier. Here is a brief comparison.
The American version typically consists of rich chocolate sponge or similar type cake layers, sweet cherry filling, sweetened whipped cream, and chocolate curls or flakes and maraschino cherries to decorate. The major differences between this version and the German are the cherries used here are very sweet - often maraschino from a jar or a cherry pie filling. The cherries are bright red and thick. The whipped cream is flavored with sugar and vanilla, and perhaps a little cherry juice, but often alcohol is omitted. Chocolate curls are used more often than grated chocolate for a better presentation. There is no shortcrust pastry base. There is no particular order for the layers - sometimes cream and cherries are placed together in layers, sometimes separated with numerous layers of both.
The German version also consists of a chocolate spongecake layered with sour cherries, and flavored whipped cream. However, it features a shortbread pastry base on the bottom of the cake, spread with cherry jam. The cake is decorated with sour cherries and grated chocolate. The major differences here are the shortcrust bottom, which does not exist in the American version, and the use of sour cherries instead of sweet. Usually bottled sour cherries are used, though these can be difficult to find outside of Europe. Fresh or frozen sour cherries may be substituted, but never sweet red cherries. The cake and cream are often flavored with Kirschwasser or cherry schnapps. Grated chocolate is used to decorate the cake. Typically following the bottom shortcrust layer, a cake layer, a cherry layer, a cake layer, a cream layer, and at least one more cake layer follows.
The similarities between the two cakes are they both have a similar chocolate spongecake base. They are both composed of layers of cherries and flavored whipped cream. They are both typically adorned with whole cherries, whipped cream rosettes, and chocolate pieces.
The conclusion? Here is a comparison of the three I have made. My parents preferred the American versions, as they found the cherries in the German version too sour. My boyfriend and his mother (both from Germany) preferred the German version, and she even thought the cherries were not sour enough. Me? As said before, I would take the best from both worlds!
Simple American Black Forest http://bexysbakingblog.blogspot.ca/2011/09/black-forest-cake.html
German-influenced American Torte
http://bexysbakingblog.blogspot.ca/2012/10/schwarzwalder-kirschtorte.html
Traditional German Black Forest http://bexysbakingblog.blogspot.ca/2013/09/original-schwarzwalder-kirschtorte.html
Here is the procedure for the authentic black forest cake I featured yesterday. It seems like a lot of steps and a lot of layers and a lengthy procedure, but it doesn't take too long to assemble once all of the individual components are made. And the process is not difficult at all.
First take the shortcrust pastry:
Spread it with cherry jam:
Add a chocolate spongecake layer:
Drizzle it with cherry schnapps to moisten.
Spread it with sour cherries and the thickened juice:
Add another chocolate spongecake layer.
Spread it with sweetened thick whipped cream flavored with a little cherry schnapps:
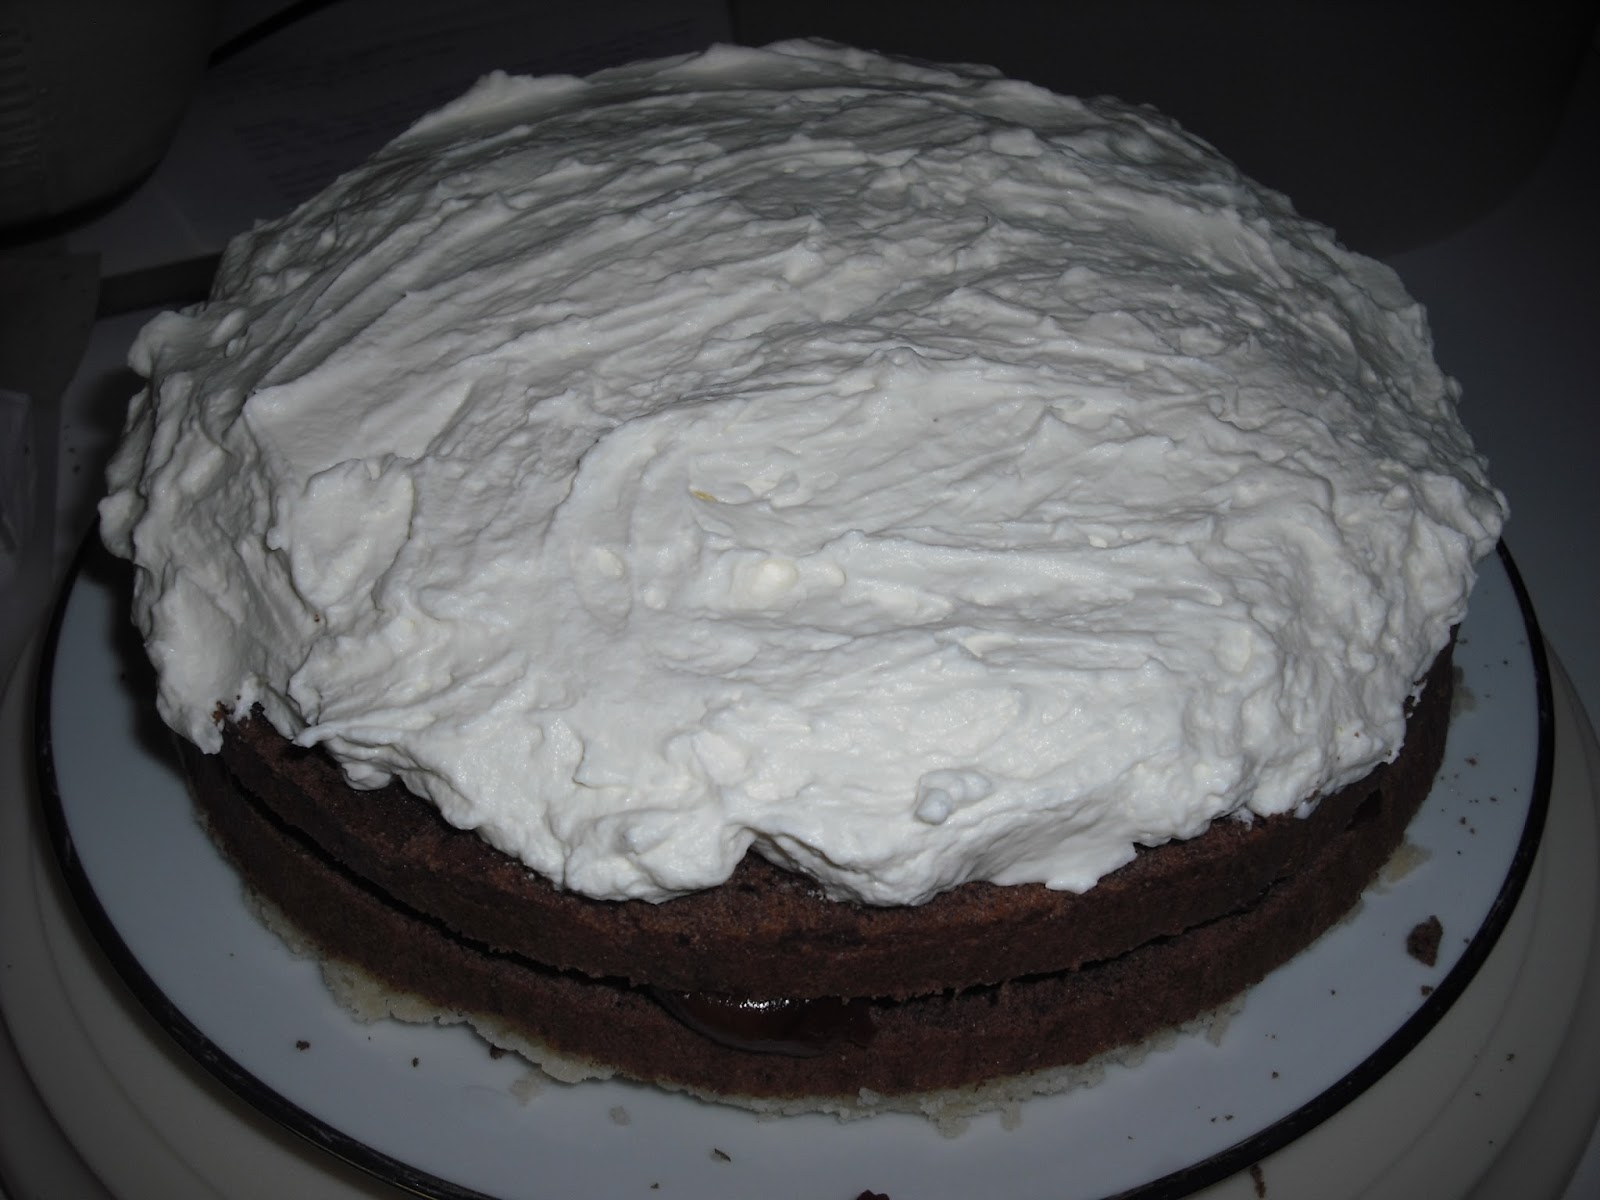
Add the final thin chocolate spongecake layer to form a dome over the cake:
Spread with the remaining cream mixture:
Decorate with some more sour cherries and grated chocolate:
Schwarzwälder Kirschtorte means Black Forest Gâteau. I have made two of these before in my life, but the recipe I used for this one is authentic. I received this recipe from the grandmother of my boyfriend, in a nice little keepsake book. The recipe comes straight from Germany, the location of the Black Forest, and of course the original Black Forest cake. The recipe was written in German, since it is a German recipe and my boyfriend's grandmother lives in Germany. So thank you to my boyfriend and his mother for translating the recipe for me!
I was very excited to try this recipe. Black Forest cake is popular around the time of the German celebration of Oktoberfest, so I decided to try a trial run of the cake before then. My father's birthday seemed like the ideal time to test it, which works out well because it is also close to the birthday of my boyfriend's mother. She definitely deserves some cake for all the trouble she went through in translating the recipe. I wanted to do a trial run because, like many older or authentic recipes, the directions are not completely specific, the availability of ingredients differs between here and Germany, and it is possible some information was lost in translation. So if something does not work out this time, I can try to improve upon it for next time. Also, there were two options for the chocolate cake layers included: a chocolate spongecake and a cocoa biscuit. This time I will be trying the spongecake, as it seems easier with more familiar ingredients, but I certainly may try the biscuit recipe another time! I won't share this recipe - since it was a gift to me and is authentic, but also because the recipe translation can be a bit confusing, and the original is written in German. Tomorrow however, I will share a step-by-step procedure with pictures.

I made these muffins to have with my breakfast in place of my usual biscuit. Therefore, I made 22 fairly small muffins, but you could make them bigger if you wish. They are very nutritious and excellent spread with peanut butter.
Apple Carrot Flax Muffins
1 cup whole wheat flour
1 cup ground flaxseed
1 cup oat bran
1/2 cup natural wheat bran
1/2 cup brown sugar
1 Tablespoon ground cinnamon
2 teaspoons baking soda
1 teaspoon baking powder
1/2 teaspoon salt
1/2 teaspoon ground ginger
1/4 teaspoon ground cloves
2 large apples, shredded
3 medium carrots, shredded
2 large eggs, beaten
3/4 cup milk
1 teaspoon vanilla extract
Preheat oven to 350◦F. Grease or line muffin cups with paper liners.
In a large bowl, stir together the first eleven dry ingredients. Stir in the apple and carrot.
Mix the eggs, milk, and vanilla together and add to dry mixture. Spoon into prepared muffin cups. Bake for about 20 minutes, or until a toothpick inserted in the center of a muffin comes out clean.
This is a really quick and easy cinnamon roll recipe. I do have my go-to cinnamon roll recipe, which is so fluffy and sweet, but it does require a little extra time and work. It also makes only nine rolls, and the recipe does not double well. I have used another recipe for biscuits, and added a cinnamon filling, but it isn't as good as the other one. I have not yet tried yeast cinnamon rolls, they just don't look as fluffy and tasty as biscuit rolls. Plus they take longer and require more work, and usually I can't wait that long for cinnamon rolls, I want them soon and I want them hot! That's where this recipe comes in. The time you begin to the time you sit down and eat will be less than one hour.
One Hour Cinnamon Rolls
DOUGH
2 1/2 cups all-purpose (plain) flour
2 Tablespoons granulated (white) sugar
1 1/2 teaspoons baking powder
1 1/2 teaspoons baking soda
1/2 teaspoon salt
1/3 cup plain yogurt or sour cream
3/4 cup buttermilk
1/4 cup oil
FILLING
1/3 cup brown sugar
1/3 cup granulated (white) sugar
1 Tablespoon ground cinnamon
1/2 cup butter, very soft or melted
Preheat oven to 375◦F. Line or butter a large round springform or a 9x13 inch rectangular baking pan.
FILLING: In a small bowl, mix the two sugars and cinnamon together. Set aside.
DOUGH: In a large bowl, mix together the flour, sugar, baking powder, baking soda, and salt. In a separate bowl, mix together the yogurt, milk, and oil. Add to dry ingredients and mix to form a dough. Transfer to a lightly floured surface and roll out to a large rectangle, about 10x16 inches, and at least 1/8 inch thick. There is no need to be precise here.
Leaving a border all around, at least 1/4 inch, spread the dough with melted butter. Sprinkle the cinnamon sugar evenly over top. Roll dough tightly from a long end, and cut into twelve equal rolls (dental floss or thread works wonders for this). Place the rolls, facing up, in the prepared pan. Spread with a little extra melted butter. Bake for about 20-25 minutes. Or, you can refrigerate the rolls and bake later to enjoy them hot from the oven!
ICING: I don't think they need them, but if you like your cinnamon rolls iced, you can whip up a simple powdered sugar and milk, or a cream cheese frosting and slather it all over the rolls once they come out of the oven. Let stand a few minutes to set, then dive in!
Sunny Honey Flax Bread
1 1/3 cups warm water
2 Tablespoons liquid honey
1 package instant yeast
2 Tablespoons oil
2 1/2 cups whole wheat flour, plus extra for kneading
1/4 cup ground flaxseeds
1/4 cup raw sunflower seeds
1 teaspoon salt
In a large bowl, stir together the water and the honey. Sprinkle the yeast over top and let stand for ten minutes, until foamy. Stir to dissolve. Stir in the oil.
Stir together the remaining dry ingredients and gradually stir into yeast mixture. Knead for 5-10 minutes until smooth, adding extra flour if needed. Allow to rise one hour.
Punch dough down and transfer to a greased 9x5 inch loaf pan. Allow to rise for another hour.
Bake at 350◦F for 35-40 minutes.
I decided to try an old-fashioned bread recipe again. The kind that needs kneading and rising, not just a quick or batter bread. This one is 100% whole wheat and has a nice texture from flax and sunflower seeds. This bread rose nicely and is not too difficult or time-consuming. It makes nice sandwich bread, and the recipe could probably be doubled.
Since my grandfather is used to having fries with his liver, whenever he eats it in a restaurant, I decided to try making some fries for him. I wasn't about to take out the deep-fryer, as that is my father's territory. I decided to just make some fries in the oven. Basically I followed the same recipe I use to make homemade hashbrowns here: Hashbrowns.
The only real difference is I cut the potatoes into fry shapes instead of small cubes. This worked really well.
I peeled, rinsed, and sliced the potatoes, then covered them in water and brought them to a boil. I drained them and placed them on a baking sheet with a little oil and a light sprinkle of salt. Then I baked them on the top rack of the oven at 425◦F for about 25 minutes, flipping every ten minutes. The result was a batch of crispy, tasty fires that are not greasy at all. A healthier choice, but comparable to restaurant fries (and I don't mean fast food style). A great side dish, and easy too!
Liver tends to get a bad rap. It always seemed like a threat at our house, "What's for supper?" 'Liver and onions if you don't behave!' Nevertheless, liver isn't exactly a gourmet, expensive meal. It is actually incredibly cheap. You can still find liver and onions on the menu at restaurants, though it isn't usually a highly popular choice. I'll be honest, I am not a beef fan, or even much of a meat fan at all. However, I have been wanting to try liver for quite some time now. This is the first time I have tried it. My grandmother cooked a batch of fresh beef liver up for me with some onions. Apparently calf liver is the most tender, but there was none at the store at the time. However, this piece of liver she cooked was incredibly tender. It just melted in your mouth, and you could cut it with a fork. Liver is really the only form of beef I enjoy eating. I mean, steak and roast beef are two of my least favorite foods, yet I enjoyed the liver. Which is a good thing, because liver is incredibly nutritious. Liver is very high in protein, iron, and zinc, while relatively low in fat and calories. It is also very affordable and easy to prepare. We bought 4-5 portions for under $2. Here's how my grandmother made it:
Heat some oil in a large frying pan. Saute onions, in large rings or slices, over high heat for about a half hour or so. You don't want them to brown or caramelize, just release their flavor and soften. Transfer to a dish and keep warm. Place the beef liver, cut into small slices, in the frying pan and cook for about 10 minutes. Add the onions back in and cook for at least five minutes more, until cooked. Do not overcook, you want the liver to be tender.
I was quite pleased one day, when I was staying at my grandmother's house and found my great-grandmother's recipe for shortbread cookies. I was looking through my grandmother's stashes of recipes, as we were sharing, comparing, and discussing. I came across this one, and immediately copied it out for myself. I could remember my great-grandmother's shortbread cookies, and they were always the best. They were rich and buttery, never dry and crumbly, not too sweet with a nice flavor. And they were always cut out in pretty little shapes, such as flowers and hearts, and adorned with just a light sprinkle of colored sprinkles. I couldn't wait to make them myself!
The first time I made them was like a step back in time, they were exactly like my grandmother's - perfect. I enjoyed inhaling them warm from the oven. I used this prized recipe (which I'm sorry, but I cannot share) in the exhibition baking competition, as it is certainly award-winning. I entered it in the heritage plain shortbread category. So I could not use sprinkles on these cookies, but I did use the same shape my grandmother often used. This recipe has been passed from my great-grandmother, to my grandmother, to my mother and me. I am sure it will be passed on again and again, as it is certainly the best! And it is quite easy as well! Whipping up a batch and baking takes no more than 30 minutes in total.
These are some miniature chocolate cupcakes I whipped up the other day. I call them doughnut cupcakes because I think they look like doughnuts or doughnut holes - with the small round chocolate base, the vanilla frosting, and the colorful round sprinkles. I was making my signature chocolate cake batter for the exhibition competition, but of course I only need to submit three small pieces. I have tried halving this recipe before, which doesn't seem to work out so well, so I made one round cake and used the rest of the batter to make miniature cupcakes. Then I whipped up a small batch of my vanilla buttercream, and used my large open star tip to pipe a swirl of buttercream on each. Then I sprinkled on some colored sprinkles. Because the buttercream icing had already hardened, and the chocolate cake is very moist and sticky, the sprinkles stuck to the cake and not the icing. I liked this effect, the plain swirl of icing surrounded with sprinkles on a chocolate cake.
This is a very quick and easy sugar cookie dough, that really isn't fussy or difficult to work with. My mother uses it every year for both Christmas cookies, such as trees, bells, and stars decorated with sprinkles or colored sugar; and frosted ghost cookies for Halloween. This is a good cookie dough for any shape, and has a nice flavor that isn't dry or crumbly.
Sugar Cookie Dough
3/4 cup butter, softened
3/4 cup granulated (white) sugar
1 large egg
1 teaspoon vanilla extract
2 cups all-purpose (plain) flour
1/4 teaspoon salt
In a large bowl, cream the butter and sugar together. Beat in the egg and vanilla. Stir in the flour and salt. Form the dough into a ball and flatten. Wrap with plastic wrap and chill for at least one hour.
To Bake: Preheat oven to 325◦F. Line cookie sheets if desired.
Roll the dough to 1/4 inch thick on a floured surface. Cut out desired shapes and place cookies on prepared cookie sheets. Decorate with sugar or sprinkles if desired, or ice after baking. Bake for 13-15 minutes, until just golden on edges, do not overbrown.
It is almost inevitable when one is trying to bake large quantities as quickly, as accurately, and as professionally as possible for a special competition that something, or several things, will go wrong. Usually I experience a few small pitfalls, despite all my prior planning and organization, not everything can run smoothly. But I had a quite funny experience my fist year entering this competition.
I was making my signature chocolate cake. I had made this cake recipe many times before, and it had always turned out perfectly. This time I decided to halve the recipe because I only needed three pieces, and not two whole cakes. I am not sure if I did not halve the recipe correctly, or what exactly happened, but it did not work out. I had put the cake in the oven to bake, and things seemed to be going smoothly, but then I began to smell toasted marshmallow. It didn't smell bad or burnt, so I figured someone was having a campfire. Then, when it came time to check on my cake, I came across quite the surprise! The cake had overflowed from the pan, and spilled onto the oven rack and floor. That's what was burning, though I am not sure why it smelled like marshmallow. The rest of the cake seemed to have survived ok. I was much more concerned about the mess I had left in my parent's oven than with the condition of my chocolate cake. Surprisingly, they weren't upset and it wasn't too difficult to clean once it cooled down. My brother was also happy to eat the cake. He said it tasted fine, and I could have probably entered that cake in the exhibition no problem, but I whipped up another (full) batch the next day. Then we ended up with a lot more cake then we had bargained for.
These things happen. That is why I plan ahead, and begin baking crucial or time-consuming items the day before. That way I can re-do them the next day, if needed. Even tried and true recipes do not always turn out perfectly.
Here are the results from the exhibition baking competition. I received a placement for each of the sweets I entered and I placed fourth overall. I received a nice gift basket, that appears to have an Italian theme - it includes a pasta cookbook, pasta, manicotti shells, pasta sauce, vegetable broth, and a sauce mix. This is certainly a nice fit with my Italian heritage. Once again this year, my chocolate cake placed first - it really is the best! My mother's awesome chocolate zucchini loaf placed first again as well. The other items I have not entered before, but my vanilla cake won first too. My two heritage recipes also earned top prizes. I am a little surprised with the placement of my lemon squares and chocolate coconut squares, which both got rave reviews from family and friends. Oh well, at least they are popular among us. I am quite pleased with my winnings, especially considering I am competing with breads and preserves for a top place, neither of which I have entered.

4th Place Overall Exhibition
COFFEE CAKE - Chocolate Streusel Cake - 2nd
ZUCCHINI LOAF - Double Chocolate Zucchini Loaf - 1st
BROWNIES - Chip Brownies - 4th
BAKED SQUARES - Lovely Lemon Cookies Bars - 3rd
NO BAKE-SQUARES - Chocolate Coconut Squares - 2nd
CHOCOLATE CAKE - Classic Chocolate Cake - 1st
WHITE CAKE - Vanilla Cake - 1st
SUGAR COOKIES - Classic Sugar Cookies - 3rd
CHOCOLATE CHIP COOKIES - 3rd
PLAIN SHORTBREAD - Nonna's Shortbread Cookies - 1st
BLUEBERRY ITEM - Blueberry Yogurt Cake - 1st
Once again, it is the time of year where the local exhibition is in town. That means there is a home cooking and baking competition and I am busy baking up a storm to enter many of my items. The process of baking, packaging, and delivering the items all happens mostly within the span of a two-day period; the baked goods have got to be fresh. However, planning beforehand does take some time, and I try to do this as early as possible in order to get as much accomplished as I can and reduce my workload for the two days before the competition. This involves getting the entry form and deciding which items I am going to bake. There are approximately eighty different categories I could enter, but there is no way I would be able to bake that much in two days. I know I am not the best at making breads, jams, or pickles, and these items are all quite time-consuming, so I eliminate those categories right away. But there are still many cakes, and squares, and cookies, and pies to choose from. So I choose what I believe I am the best at, and what I know I have great recipes for. I also try to choose recipes that are, for the most part, quick and easy, as I want to bake as much as I can in a short amount of time.
Before baking begins, I also write up all of my tags for the entries, gather my recipes together, organize my supplies, and make a grocery list and purchase ingredients. I certainly don't want to run out of something in the middle of baking, and lose precious time running to the store, so I make sure I have plenty of everything.
Then when it comes time to bake, I grab the recipe from my stack, bake the item, cool it properly, and package and tag it to be displayed on a paper plate in a plastic bag. Then I place it in a safe place, and make sure everyone knows the leftovers are there for eating, not the ones on the plate! I try to bake things in a logical order, to make best use of oven time, and bake things like cake and bars the day before, to be cooled properly before cutting, and bake items that need to be the freshest or are the least stressful the day of.
Leftovers, there are usually a lot of them, though I try to make small batches. I end up freezing a lot of them, sharing with my family, or giving away to friends. But of course, these are all family favorite recipes, and every item needs to be tasted before I enter it!
This recipe is a time-saver, and also a saver when it is too hot to even think about turning on the oven. It seems simple, but is quite addictive. You can add 1/2 cup chopped nuts along with the coconut if you wish. The chocolaty flavor is good, and these need no other garnish, though some melted chocolate or icing will make them appear a bit fancier.
Chocolate Coconut Boil
1/2 cup butter or hard margarine
2 Tablespoons unsweetened cocoa powder
1 Tablespoon milk
1 cup packed brown sugar
2 large eggs, lightly beaten
3 cups graham cracker crumbs
1/2 cup shredded coconut
1/4 teaspoon salt
Grease or line an 8x8 inch square pan.
In a medium saucepan, melt the butter, cocoa, milk, and sugar. Stir together, then stir a couple spoonfuls of this mixture into the eggs to temper them. Pour the eggs into the saucepan, and stir. Bring the mixture to a low boil, stirring occasionally and boil for one minute. Remove from heat, stir in remaining ingredients. Press mixture into prepared pan. Refrigerate until firm.
To decorate: I spread squares with a mixture of 1 cup semi-sweet chocolate chips and two tablespoons hard margarine melted together. After this set a bit, I drizzled them with a bit of icing sugar and milk mixture in one direction, and cocoa, icing sugar, and milk mixture in the other direction. I let this set only a few minutes at room temperature before cutting in order to avoid cracking. Then I refrigerated them after cutting.
Paré, Jean. "Chocolate Boil." Recipe. 150 Delicious Squares, Edmonton Alberta: Company's Coming Publishing Limited, 1981. 128.
If you are not familiar with Ferrero Rocher chocolates, they consist of a whole roasted hazelnut surrounded by a creamy caramel filling and crisp wafer coated in milk chocolate and chopped hazelnuts. Yum! Though most are familiar with the classic chocolate, there are also two other types of Ferrero Rocher out there; the Ferrero Rondnoir, which is a dark chocolate creation, and the Raffaello, which is an almond in a creamy coconut coating. Ferrero Rocher are exquisite creations, and very delectable. They are wrapped in fancy gold cup packaging and are a bit pricey, but make great gifts for Valentine's Day, Christmas, and birthdays. I found some extra Ferrero Rocher chocolates at my house, though it is a bit of a surprise they had not been gobbled up. I remember seeing a recipe for brownie bites with a Ferrero Rocher in the middle, smothered with a caramel and caramel cream cheese frosting. Though I did not bother with the frosting, these brownie bites are still divine!

Ferrero Rocher Brownie Bites
1 brownie mix or brownie recipe, about 18.5 ounces or enough to make an 8x8 inch pan or 24 miniature muffin cups full
24 Ferrero Rocher chocolates, or use any other chocolates you think will work, unwrapped
caramel sauce, if desired
frosting, if desired
Preheat oven to 350◦F. Line 24 miniature muffin cups with paper liners.
Prepare the brownie mix, and divide batter evenly among the muffin cups, filling them 3/4 full.
Bake for 11-13 minutes, or as directed.
Immediately press a chocolate into the center of each warm brownie bites. Be gentle, but press it in so the brownie sinks a bit. The chocolate will melt a bit, but will firm upon cooling.
Cool completely. Add a dab of caramel sauce, and a swirl of frosting if desired.
I used mostly original Ferrero Rochers, but I also had a few of the dark and coconut kind. I used a basic brownie cup recipe I have used before with another type of candy; chocolate peanut butter cups. You can find that recipe here: Peanut Butter Cup Buttons.
My mother made this delicious cinnamon bread cake. I call it a cinnamon bread cake, because technically it is a cinnamon bread, but instead of baking it in a loaf pan, my mother made it in a square cake pan. This worked out really more, and now it is more like a cake! It is sweet enough to be a cake anyway. She was looking for a cinnamon fix, and cakes are easier and quicker than making cinnamon rolls, but we were looking for a new cake recipe to try. She found this bread in an old cookbook. It is light, fluffy, and full of cinnamon!
Cinnamon Bread Cake
2 cups all-purpose (plain) flour
1 cup granulated (white) sugar
2 teaspoons baking powder
1/2 teaspoon baking soda
1 1/2 teaspoons ground cinnamon
1 teaspoon salt
1 cup buttermilk
1/4 cup oil
2 large eggs
2 teaspoons vanilla extract
TOPPING
2 Tablespoons granulated (white) sugar
1 teaspoon ground cinnamon
2 teaspoons butter or margarine
Preheat oven to 350◦F. Grease or line a 9x5x3 loaf pan or 9x9 inch square pan.
In a large bowl, measure all ingredient in order given. Beat for three minutes. Pour into prepared pan.
TOPPING: Mix all ingredients until crumbly. Sprinkle over batter. Use a knife to swirl gently. Bake for about 50 minutes, it might need less time for the square pan.
Paré, Jean. "Cinnamon Bread." Recipe. Muffins & More, Edmonton Alberta: Company's Coming Publishing Limited, 1983. 109.
Almond Raisin Date Granola
2 cups old-fashioned oats
1 cup almonds, sliced or chopped
1/2 cup wheat germ
1/2 cup unsweetened shredded coconut
ground cinnamon, ginger, nutmeg, cloves, as desired
1/4 cup coconut oil
1/4 cup molasses
1/2 cup raisins
1/2 cup dates, chopped
Preheat oven to 350◦F. Line a 9x13 inch rectangular baking pan with parchment paper.
Stir together the oats, almonds, wheat germ, coconut, and spices in the baking pan. Drizzle the oil and molasses over top and mix.
Bake for 40 minutes, stirring every ten minutes until golden.
Add the raisins and dates and let cool before stirring.
This is just another granola cereal recipe I tried. I really like this one, as it is easy, hearty, and I really like the flavor combinations, but you can vary the type of nuts and dried fruit as you wish.
This is a great way to make homemade "ice cream" without an ice cream maker. It also doesn't require the old-fashioned way of placing cream in a bag in a bag of ice and shaking for hours. Technically speaking, this isn't ice cream, as it contains no milk ingredients. I guess it would be considered a sorbet. It certainly is reminiscent of ice cream, and a lot lighter and healthier. I could eat a lot of this. The bananas need to be ripe and frozen for the best flavor and texture in this dish. Without sugar, it takes like a banana dark chocolate ice cream, but if you aren't fond of dark chocolate, sweeten or serve with caramel or hot fudge sauce on top. This is quick and easy, and you'll be enjoying some homemade soft-serve in just a few hours!
Chocolate Banana Soft Serve
3 overripe frozen bananas
3 tablespoons unsweetened cocoa powder
1 teaspoon vanilla extract
pinch salt
sugar, agave, honey to sweeten, as desired
Place all ingredients in a food processes and process until smooth. This should only take a few minutes. Then transfer to a shallow container and freeze overnight or until firm.
I am still looking for a really good, basic white cake recipe. I would like to say this is it, but that is not the case. This is the cake I used for my mother's birthday cake yesterday. This one isn't too bad, but not the best. It has a nice vanilla flavor, and a good texture. But it isn't light and fluffy and moist like I am looking for. I wouldn't say the extra work is worth it for this recipe, as I have a one-bowl white cake recipe that is better.
Vanilla Cake
1 cup butter, softened
3 cups granulated (white) sugar
7 large eggs, at room temperature
2 Tablespoons vanilla extract
1 cup sour-cream or yogurt (low-fat works), at room temperature
3 cups cake and pastry flour, sifted
3/4 teaspoon salt
1/2 teaspoon baking powder
1/2 teaspoon baking soda
Preheat oven to 325◦F. Grease and flour three 8 inch or two 9 or 10 inch round pans with high sides (at least 2 inches).
In a large bowl, cream the butter and sugar together until light and fluffy. Beat in the eggs, one at a time, beating well after each addition. Beat in the vanilla, then add the sour cream and beat for thirty seconds.
Mix the dry ingredients together and add to batter in three additions, stirring carefully after each addition.
Divide batter evenly among prepared pans.
Bake for 40-50 minutes.
Allow to cool in the pans for ten minutes, then gently loosen from pans to cool completely.
This is my mother's birthday cake for this year. It starts with a basic vanilla cake recipe, one that I will share tomorrow. Then the cake was iced with "margarine milk" icing by my father. My mother prefers this icing, which is a specialty of my father, as opposed to my buttercream. Personally, I am more familiar with (and more fond of) buttercream, but this is my mother's cake, not mine, and this is what she requested. This is why my father made the icing and iced the cake. However, I did all of the piping and decorations. Normally I would do this with buttercream, as it is stiffer and easier to pipe and to work with, but there was just enough leftover margarine milk, so I used that.
My mother really likes tulips, and that is the only request she had for the decorations on her cake. We aren't fondant or gum paste fans here, so I tried to find a way to make tulips using margarine milk icing. If you can make buttercream roses, why not margarine milk tulips? It wasn't as difficult as I though, I just used my flower petal tip, and made three lines as tulip petals. I decorated the top of the cake with one big and several small tulips, then I put four on the side of the cake as well. The top border is a simple flower border using my drop flower tip. The bottom border is a ruffle border using my petal tip again. I piped "Happy Birthday Dianne" with my mother's name as requested. All of this was done in my mother's favorite color, light pink. Then I added some leaves with a light green icing and my leaf tip. It didn't take very long, and is quite simple, but that's the way my mother likes it.
Happy Birthday Mom! :)
I wouldn't necessarily call these "healthy cookies" but they are better for you than most typical cookie recipes. They are also a lot faster and easier to make - an added bonus. They contain a nice dose of chocolate, a nice flavor of coffee, and the nutrients of whole-grain oats. They are made with coconut oil, a healthier alternative to butter or margarine. The amount of sugar could probably be reduced, but I recommend using the full amount first, then adjusting to suit your tastes. Perhaps honey or agave would work too. I found the idea for these cookies on a healthy dessert recipe site.
Mocha Choco Oat No-Bake Cookies
1/2 cup old-fashioned (or quick) oats
(or use 1/4 cup + 2 Tablespoons oat flour)
3/4 cup quick oats
1/4 cup + 1 Tablespoon granulated (white) sugar
1/4 cup miniature chocolate chips
2 Tablespoons unsweetened cocoa powder
1 1/2 teaspoons instant coffee granules
1/4 teaspoon baking powder
1/4 teaspoon salt
1/4 cup coconut oil
2 Tablespoons water
1/2 teaspoon vanilla extract
Grind the 1/2 cup oats in a blender until it resembles flour.
In a medium bowl, mix together the first seven dry ingredient. Stir together the liquid ingredients separately, then add to the dry, mix well. Roll into balls and refrigerate until firm.
The yield depends on how big and how flat you make them. I got 13 round cookies. One of these cookies is enough to give you a nice pick-me-up in the mid-afternoon!
Zucchini Potato Patties
2 medium zucchini, shredded
1 small carrot, shredded
1 teaspoon salt
ground black pepper and salt to taste
1/2 cup mashed potato
1/4 cup pastry flour
1/4 teaspoon baking soda
oil for frying
Place the zucchini and carrot in a colander and sprinkle with the salt. Allow to drain for at least 30 minutes.
Squeeze all the excess water from the vegetables and pat dry. Add remaining ingredients and blend well. Form into patties with your hands, I made about ten patties, but it depends on size. The patties will hold together better if refrigerated at this point for at least 30 minutes. Or prepare the patties ahead and refrigerate overnight.
Heat a little oil in a large frying pan over medium heat. Fry the patties, about 5-6 minutes per side, until lightly browned.
If you want crispy patties, make them thin, and possibly cook them in batches or use two frying pans. I made my patties thicker, and ended up baking them for a bit after frying. This works well, or works to keep them warm, just be sure to grease or line the tray with parchment paper.
This is a really quick and quite tasty side dish to go with supper, that doesn't require many ingredients or prep work. They can also be prepared ahead, or cooked and reheated, or eaten cold. It makes good use of fresh zucchini. The zucchini flavor is quite prominent. You could vary this recipe by adding minced onion or garlic, or using different spices.