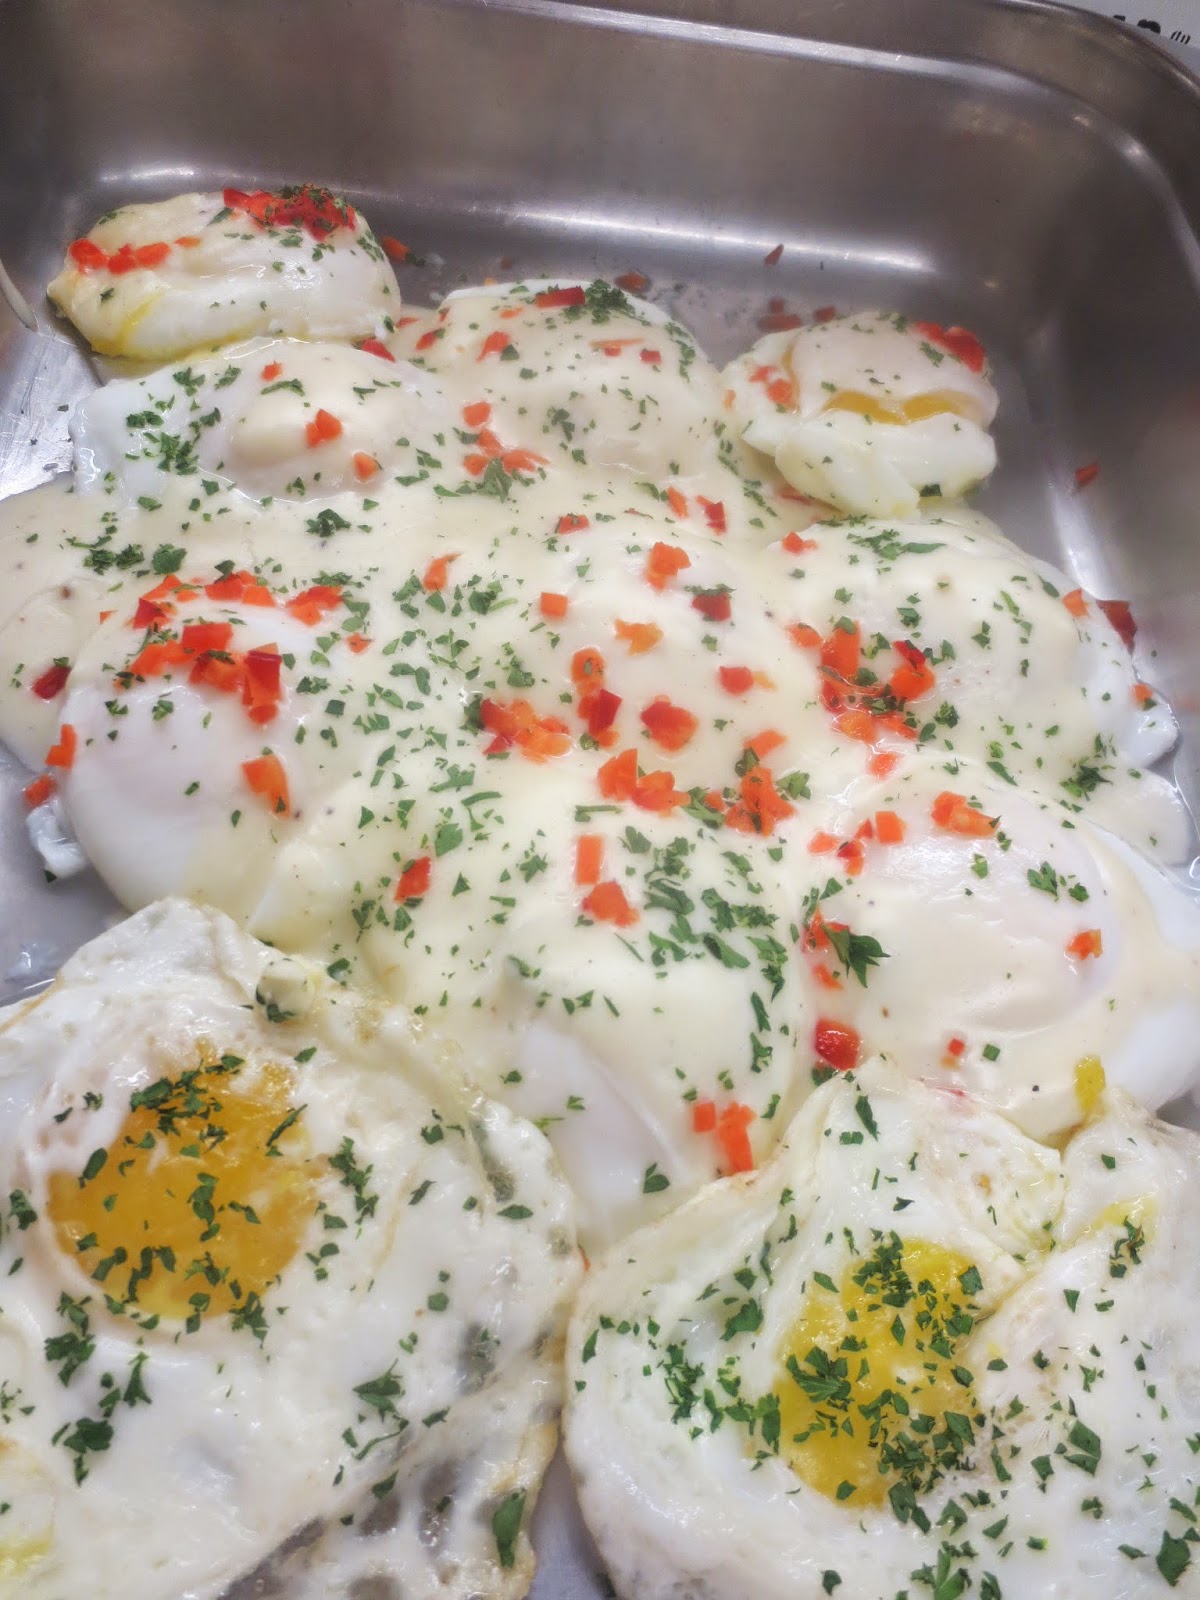
Forget hollandaise sauce. Sure, it's tasty and buttery, but can also be heavy and overpowering. Not to mention a pain to make, hold, and serve. If you are looking for an alternative for poached eggs, look no further than this white cheese sauce. Quicker and simpler to make than hollandaise, it is still rich and creamy but not as heavy and overpowering. Plus there is no need to be quite as precise and you can change up the flavorings as desired. It is excellent served on poached eggs, but it would actually make a good fettuccine sauce - as alone, it tastes similar to alfredo sauce.
White Sauce
1/2 cup whole butter
1/2 cup all-purpose (plain) flour
5 cups milk
1/2 cup grated Parmesan cheese
salt, to taste
ground black pepper, to taste
mustard powder, to taste
ground nutmeg, to taste
In a medium saucepan over medium heat, melt the butter. Quickly whisk in the flour to form a smooth paste. Gradually whisk in four cups of the milk, whisking constantly, until smooth. Bring mixture to a gentle boil. Whisk in the cheese until it melts. Whisk in the additional cup of milk, then season to taste. If desired, sauce can be thinned out further with a little more milk or enriched with cream. It can be seasoned as desired with any herbs and spices. Other types of cheeses could be used as well.
Ladle over poached eggs and garnish with finely chopped vegetables and herbs.
This is a blog of items I have baked, including recipes from the many cookbooks I own, my own created recipes, and recipes from other sources. I will write about what I have made and post a picture along with it! During stretches when I go without baking, I will write a brief article about some aspect of cooking, baking, ingredients, or preparation techniques.
Showing posts with label eggs. Show all posts
Wednesday, May 06, 2015
Thursday, April 09, 2015
Chick Deviled Eggs
I've never made (or had) deviled eggs before, but I figure I might as well try them for Easter, and make them look like chicks while I was at it to better suit the occasion. To do this, simply hard-boil as many eggs as you need. Actually, technically speaking, eggs should never be boiled, as this causes a sulfur reaction that makes the grey rings around the yolks. Eggs should be simmered gently until of desired doneness.
Once cool, carefully peel the eggs and cut off the top third. Cut a small slice off the bottom if needed so the egg stands up, or use egg cups. Carefully remove the yolks, and place them in a bowl. Mash with a little mustard, mayo, salt, pepper, garlic powder, paprika, or whatever flavorings you would like. Then pipe, spoon, or scoop this mixture back into the eggs. Top with the top third of egg. Decorate with carrot slices for the beak and arms/feet, and black peppercorns or capers for the eyes. Garnish with chives as grass if desired.
Sunday, January 25, 2015
Mushroom Onion Omelette
Omelettes. They seem like such an easy, everyday dish - for a hearty breakfast, warm lunch, or quick supper. They are basically cooked eggs with some flavoring ingredients. However, making a traditional, filled and folded, perfect-looking omelette is no easy feat. It starts off fairly basic - beat together some eggs and milk and seasoning. Heat a little butter in a pan and begin cooking the eggs. Now, you don't want to move the eggs around as if making scrambled eggs, but rather let them settle themselves in a single layer in the pan. Then eventually the filling will be added - omelettes will not hold a lot so often additional filling is served alongside the omelette. The filling must also be precooked. Once the filling is added comes the part that will make it or break it, and the part that makes an omelette an omelette.
I have heard of several omelette techniques - one is to use two pans to help flip the omelette and encase the filling underneath, which is helpful for large omelettes. Another is to simply use a spatula to gently fold the omelette over the filling. The third technique is one I had never hear of, but decided to try, and it didn't seem to work here for me (see picture below). The eggs are cooked and allowed to settle, but not set, then stirred rapidly with a wooden utensil and then allowed to resettle. Well, maybe my eggs had set too much already because they didn't resettle, causing the omelette to have a broken appearance when I folded it. Still equally as tasty though!
Another option that is just as delicious is the "scrambled" omelette. This is where you cook the omelette filling, then pour the egg mixture over it and cook as scrambled eggs. Not the same appearance, but the same taste.
I have heard of several omelette techniques - one is to use two pans to help flip the omelette and encase the filling underneath, which is helpful for large omelettes. Another is to simply use a spatula to gently fold the omelette over the filling. The third technique is one I had never hear of, but decided to try, and it didn't seem to work here for me (see picture below). The eggs are cooked and allowed to settle, but not set, then stirred rapidly with a wooden utensil and then allowed to resettle. Well, maybe my eggs had set too much already because they didn't resettle, causing the omelette to have a broken appearance when I folded it. Still equally as tasty though!
Another option that is just as delicious is the "scrambled" omelette. This is where you cook the omelette filling, then pour the egg mixture over it and cook as scrambled eggs. Not the same appearance, but the same taste.
Tuesday, November 11, 2014
Miniature Bread Puddings
8 large eggs
1 cup milk
1 Tablespoon vanilla extract
1 teaspoon ground cinnamon
1/2 cup granulated (white) sugar
1/2 cup packed light brown sugar
1 1/3 cups raisins
6 cups dry bread cubes
Preheat oven to 350◦F. Line muffin cups with paper liners.
In a large bowl, beat together the eggs and milk. Beat in the vanilla and cinnamon, then both sugars. Stir in the raisins and bread, folding well. Spoon mixture into prepared muffin cups. Bake for 20 minutes until a toothpick inserted in the center comes out clean. Enjoy warm, cold, or reheated. Makes about 18.
Bread pudding is a classic comfort food. Normally it is made in a large pan and then cut into squares, but making them in individual muffin cups makes them easier to serve, or enjoy for breakfast on the go, as they can easily be frozen as well. For this recipe, I used mostly white French or Italian bread or baguette, but also some sweeter challah bread as well. If you use all of a sweet bread, you may want to cut back on the amount of sugar slightly. I would describe this bread pudding as halfway between a really eggy, custardy pudding and a dry, firm pudding. To make them extra special, add a dusting of icing sugar, a dollop of whipped cream, or a warm caramel sauce or caramel icing.
8 large eggs
1 cup milk
1 Tablespoon vanilla extract
1 teaspoon ground cinnamon
1/2 cup granulated (white) sugar
1/2 cup packed light brown sugar
1 1/3 cups raisins
6 cups dry bread cubes
Preheat oven to 350◦F. Line muffin cups with paper liners.
In a large bowl, beat together the eggs and milk. Beat in the vanilla and cinnamon, then both sugars. Stir in the raisins and bread, folding well. Spoon mixture into prepared muffin cups. Bake for 20 minutes until a toothpick inserted in the center comes out clean. Enjoy warm, cold, or reheated. Makes about 18.
Bread pudding is a classic comfort food. Normally it is made in a large pan and then cut into squares, but making them in individual muffin cups makes them easier to serve, or enjoy for breakfast on the go, as they can easily be frozen as well. For this recipe, I used mostly white French or Italian bread or baguette, but also some sweeter challah bread as well. If you use all of a sweet bread, you may want to cut back on the amount of sugar slightly. I would describe this bread pudding as halfway between a really eggy, custardy pudding and a dry, firm pudding. To make them extra special, add a dusting of icing sugar, a dollop of whipped cream, or a warm caramel sauce or caramel icing.
Saturday, July 19, 2014
Mortifying Mistake - Custard
As I have mentioned before, I do feature my cooking mistakes and flops on here, because I think it is important to embrace them, learn from them, and develop some critical, think-on-your-feet, problem-solving techniques. I also strive as much as possible to turn these mistakes into something still perfectly edible, if not less than perfect, or maybe not so pretty.
This mistake comes from the first time I tried to make a custard. I had never made it before, but thought i knew enough from reading recipes. I made the one easy, common mistake - I overcooked it. Even though I knew not to do this, it is difficult when you are actually in the process of making it because custard changes so quickly. Many chefs, even those well practiced in the field, have made this mistake. I am also a food-safety enthusiast, and I did not want to serve a custard with undercooked eggs.
What ended up happening, was I cooked the custard too much and ended up essentially with scrambled eggs, even though I had followed the directions. Obviously I cannot incorporate scrambled eggs into a dessert. But I tasted them, and thanks to the addition of sugar, milk, and vanilla, they were sweet, rich and flavorful. Delicious, but too sweet to put on an egg salad sandwich. And nothing I could really save at this point or transform to serve to guests. I did end up eating the custard myself though, because it was tasty and I hate to waste food. The texture was really the problem here, and as long as you don't mind eating scrambled eggs for dessert, no problems!
I am happy to report my second of trial custard went much more smoothly (no pun intended), and luckily I did not need a third or even fourth try. I learned to use low heat, indirect heat is even better, and not to make the milk to hot before adding the egg. Temper the eggs first with a spoonful of the warm milk, then slowly stream the egg in, stirring constantly. Cook until just thickened and glossy - don't second guess it, it is probably done!
This mistake comes from the first time I tried to make a custard. I had never made it before, but thought i knew enough from reading recipes. I made the one easy, common mistake - I overcooked it. Even though I knew not to do this, it is difficult when you are actually in the process of making it because custard changes so quickly. Many chefs, even those well practiced in the field, have made this mistake. I am also a food-safety enthusiast, and I did not want to serve a custard with undercooked eggs.
What ended up happening, was I cooked the custard too much and ended up essentially with scrambled eggs, even though I had followed the directions. Obviously I cannot incorporate scrambled eggs into a dessert. But I tasted them, and thanks to the addition of sugar, milk, and vanilla, they were sweet, rich and flavorful. Delicious, but too sweet to put on an egg salad sandwich. And nothing I could really save at this point or transform to serve to guests. I did end up eating the custard myself though, because it was tasty and I hate to waste food. The texture was really the problem here, and as long as you don't mind eating scrambled eggs for dessert, no problems!
I am happy to report my second of trial custard went much more smoothly (no pun intended), and luckily I did not need a third or even fourth try. I learned to use low heat, indirect heat is even better, and not to make the milk to hot before adding the egg. Temper the eggs first with a spoonful of the warm milk, then slowly stream the egg in, stirring constantly. Cook until just thickened and glossy - don't second guess it, it is probably done!
Friday, March 14, 2014
Broccoli Mushroom Quiche Pie
Happy Pi Day! To celebrate, enjoy some pie (or do some math problems). This is a quick "pie" recipe I came up with for dinner tonight. It is fairly basic (and quick and easy) so feel free to take the recipe and make it your own. Use any vegetables you like, different seasonings, and add some cheese for more flavor if you wish. The bread adds a little more texture and heartiness to the quiche, and almost melts into the egg.
Broccoli Mushroom Quiche Pie
2 cups chopped broccoli
1 package (227 grams) white button mushrooms (6 large), thinly sliced
1/2 medium white onion, chopped
3 slices thick, crusty or homemade bread (not sandwich bread), torn into cubes
4 large eggs, beaten
1 1/2 cups milk (fresh, canned or reconstituted powdered)
salt and pepper, to taste
dash paprika
The vegetables should be cooked briefly beforehand, to ensure they are tender in the finalized quiche. I steamed the broccoli, mushrooms and onions all together for a few minutes until tender-crisp, but they could also be sautéed or stir-fried for more flavor.
Combine all ingredients in a large bowl and mix well. Transfer to an oiled 8x8 inch square pan. At this point, the quiche may be refrigerated for up to 24 hours before baking for advanced preparation. Bake at 375◦F for 45-60 minutes, until a knife inserted in the center comes out clean.
Be sure to check out my dessert pie in tomorrow's post!
Broccoli Mushroom Quiche Pie
2 cups chopped broccoli
1 package (227 grams) white button mushrooms (6 large), thinly sliced
1/2 medium white onion, chopped
3 slices thick, crusty or homemade bread (not sandwich bread), torn into cubes
4 large eggs, beaten
1 1/2 cups milk (fresh, canned or reconstituted powdered)
salt and pepper, to taste
dash paprika
The vegetables should be cooked briefly beforehand, to ensure they are tender in the finalized quiche. I steamed the broccoli, mushrooms and onions all together for a few minutes until tender-crisp, but they could also be sautéed or stir-fried for more flavor.
Combine all ingredients in a large bowl and mix well. Transfer to an oiled 8x8 inch square pan. At this point, the quiche may be refrigerated for up to 24 hours before baking for advanced preparation. Bake at 375◦F for 45-60 minutes, until a knife inserted in the center comes out clean.
Be sure to check out my dessert pie in tomorrow's post!
Saturday, January 11, 2014
Frittata For Two
Frittata For Two
1 teaspoon oil
2 Tablespoons chopped onion
1/2 cup thinly sliced mushrooms
2 large eggs, beaten
1/4 cup diced tomatoes, drained
salt and ground black pepper, to taste
2 Tablespoons chopped or grated Monterey Jack cheese
Heat the oil in a small frying pan over medium heat. Add the oil and mushrooms and sauté for about three minutes until soft. Pour the egg over top and tilt the pan to coat evenly, sprinkle with tomato and salt and pepper. Cook for another three minutes or so until egg is almost set. Sprinkle the cheese over top, then place the pan in the oven under the broiler and broil for a minute or two until the cheese is melted. Slide frittata onto a plate, slice in two, and serve immediately.
Broiling is optional, though it does make the cheese nice and bubbly and makes the top a bit more golden. If you aren't sure your pan is oven safe, wrap the handle in foil or simply don't broil and cook a bit longer on the stove. I am sure ingredients and seasoning could be played with in this dish as well. Quantities could also be increased to make a bigger dish. As is, it makes a nice breakfast, brunch, or quick lunch for two with a sandwich or salad and some fruit.
1 teaspoon oil
2 Tablespoons chopped onion
1/2 cup thinly sliced mushrooms
2 large eggs, beaten
1/4 cup diced tomatoes, drained
salt and ground black pepper, to taste
2 Tablespoons chopped or grated Monterey Jack cheese
Heat the oil in a small frying pan over medium heat. Add the oil and mushrooms and sauté for about three minutes until soft. Pour the egg over top and tilt the pan to coat evenly, sprinkle with tomato and salt and pepper. Cook for another three minutes or so until egg is almost set. Sprinkle the cheese over top, then place the pan in the oven under the broiler and broil for a minute or two until the cheese is melted. Slide frittata onto a plate, slice in two, and serve immediately.
Broiling is optional, though it does make the cheese nice and bubbly and makes the top a bit more golden. If you aren't sure your pan is oven safe, wrap the handle in foil or simply don't broil and cook a bit longer on the stove. I am sure ingredients and seasoning could be played with in this dish as well. Quantities could also be increased to make a bigger dish. As is, it makes a nice breakfast, brunch, or quick lunch for two with a sandwich or salad and some fruit.
Thursday, September 12, 2013
Spaghetti Carbonara
I have been wanting to try making pasta with carbonara sauce for quite some time now. It is quite a simple and basic dish, but the idea always intrigued me. A sauce made with eggs that are cooked once tossed with the hot pasta? Interesting! I didn't really follow a particular recipe for this one, but just sort of made it based on several different recipes I read. Therefore, I don't have any precise measurements - just eyeballed amounts based on taste preferences. I also made a vegetarian version - usually carbonara begins by frying up some bacon or pancetta, and using the flavorful oil in the sauce base, as well as the crispy meat in the finished dish. I omitted this, but I did add some breadcrumbs for a little extra flavor. Another change I made, since I am paranoid about food poisoning and proper cooking, was to bring the sauce to a boil, instead of removing the spaghetti from the heat and then stirring in the sauce. This not only ensures the eggs are properly cooked, but also thickens the sauce. I have given approximate measures, and the procedure below for about four servings, though amounts may be tailored to suit different amounts or tastes.
Ingredients
spaghetti (4 servings)
butter (1 Tablespoon)
olive oil (1 Tablespoon)
chopped onion (1/2 small)
dry breadcrumbs ( 2 Tablespoons)
whipping cream (200 mL)
eggs (2 large)
grated Parmesan cheese (3 Tablespoons, plus extra for topping)
salt (to taste)
ground black pepper (to taste)
Cook spaghetti according to package directions. Meanwhile, heat the butte rand oil in a small frying pan over medium heat. Sautée the onion until softened, but do not brown. Add the breadcrumbs and stir for a few minutes until aromatic.
Beat the cream, eggs, Parmesan, salt and pepper together in a small bowl.
Drain the spaghetti, return to pot, then immediately stir in the onion mixture and the cream mixture. Stir for a few minutes to coat, then turn heat to high and cover. Bring the mixture just to a boil, stir again, and serve topped with more Parmesan.
Ingredients
spaghetti (4 servings)
butter (1 Tablespoon)
olive oil (1 Tablespoon)
chopped onion (1/2 small)
dry breadcrumbs ( 2 Tablespoons)
whipping cream (200 mL)
eggs (2 large)
grated Parmesan cheese (3 Tablespoons, plus extra for topping)
salt (to taste)
ground black pepper (to taste)
Cook spaghetti according to package directions. Meanwhile, heat the butte rand oil in a small frying pan over medium heat. Sautée the onion until softened, but do not brown. Add the breadcrumbs and stir for a few minutes until aromatic.
Beat the cream, eggs, Parmesan, salt and pepper together in a small bowl.
Drain the spaghetti, return to pot, then immediately stir in the onion mixture and the cream mixture. Stir for a few minutes to coat, then turn heat to high and cover. Bring the mixture just to a boil, stir again, and serve topped with more Parmesan.
Sunday, April 14, 2013
Mini Broccoli & Mushroom Quiches
4 large eggs
2 Tablespoon milk
salt and pepper, to taste
2 Tablespoons grated Parmesan cheese
1/4 cup grated mozzarella cheese, plus extra for the top
1/2 cup chopped onion
1/2 cup chopped or sliced mushroom
1/2 cup chopped broccoli
Preheat oven to 425◦F. Grease or line six muffin cups.
In a medium bowl, beat the eggs, milk, salt, and pepper. Stir in the remaining ingredients. Divide among muffin cups. Bake for 15-20 minutes, until a knife inserted in the center comes out clean.
This is a quick and easy supper that can be changed up to feature different vegetables, cheeses, and spices. The amounts can also be adjusted to make more or less. This recipe will serve two or three as a main course, or makes six miniature appetizers. I lined the cups with paper liners, as I was afraid they would stick to the pan, but it turned out the liners stuck to the pan and made it difficult to release the quiches. Next time I will just grease the cups. This recipe is very versatile. You could add a crust made from bread or potato, or add some chopped meat to the egg mixture. You can also make the mixture in advance and just pop it in the oven about 20 minutes before you are ready to eat.
4 large eggs
2 Tablespoon milk
salt and pepper, to taste
2 Tablespoons grated Parmesan cheese
1/4 cup grated mozzarella cheese, plus extra for the top
1/2 cup chopped onion
1/2 cup chopped or sliced mushroom
1/2 cup chopped broccoli
Preheat oven to 425◦F. Grease or line six muffin cups.
In a medium bowl, beat the eggs, milk, salt, and pepper. Stir in the remaining ingredients. Divide among muffin cups. Bake for 15-20 minutes, until a knife inserted in the center comes out clean.
This is a quick and easy supper that can be changed up to feature different vegetables, cheeses, and spices. The amounts can also be adjusted to make more or less. This recipe will serve two or three as a main course, or makes six miniature appetizers. I lined the cups with paper liners, as I was afraid they would stick to the pan, but it turned out the liners stuck to the pan and made it difficult to release the quiches. Next time I will just grease the cups. This recipe is very versatile. You could add a crust made from bread or potato, or add some chopped meat to the egg mixture. You can also make the mixture in advance and just pop it in the oven about 20 minutes before you are ready to eat.
Labels:
broccoli,
cheese,
eggs,
mozzarella,
mushrooms,
onion,
parmesan,
quiche,
supper,
vegetables
Tuesday, September 25, 2012
Popovers
Tonight we had popovers with our omelettes for supper. Popovers have been on my list of things I want to make for quite a while now, and apparently my mother also wanted to try them. She decided tonight would be a good night to try them. We compared a few different popover recipes to find the best technique, ingredient amount, and cooking method. The recipe we used follows. Popovers are difficult to describe. They are a simple mixture of eggs, milk, flour, and salt. They are baked at a high temperature, and rise very high without a leavening agent. They are crispy on the outside and light and fluffy on the inside. They are a nice side dish served with breakfast or brunch, or even with soup. They are good plain, or with butter, jam, or honey.
Popovers
2 large eggs
1 cup milk
1 cup all-purpose (plain) flour
1/2 teaspoon salt
Preheat oven to 450◦F. Generously spray eight muffin cups (or a popover pan if you have it) with cooking spray, or grease with butter or shortening.
In a mixing bowl, whisk the eggs for about a minute, just until they are a uniform color and not yet fluffy. Whisk in the milk. Dump in the flour and salt all at once, and stir with a wooden spoon until incorporated. Batter will be lumpy.
Pour the batter into the muffin cups, filling them almost to the top. Fill the extra cups with water. Bake for exactly 30 minutes. Do not open the oven during baking!
Place pan on a wire rack, and gently pierce the top of each popover with a sharp knife to let steam escape. Cool for a minute or two, and gently turn the popovers on to a serving dish. Serve immediately, while they are warm and before they deflate.
A few notes: 450◦F for exactly 30 minutes is the perfect oven temperature to achieve a crisp exterior and fluffy interior texture. Ensure the pans are greased well so your popovers will pop right out. This recipe made eight.
Popovers
2 large eggs
1 cup milk
1 cup all-purpose (plain) flour
1/2 teaspoon salt
Preheat oven to 450◦F. Generously spray eight muffin cups (or a popover pan if you have it) with cooking spray, or grease with butter or shortening.
In a mixing bowl, whisk the eggs for about a minute, just until they are a uniform color and not yet fluffy. Whisk in the milk. Dump in the flour and salt all at once, and stir with a wooden spoon until incorporated. Batter will be lumpy.
Pour the batter into the muffin cups, filling them almost to the top. Fill the extra cups with water. Bake for exactly 30 minutes. Do not open the oven during baking!
Place pan on a wire rack, and gently pierce the top of each popover with a sharp knife to let steam escape. Cool for a minute or two, and gently turn the popovers on to a serving dish. Serve immediately, while they are warm and before they deflate.
A few notes: 450◦F for exactly 30 minutes is the perfect oven temperature to achieve a crisp exterior and fluffy interior texture. Ensure the pans are greased well so your popovers will pop right out. This recipe made eight.
Saturday, August 18, 2012
Zucchini Pie
This zucchini pie is not the typical type of a pie you would think of. It is more like a quiche with no crust, but less eggy. It can also be baked in either a pie pan or a square pan. It is good warm, cooled, or cold, and stores well in the refrigerator. It cuts quite nicely into small squares or large wedges, and can easily be doubled for large crowds. It is quick, easy, and very tasty. A good way to use zucchini during zucchini season when you get tired of it plain. I used yellow zucchini because that's what I had, but green will add more color. The yellow looks like cheese, speaking of which, you could always add some grated mozzarella cheese to the batter too, it would be delicious. You can use whatever spices you would like, and serve this pie with whatever you wish! My grandmother shared this recipe with me, so I am not sure where it originally came from. I used a decorative quiche pan to bake mine, any type of pan will work really, just adjust cooking time accordingly.
Zucchini Pie
1 cup all-purpose flour
1 1/2 teaspoons baking powder
1/4 teaspoon salt
1 Tablespoon oil (or melted butter)
4 large eggs
1/2 cup oil
3 cups fresh zucchini, grated or finely chopped
1 cup diced onion (1 medium)
1/2 cup grated Parmesan cheese
1/2 teaspoon salt
1/2 teaspoon ground black pepper
1/2 teaspoon parsley
1/2 teaspoon marjoram
Preheat oven to 350◦F. Grease a 9-inch pie plate or an 8x8 inch square baking pan.
In a small bowl, stir together the flour, baking powder, and salt. Stir in the oil.
In a separate large bowl, beat the eggs and the oil. Add the zucchini and onion. Add the flour mixture along with the remaining ingredients. Pour into prepared pan. Save some of the Parmesan cheese to sprinkle on top, or use extra. It turns golden and crisp and adds some more flavor and texture. Bake for 40-50 minutes until set.
Zucchini Pie
1 cup all-purpose flour
1 1/2 teaspoons baking powder
1/4 teaspoon salt
1 Tablespoon oil (or melted butter)
4 large eggs
1/2 cup oil
3 cups fresh zucchini, grated or finely chopped
1 cup diced onion (1 medium)
1/2 cup grated Parmesan cheese
1/2 teaspoon salt
1/2 teaspoon ground black pepper
1/2 teaspoon parsley
1/2 teaspoon marjoram
Preheat oven to 350◦F. Grease a 9-inch pie plate or an 8x8 inch square baking pan.
In a small bowl, stir together the flour, baking powder, and salt. Stir in the oil.
In a separate large bowl, beat the eggs and the oil. Add the zucchini and onion. Add the flour mixture along with the remaining ingredients. Pour into prepared pan. Save some of the Parmesan cheese to sprinkle on top, or use extra. It turns golden and crisp and adds some more flavor and texture. Bake for 40-50 minutes until set.
Saturday, May 26, 2012
Dad's Waffles
Just like we sometimes have pancakes for supper, we occasionally have waffles for supper (or lunch) as well. My mother seems to hold the title of pancake master while my father owns the title of waffle master. My father doesn't make waffles too often, maybe once or twice a month if we are lucky, but when he does, he really seems to take a lot of pride in making them. He carefully measures out the ingredients and gently mixes up the batter. Then he cooks the waffles - two at a time - in our standard waffle maker. It's just a simple one that makes two square waffles at once - not a fancy shape or Belgian waffle maker or anything. He also tailors the waffles to suit our own personal tastes - whether we like them extra crispy, or slightly soft, or fresh from the maker, or from the oven. And we all put whatever topping we like on our waffles - butter, syrup, yogurt, applesauce, peanut butter, honey, fresh fruit, cinnamon, etc. We like to enjoy these waffles with pan-fried ham and scrambled eggs, or sometimes a bowl of cereal, or sometimes just waffles alone!
Monday, April 09, 2012
Chocolate Oat Nests
I made these simple no-bake cookies for Easter to look like little nests. After I dropped them onto the cookie sheet, I put three candy-coated chocolate mini eggs in each nest. This idea would also work well with coconut cookies, macaroons, or meringues.
Even though the recipe called to use waxed paper, I found the cookies stuck a little bit to it, although they didn't leave bits of waxed paper on them, so it worked out okay. Next time though, I would use parchment paper.
These cookies are so quick and easy, but very tasty.
No-Bake Chocolate Oat Drop Cookies
1/2 cup (1 stick) butter or hard margarine2 cups granulated (white) sugar
3 Tablespoons unsweetened cocoa powder
1/2 cup milk
3 cups minute oats
1 teaspoon vanilla extract
In a large saucepan over medium heat, melt the butter. Add the sugar, cocoa, and milk. Stir occasionally until mixture comes to a boil, boil and stir for three minutes. Remove from heat and stir in vanilla. Quickly mix in the oats.
Working quickly before the mixture has time to harden, drop the mixture by spoonfuls onto a cookie sheet lined with waxed paper. Refrigerate at least one hour, or until firm.
Thursday, January 12, 2012
Pancake Supper
Pancakes for supper are a regular occurrence for my family. In fact, we rarely eat them for breakfast. We commonly enjoy waffles for supper too. Often these are served with pan-fried ham and scrambled eggs. Having breakfast-style meals for supper is quick, easy, and tasty. It also makes a very well-balanced meal that doesn't require a lot of preparation work and uses ingredients on hand. These are the pancakes that my mother has been making for as long as I can remember. Mom likes to make small pancakes, about four inches in diameter, instead of large plate-sized pancakes. That way we can eat a lot more, and they fit on the plate and in your mouth better. Everyone enjoys different toppings on their pancakes, common toppings in our house include butter, syrup, jam, peanut butter, and applesauce. Cooking pancakes on a griddle makes the work go a lot faster - we can fit up to ten pancakes on our griddle at the same time. That means a lot less batches, and a lot less cooking time. Griddles are also very easy to use and clean. Here are some pancakes that were cooked up for supper tonight!
Friday, August 26, 2011
How To Beat Egg Whites
The step of beating egg whites, to soft, firm or stiff peaks, appears in many recipes, such as meringues, souffles, and cakes. Beating egg whites sounds easy enough, but sometimes problems arise. Here are a few tips to help ensure success at beating egg whites, and to help achieve the most volume from the whites.
- Separate the eggs. Eggs separate more easily when they are very cold, the whites should be brought to room temperature after separation to ensure maximum volume. To separate eggs, make a clean crack as close to the center of the egg as possible, hold it over a bowl and allow the white to seep out, transferring the yolk between the two shell halves. You may also crack the egg into your hand and hold the yolk in your palm, allowing the white to run off, but this is messier. Ensure there is absolutely no trace of yolk in the white (a trace of white in the yolk is usually not a problem). Separate each egg over an empty bowl, so if some yolk does leak in, only one egg white is ruined and not all of them.
- The best type of bowl to use is copper, followed by stainless steel then glass. Plastic does not work well, and metal and aluminum bowls may have a negative reaction with the egg whites. Ensure both the bowl and the beaters are very clean, free of any grease, fully dry, and at room temperature.
- Always begin beating at low speed, then gradually increase to high speed. Adding cream of tartar will help to stabilize the egg whites, add it once the whites are foamy, 1/8 teaspoon per white. Sugar also helps to stabilize and flavour the whites. Sugar should be added once soft peaks form, a tablespoon at a time, beating well after each addition.
- Beaten egg whites should form moist, shiny peaks. Soft peaks just begin to hold, and will deform after a few seconds. Firm peaks will hold, but the tips will deform after a few seconds. Stiff peaks will fully hold, and will not deform. They can stand straight up without collapsing at all, and the whites are thick and heavy. Beaten egg whites should never be dry or grainy, if they are, they have been over-beaten. To fix this, add one unbeaten egg white to the mixture, beat again to form peaks, and remove 1/4 cup before proceeding with the recipe.
- Beaten egg whites must be used immediately. When adding egg whites to a batter, always use a rubber spatula to gently fold the whites into the heavier mixture. Start with a small spoonful, then add the remaining whites all at once. Whites should be folded in very gently so they do not deflate, do not stir, beat, or overmix. A few streaks of white left are actually preferable.
“Eggs.” hhttp://www.joyofbaking.com/eggs.html. Joy of Baking, n.d. Friday, August 26, 2011
Subscribe to:
Posts (Atom)