This is what I made for dinner last night. I call it Pumpkin "Curry", because I left out most of the spices that would normally categorize a dish as curry in order to adapt the recipe to suit my family's taste preferences. Nevertheless, it was very good! I came along the recipe in a cooking magazine, and it sounded very intriguing. Although pumpkins are most commonly associated with carving, followed by baked goods, they also work very well in main dishes as they are very similar to any other squash. Obviously fresh pumpkin must be used in this recipe, because it is kept in pieces and not pureed. I used a fresh pie pumpkin (or sugar pumpkin). When choosing pumpkins to eat, the smaller the better in terms of taste and texture. The recipe called for stir-frying the pumpkin with onion, and then adding some spice, tomato paste, and chicken broth and simmering into a sauce. Since the pumpkin was only cooked for a total of less than 20 minutes, I decided to wrap it up in foil and bake it for an hour beforehand at 350F, and then dice it. Without this step, I don't think the pumpkin would have been tender enough, as even now it was not the least bit mushy. The recipe did not call for chicken at all, but I decided to add some for extra protein. I prebaked the chicken breasts with the pumpkin, but instead of dicing and adding directly to the sauce, I just served it on the side with a drizzle of the sauce. It was much easier and less time consuming. Serve the curry over rice, and you've got yourself a delicious, hearty fall meal!
P.S. Don't forget to save the pumpkin seeds for roasting. I did mine with a little olive oil, salt, and paprika for 25 minutes at 350F along with the pumpkin. Makes a great appetizer!
This is a blog of items I have baked, including recipes from the many cookbooks I own, my own created recipes, and recipes from other sources. I will write about what I have made and post a picture along with it! During stretches when I go without baking, I will write a brief article about some aspect of cooking, baking, ingredients, or preparation techniques.
Monday, October 24, 2011
Sunday, October 23, 2011
Witch Cake
Well, along with my Halloween Cupcakes, I've also got a Halloween Witch Cake to show you. I baked a simple white cake in a 9x13 inch pan, cut it into four basic shapes, and reassembled the shapes to resemble a witch's head. I didn't come up with this on my own - I found the idea online. Then I frosted the cake and piped on icing decorations. I made this for a cake walk for a fundraiser.
I guess if I had made the witch's face green, she would look more like a witch and less like a clown, but I don't particularly like to eat green icing, so I left it a pasty white. I also did not use the traditional Halloween colors, black and orange, on either this cake or the cupcakes. This is because I only have a simple kit of liquid food coloring bearing just four colors: red, blue, yellow, and green. I don't really have use for a complex set containing a variety of different colors. From experience, I know that orange is a very difficult color to achieve, especially with large quantities of icing (you'd think they would include a vial of orange instead of green, as green is quite simple to make). Black is also nearly impossible, although I did manage to make grey once. I know you can buy paste food colorings in black and orange, but they contain a lot of dye. I usually don't even use colors as vivid as the witch's hair, in order to use as little food dye as possible. You can also buy tubes of premade orange and black icing, but they don't taste nearly as good as homemade. So that's my Halloween witch! And you never know, I may use the same idea and make a clown cake someday!
Saturday, October 22, 2011
Halloween Cupcakes
Today I whipped up a batch of Halloween Cupcakes. I used a basic white cake recipe and a simple icing. I made some mummies, by piping long strips with my basketweave tip; some eyeballs, by drawing an eye and piping red squigglys, and some simple "BOOs". They were quite fun and quick to make. Here I have them displayed on my cupcake rack with a jack-o-lantern puppet and a skeleton toy on a Halloween tablecloth. Halloween is just around the corner!
Friday, October 21, 2011
Idiomatic Expressions
For today's post, I have decided to compile a list of idiomatic expressions involving food. Idiomatic expressions are phrases that mean or represent something, but not their literal meaning. We come to understand their meanings through frequent usage. They are also known simply as "idioms". For some of the less well-known idioms, I have also included their meaning. Enjoy!
Apple of my eye, have your cake, and eat it too, not my cup of tea, bring home the bacon, spill the beans, take with a grain of salt, sold like hot cakes, in a nutshell, one smart cookie, piece of cake, egg someone on, butter someone up, full of beans, nutty as a fruitcake, have egg on your face, couch potato, eat your words, cool as a cucumber, don't cry over spilled milk, butter up, don't put all your eggs in one basket, use your noodle (use your brain), spice it up, out to lunch (crazy), enough comments from the peanut gallery, carrot top, bad apple, two peas in a pod, it's like comparing apples and oranges, the best thing since sliced bread, cut the cheese, easy as pie, flat as a pancake, forbidden fruit, go bananas/nuts, food for thought, have your lunch handed to you, your fish is fried, icing on the cake, how do you like them apples?, life is like a bowl full of cherries, like giving candy to a baby.
Well, there are actually hundreds more, and those are just the ones about food! I listed as many of these as I could, but I found the rest on idiomconnection.com and usingenglish.com.
Thursday, October 20, 2011
Fondant versus Buttercream
Making a cake? How do you plan to frost and decorate it? I myself prefer the traditional buttercream, but the new craze now a day is fondant. There are so many different ways to decorate cakes; so many different techniques and ingredients. I like buttercream because I love the sweet, fluffy taste of it and its versatility. I prefer piping rather than rolling, and enjoy piping the fun borders and making buttercream roses. I see buttercream as less artificial than fondant, and I prefer the look of the finished product. But this is only my opinion, and everyone is entitled to their opinion. Fondant is also very versatile, and can be rolled, shaped, and molded to form just about anything! I am not against fondant, I just prefer to use buttercream. Fondant is all the rage now though, especially with the airing of the hit television show, Cake Boss.
Traditional Types of Frostings
· Buttercream
· Meringue
· Whipped
· Seven Minute
· Royal Icing
· Pudding
· Cream Cheese
· Glaze
· Poured
· Ganache
· Piping Gel
Modern Types of “Frostings”
· Fondant
· Gum Paste
· Modeling Chocolate
· Candy Clay
Decorating Products
· Sprinkles
· Coloured Sugars
· Non-pareils
· Sugar sheets
· Chocolate
· Candies
· Food colour spray
PHOTO CREDIT: "Whimsical Birthday Cake." http://thetwistedsifter.wordpress.com/2009/05/15/whimsical-fondant-40th-birthday-cake/. The Twisted Sifter, May 15, 2009. Thursday, October 20, 2011.
Labels:
buttercream,
cake,
decorations,
fondant,
frosting,
icing
Wednesday, October 19, 2011
Cream Cheese Frosting
Yesterday I told you about the Pumpkin Carrot Cake that turned out amazing! However, I was not at all a fan of the cream cheese frosting. I am not sure what went wrong; if something was done wrong, or if the recipe was just plain wrong. Because the recipe yielded enough to thickly fully frost, fill, and decorate two bundt cakes, and I only required a thin coat of frosting for one, I scaled down the large recipe by 1/4 for a reasonable size. Could this have made any difference in the final result? Also, time did not permit to allow the cream cheese and butter to fully come to room temperature beforehand, so the microwave was used as a little cheat.
The proportions of cream cheese, butter, icing sugar, and vanilla seemed right, and real butter and vanilla were used. But in the end, the icing turned out way too thin. Even after doubling the amount of icing sugar, it was still too thin. This frosting should be thick and spreadable, and not drip from a spoon at all when held up. Yet it was thin and runny, which made for poor presentation on the cake as well. Upon tasting, the addition of extra icing sugar certainly did not make the frosting too sweet, as it tasted too sour with a strong taste of cream cheese. Yes, cream cheese frosting should taste like cream cheese, but it should have a smooth, delicate, and sweet taste,which I did not find.
After looking up other cream cheese frosting recipes, I discovered that this recipe is very typical. Actually, most recipes used the same amount I made, so cutting the recipe down did not cause poor results. Maybe it was the combination of the too-small bowl, the overheated butter and cream cheese, the still warm cake, and the spoon in place of the electric mixer. Usually, I don't try to make things in a rush, I allow plenty of time for proper results. With this cake however, I did not have much time, and I had to have it ready by a certain time, so the results were not as good. Lesson learner: don't rush, slow and steady wins the race, and yields the best results.
The proportions of cream cheese, butter, icing sugar, and vanilla seemed right, and real butter and vanilla were used. But in the end, the icing turned out way too thin. Even after doubling the amount of icing sugar, it was still too thin. This frosting should be thick and spreadable, and not drip from a spoon at all when held up. Yet it was thin and runny, which made for poor presentation on the cake as well. Upon tasting, the addition of extra icing sugar certainly did not make the frosting too sweet, as it tasted too sour with a strong taste of cream cheese. Yes, cream cheese frosting should taste like cream cheese, but it should have a smooth, delicate, and sweet taste,which I did not find.
After looking up other cream cheese frosting recipes, I discovered that this recipe is very typical. Actually, most recipes used the same amount I made, so cutting the recipe down did not cause poor results. Maybe it was the combination of the too-small bowl, the overheated butter and cream cheese, the still warm cake, and the spoon in place of the electric mixer. Usually, I don't try to make things in a rush, I allow plenty of time for proper results. With this cake however, I did not have much time, and I had to have it ready by a certain time, so the results were not as good. Lesson learner: don't rush, slow and steady wins the race, and yields the best results.
Labels:
bundt,
cake,
carrot,
cream cheese,
cream cheese frosting,
frosting,
pumpkin,
rush
Tuesday, October 18, 2011
Pumpkin Carrot Cake
I came across this recipe recently and both my mother and I were delighted to give it a try! It sounded like such a heavenly fall delight. Delicious, moist spice cake with soft pumpkin flavour and the added benefit of grated carrot for taste and moistness. Add a simple cream cheese frosting, and you're all set! Baking in a bundt pan makes for an attractive-looking cake. After tasting this creation, you may never use a boxed cake mix again! The combination of pumpkin, carrot, spice, and cream cheese is utterly divine, and the cake is so tender, sweet, and moist. Delicious!
Because this is a bundt cake, it really doesn't require much decoration. Just spread the frosting on as best you can, and make a little swirl pattern with the back of a spoon, if desired. However, the recipe also gives a suggestion for feeding a large Halloween crowd. Make two of these cakes, tint the frosting orange, stack the two cakes together and frost to resemble a pumpkin. For the finishing touch, coat a flat-bottomed ice cream goblet with green frosting for the pumpkin stem. It makes a very cute-looking cake.
Monday, October 17, 2011
Potato Cake
Here is another trusty side dish. It is a potato cake composed of mainly thinly sliced potato, diced onion, and mozzarella cheese. How can you go wrong with that? I found this recipe in a cookbook I was flipping through somewhere, and it was such a simple and brief recipe that I remembered the general idea of it. The dish I made tonight is more or less the recipe I read, probably with a few slight modifications.
All you have to do is place some large, thinly sliced potatoes in an overlapping fashion in a 9-inch round cake pan or pie plate sprayed with cooking spray. Sprinkle with some diced onion, top with some mozzarella cheese (grated or sliced) and repeat layers 3-4 times. I just kept layering until all of my ingredients were used up. The amount of onion and cheese depends on your personal taste, use enough potato to make 3-4 full layers. This needs to be baked for awhile in order to become tender due to the numerous layers. I'm talking, like 450◦F for at least an hour, or par-boil the potatoes first. Cover with foil, but uncover the last 5 minutes of baking for a crisp cheese crust.
Sunday, October 16, 2011
Rice Pilaf
This is a little rice side dish I made to go with our grilled salmon for supper. It is quick, easy, and convenient, it just bakes in the oven while the rest of your supper cooks. I didn't really get the recipe from anywhere, and it can certainly be adapted to suit your tastes! This is a simple and tasty recipe!
Rice Pilaf
1 small carrot, finely diced
1/2 large onion, chopped
1/4 head cauliflower, finely chopped
1 ripe tomato, peeled and finely diced
2 packets chicken bouillon powder
3/4 cup dry white rice
1 1/2 cups boiling water
Preheat oven to 350◦F. In a casserole dish, mix all ingredients except water. Add water and mix. Bake for 30 minutes. I then had to microwave it for 3 minutes, until all the liquid was absorbed.
Note: If you want to use brown rice, add 1/4 cup more water and allow another 20 minutes or so for baking. Also, feel free to vary the vegetables any way you like!
Rice Pilaf
1 small carrot, finely diced
1/2 large onion, chopped
1/4 head cauliflower, finely chopped
1 ripe tomato, peeled and finely diced
2 packets chicken bouillon powder
3/4 cup dry white rice
1 1/2 cups boiling water
Preheat oven to 350◦F. In a casserole dish, mix all ingredients except water. Add water and mix. Bake for 30 minutes. I then had to microwave it for 3 minutes, until all the liquid was absorbed.
Note: If you want to use brown rice, add 1/4 cup more water and allow another 20 minutes or so for baking. Also, feel free to vary the vegetables any way you like!
Saturday, October 15, 2011
Banana Chip Cookies
This cookie recipe is from a novel called "Plum Pudding Murder" by Joanne Fluke. This novel, along with the others in the series, include recipes to foods cleverly incorporated into the stories. I have tried several recipes from these books, and they have all turned out fantastic, so I was very confident in trying this one too! These cookies are a great change from the standard banana chip muffins. They are moist and soft and chocolatey, with just the right hint of banana! They were also quite easy and quick to make, and surprisingly, don't require any eggs! A good recipe to keep in mind if ingredients are running short and bananas are turning speckly.
Banana Chip Cookies
1 cup softened butter
1 1/2 cups powdered sugar
1/2 tsp lemon extract
1/2 cup mashed banana (1 medium)
1 tsp baking powder
1/4 tsp salt
2 cups flour
1 cup mini semi-sweet chocolate chips
Beat butter and sugar together until light and creamy. Add lemon extract. Mix banana in thoroughly Stir in baking powder and salt. Add flour in half cup increments. Stir in chocolate chips.
Line cookie sheets with foil and spray (I used parchment). Use a teaspoon to drop dough 2 inches apart. Use a metal spatula to flatten the cookies. Bake at 400◦F for 8-10 minutes until golden on top (I found bottom to be a better indicator). Let them sit on cookie sheet 2 minutes before removing to cool. Makes 3 dozen large or 5 dozen small.
Fluke, Joanne. "Banana Chip Cookies." Recipe. Plum Pudding Murder, New York: Kensington, 2009. 222.
Banana Chip Cookies
1 cup softened butter
1 1/2 cups powdered sugar
1/2 tsp lemon extract
1/2 cup mashed banana (1 medium)
1 tsp baking powder
1/4 tsp salt
2 cups flour
1 cup mini semi-sweet chocolate chips
Beat butter and sugar together until light and creamy. Add lemon extract. Mix banana in thoroughly Stir in baking powder and salt. Add flour in half cup increments. Stir in chocolate chips.
Line cookie sheets with foil and spray (I used parchment). Use a teaspoon to drop dough 2 inches apart. Use a metal spatula to flatten the cookies. Bake at 400◦F for 8-10 minutes until golden on top (I found bottom to be a better indicator). Let them sit on cookie sheet 2 minutes before removing to cool. Makes 3 dozen large or 5 dozen small.
Fluke, Joanne. "Banana Chip Cookies." Recipe. Plum Pudding Murder, New York: Kensington, 2009. 222.
Friday, October 14, 2011
Natural Meat
I have fallen in love with a new product. Nitrates, artificial preservatives, loads of sodium, and other cancer causing agents, does that sound like good sandwich meat? Not to me, that's why I turn to a brand of natural deli meats that contain no artificial preservatives, colours, or flavours and no harmful nitrates. More and more natural brands of meats are springing up everywhere due to the discoveries of recent studies and research.Processed meats, including ham, salami, pepperoni, pastrami, bacon, hot dogs, and sausage as well as some turkey, chicken, and hamburgers, pose great health risks due to their harmful additives and preservation techniques. However, that does not mean you have to avoid these foods completely, you just need to find great natural alternatives. My favourite natural brand start with real meats, and use ingredients such as lemon juice, vinegar, celery seed, sea salt, honey, and cane sugar in place of artificial preservatives. And they still taste great, even better, in my opinion, as you get more of the real meat flavour. The list of products available in include: deli sliced ham, chicken breast, turkey breast, and salami; baked full ham, turkey breast, and chicken breast; and bacon, roast beef, and hot dogs. A wide selection of great-tasting products that are good for you too!
PHOTO CREDIT: "Deli Meats." http://www.hellotrade.com/natural-exotic/product.html. Natural & Exotic, n.d. Friday, October 14, 2011
Thursday, October 13, 2011
Pie Crusts
When people think of pie, they typically think of the old-time flaky crust created with lard or shortening. Whether it be single, double, or lattice, this is the most commonly used crust. However, there are so many other choices for pie crusts.These crusts may also be used for cheesecakes and bars. Here are some tried and true crust ideas.
* Butter-based, Oil-based, Shortbread, Shortnut
* Puff pastry, Phyllo pastry
* Graham crumb, Chocolate wafer crumb
* Vanilla wafer crumb, Chocolate chip cookie crumb
* Gingersnap crumb, Cornflake, Crisp rice
You can make pretty much any crust with any kind of cookie, cereal, or cracker crumbs. Just crush the ingredient either by placing it in a sealed plastic bag and rolling a rolling pin over top, or processing it in a blender or food processor. For an eight or nine inch round or square pan, you will need approximately 1 ½ cups of crumbs, ¼ cup sugar (granulated or brown), and six tablespoons of melted butter or hard margarine. All you need to do is mix the three ingredients and pat firmly into the pan. For a 9x13 inch crust, double the ingredients.
PHOTO CREDIT: "Introduction." http://www.marthastewart.com/274216/making-decorative-piecrusts/@center/276949/everything-thanksgiving. MarthaStewart.com, n.d. Thursday, October 13, 2011
Wednesday, October 12, 2011
Lovely Leftovers
Why do leftovers have a bad reputation? Why does the mere sound of the word give off a negative connotation? Leftovers, as a dictionary definition, are uneaten, edible remains of a meal following the conclusion of the meal. In other words, leftovers are the parts of the meal that did not get eaten, either because too much food was cooked, the diners were too full to eat more, or the food wasn't very good and no one wanted seconds. However, I like leftovers. Leftovers can be quite useful. Sometimes leftovers are cooked in our house on purpose, or extra food is prepared in order to make a "two-mealer". Many foods store and reheat well. Here is a mini guide to leftover:
- Freshly cooked meats and meat dishes are usually good for up to two days after they are cooked.
- Dishes not containing meat such as pasta, rice, salads, and casseroles can usually keep for a few days longer.
- Cooked vegetables store and reheat very well.
- Leftover condiments such as tomato sauce, canned broth, and dips may last up to a week.
- Plain foods are less likely to go rancid as quickly. For example, plain pasta will keep longer than pasta with meat sauce, rice will fare better without added vegetables, etc.
- Dishes like cooked eggs (aside from hard boiled) do not keep well, and should be eaten immediately.
Leftovers are best if refrigerated promptly, just when they are barely lukewarm. They should be stored in an airtight container, jar, or casserole dish or put on a plate and covered tightly with plastic wrap and then foil overwrap. Leftovers can be reheated in the microwave quickly with generally good results, but may also be reheated in the oven as well for more even heating. Many leftovers also freeze quite well for long-term storage.
To use the microwave: Cover food tightly with waxed paper to prevent splatter, and heat on medium-high. Halfway through heating, remove food from the microwave and let sit for one minute before continuing. Microwaved food may be steaming hot at first, but it does not hold the heat for long since it heats unevenly.
To use the oven: Place food in a covered casserole dish or wrap in foil, adding a little bit of water to prevent foods from drying out. Heat at a moderate temperature, and expect a lengthy amount of time for thorough heating. Cut large foods into smaller pieces to quicken heating and ensure foods heat evenly.
Tuesday, October 11, 2011
Whole Wheat Pita Bread
Whole Wheat Pita
2 cups whole wheat flour
1 package (8g) active dry yeast
1 1/4 cups warm water
1/2 tsp. salt
1 1/2 cups all-purpose flour, approximately
Measure first 4 ingredients into large bowl. Mix well. Work in enough remaining flour until dough pulls away from sides of bowl. Turn out onto floured surface. Knead 4 to 5 minutes until smooth and elastic. Cut and shape into 10 balls. Roll out each ball 1/4 inch thick and 5 to 6 inches in diameter on lightly floured surface. Both sides should be lightly covered with flour.
Place on ungreased non-stick baking sheet or a cornmeal dusted regular sheet. Cover with tea towel. Let stand in oven with light on and door closed about 35 minutes. Bake in 500◦F oven on bottom rack for 5 minutes. Wrap in tea towel for 3 minutes as they are removed from oven.
I used whole wheat flour for the second amount too, because otherwise I consider them "half wheat pita" when I want whole wheat. I know 500◦F sounds high, but it is necessary for the characteristic pita texture. Don't worry, it won't burn in the short span of 5 minutes as long as you don't forget about them.
Paré, Jean. "Whole Wheat Pita." Recipe. Breads, Edmonton Alberta: Company's Coming Publishing Limited, 1996. 34
Monday, October 10, 2011
Potatoes: Sweet versus White
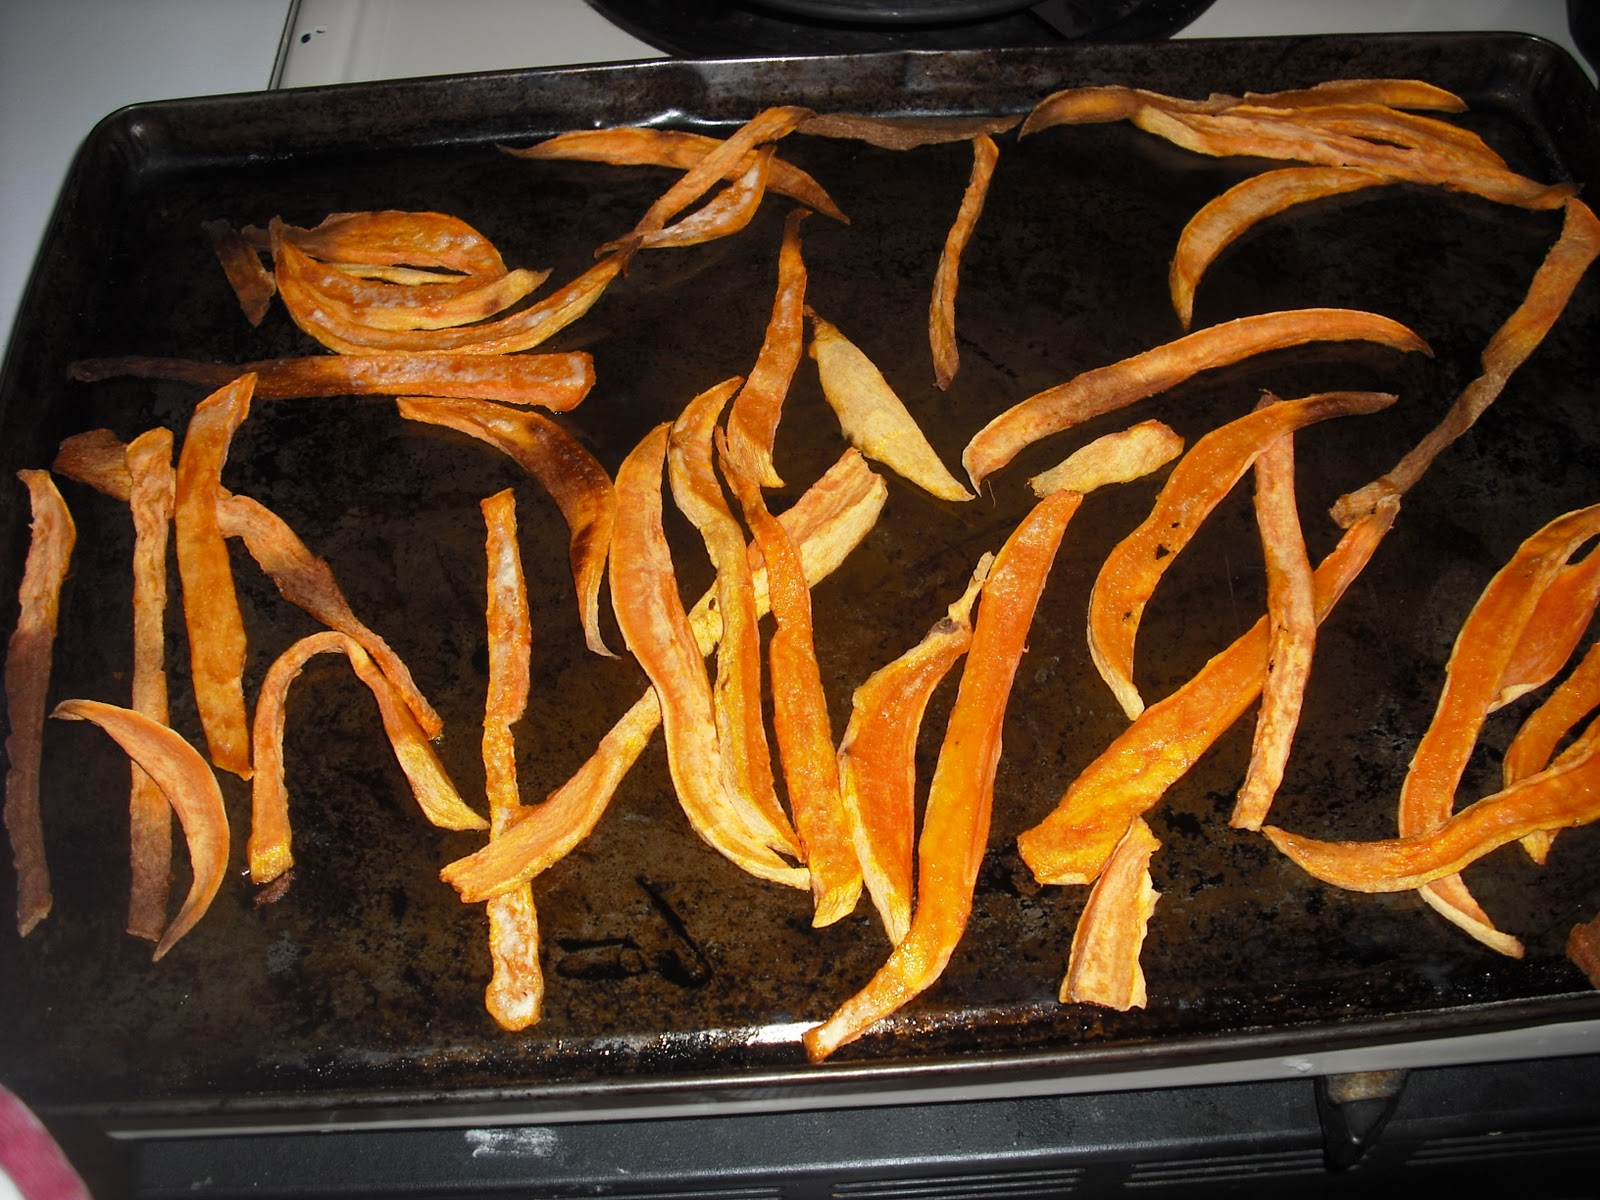
Ahh, potatoes! The ultimate comfort food. I have already bored you in a previous post with all of the diferent ways you can prepare them. Now I am talking about the different varieties of potatoes. White and sweet potatoes are by far the most popular two, but there are many more kinds, including red, blue, baby, new, russet, fingerling, etc. Potatoes are considered both vegetables and healthy starches. White potatoes often receive a bad name, highly due to the recent craze of the low-carb diet. Sweet potatoes contain more vitamin A and vitamin C and have less of an effect on blood sugar than white potatoes, but otherwise the two are pretty similar. White potatoes are generally available year-round while sweet potatoes have a much shorter season, so I like to indulge in sweet potatoes while I can. My favourite way to enjoy them: sweet potato fries. They are so simple to make and go well with almost any meal. All you need to do is cut sweet potato into fry-like wedges, add some oil and salt, and bake. Much better than getting them frozen!
Sunday, October 09, 2011
Roasted Brussels Sprouts
Brussels Sprouts aren't considered to be a very popular vegetable, many people overlook these poor veggies because they are bitter and green. When prepared properly however, they can turn out quite yummy. Although a quick steam is probably the healthiest method of preparing them, Brussels sprouts require a little more that that to make them taste good. And, like most seemingly unpleasant vegetables, they are extremely good for you! They are a good source of many vitamins and minerals, and are particularly high in fibre and vitamin C. They are also beneficial in protecting against many types of cancer, so eat up! Here is how I prepared them:
Cut in half and toss with wedges of onion (red or white) and small carrot sticks. Drizzle with some Italian dressing and a little bit of brown sugar. Roast at 350◦F for 50-60 minutes or until vegetables are tender. That's it! Pretty easy but quite good.
By the way, Brussels sprouts were actually originally cultivated in Italy, not Belgium. They received their name from a newer variety cultivated in large quantities in Brussels, Belgium.
Cut in half and toss with wedges of onion (red or white) and small carrot sticks. Drizzle with some Italian dressing and a little bit of brown sugar. Roast at 350◦F for 50-60 minutes or until vegetables are tender. That's it! Pretty easy but quite good.
By the way, Brussels sprouts were actually originally cultivated in Italy, not Belgium. They received their name from a newer variety cultivated in large quantities in Brussels, Belgium.
Saturday, October 08, 2011
Chocolate Cream Pie
This is my idea of pie. No finicky, shortening-filled flaky pastry to mix, chill, roll out, chill, blind bake, and cool. Just a simple chocolate crust I came up with after looking at other crust recipes; more like a shortbread crust. Add the chocolate cream filling and some chocolate buttercream piping decorations, and you've got yourself a wickedly rich and simple chocolate pie!
Easy Chocolate Pie Shell
3/4 cup all-purpose flour
1/4 cup unsweetened cocoa powder
2 Tbsp. light brown sugar, firmly packed
1/4 tsp. salt
1/4 tsp. baking powder
1/2 cup hard margarine, cut into pieces
3 Tbsp. cold water
Preheat oven to 400◦F. In a medium bowl, stir together the flour cocoa, sugar, salt, and baking powder. Using a pastry bender (or two knives or your fingers) cut in the margarine until mixture is crumbly. Sprinkle water over top, work into a ball. Turn out onto a piece of waxed paper, and gently press it out into a circle, slightly larger than your 9-inch pie plate, using your hands. Gently lift it into the pie plate and press it down to fit. Prick with the tines of a fork all over. Bake for 10 minutes until firm.
Chocolate Cream Pie
1 baked 9-inch pie crust
1 1/4 cups granulated sugar
1/2 cup unsweetened cocoa powder
1/3 cup cornstarch
1/4 tsp. salt
1 can (2 cups) 2% evaporated milk
1 cup fresh 1% milk
1 1/2 tsp. vanilla extract
3 Tbsp. hard margarine, cubed
In a medium saucepan, mix the sugar, cocoa, cornstarch, and salt. Gradually add the milk, stirring until smooth. Bring to a boil over medium-high heat, stirring constantly. Boil for one minute until very thick.
Remove from heat and stir in the vanilla and butter. Spoon into prepared crust. Press plastic wrap directly onto the surface of the pie filling, cool to room temperature. Refrigerate for at least six hours or overnight. Garnish as desired, and keep pie stored in the fridge.
West Side Publishing. "Hershey's Cocoa Cream Pie." Recipe. Hershey's Classic Recipes, Lincolnwood Illinois: Publications International, Limited, 2009. 295.
Friday, October 07, 2011
Apple Oven Pancake
Tonight I tried a new recipe for breakfast at supper: Apple Oven Pancake. The recipe is from the book "Essentials of Baking" which I find to be an excellent, all-inclusive, and very explanatory book that I refer to as my baking bible. The recipe states that this is a classic Dutch dish, a simple oven pancake that billows like a popover. It doesn't look like much in the picture, but it is an excellent dish. It has a nice balance of textures, from the crisp and flaky shell to the soft and fluffy inside pancake to the buttery softened apples. It is good enough on its own, but a drizzle of pure maple syrup or a dusting of icing sugar would make it even sweeter.
Apple Oven Pancake
4 Tbsp butter
4 cups diced peeled apples
2 Tbsp firmly packed golden brown sugar
Juice of 1/2 lemon, strained
1/2 tsp ground cinnamon
4 eggs, lightly beaten
1 cup milk
1 cup all-purpose flour
1 tsp vanilla
1/2 tsp salt
Preheat oven to 425◦F. Place a 9x13 inch baking dish in the oven to preheat for 5 minutes.
In a large frying pan over medium-high heat, melt 2 Tbsp butter. Add the apples and saute, turning as needed, just until tender, 5-7 minutes. Sprinkle with the sugar, juice, and cinnamon and stir to combine.
Add 2 Tbsp butter to the preheated baking dish and tilt to coat. Evenly spoon the sauteed apples into the bottom.
In a bowl, whisk together the eggs, milk, flour, vanilla, and salt until blended. Carefully pour the batter over the hot fruit. Bake until puffed and golden brown, 20-25 minutes.
Williams and Sonoma. "Apple Oven Pancake." Recipe. Essentials of Baking, San Francisco: Oxmoor House, 2003. 101.
Thursday, October 06, 2011
Chocolate Cake Roll
Voila! Here it is, the Chocolate Cake Roll I promised. You saw the chocolate cake roll yesterday, which I filled with my signature buttercream icing. Then I glazed it with a very simple chocolate glaze, and decorated with some more buttercream icing. I wanted to keep the flavours in this cake clean and simple, just classic chocolate and vanilla. It turned out very nice, delicious and chocolately, but not too rich and not too sweet. I will include the recipe for the chocolate glaze, because it is very easy and could come in handy for everything from cookies to brownies to cakes to cream puffs.
Simple Chocolate Glaze
1/4 cup unsalted butter, cut into small cubes
2/3 cup semi-sweet chocolate chips
1/4 cup chocolate milk
Place the butter and chocolate in a heatproof bowl. Heat the milk until boiling, pour over the chocolate and butter and stir until smooth.
Wednesday, October 05, 2011
Jelly Roll Cake
I whipped up a chocolate jelly roll cake tonight for a dessert I am planning to finish tomorrow. A jelly roll cake is a large, flat cake that is filled and rolled up into a log. As the name suggests, it can be filled with jelly, but it can also be filled with a wide variety of other fillings. A few examples are: whipped cream, frosting, peanut butter, chocolate spread, jam, ganache, buttercream, and even ice cream. These cakes are baked in a large pan, which is essentially a cookie sheet with sides. It is not actually a jelly roll unless you fill it with jelly and roll it up, so I guess what I'm making is called a chocolate roll. You can make cakes in a jelly roll pan without rolling them, called sheet cakes; this way you get a large cake to feed a crowd, with some icing on every bite! An example of this is Chocolate Texas Sheet Cake, which is an excellent dessert option for potlucks. Here is the master recipe I normally use to make jelly rolls. It is a pretty simple and straight-forward recipe. To make a chocolate jelly roll, I just replace 1/4 cup of flour with unsweetened cocoa powder.
Jelly Roll Cake
4 eggs, room temperature
1 cup granulated sugar
1/4 cup water
1 tsp. vanilla
1 cup all-purpoise flour
2 tsp. baking powder
1/4 tsp. salt
icing sugar
Grease 10x15-inch jelly roll pan. Line with waxed paper.
Beat eggs in mixing bowl until frothy. Add sugar and beat until light colored and thick. Mix in water and vanilla.
Sift flour, baking powder and salt over egg mixture and fold in.
Turn into prepared pan. Bake in 400◦F oven for 12-15 minutes until an inserted toothpick comes out clean. Sift icing sugar over tea towel. Turn cake out onto sugar. Peel off waxed paper. Trim crisp edges if any. Roll from narrow end, towel and cake together. Cool. Unroll. Fill with filling. Reroll.
Here is a picture of my cake roll cooling.
Paré, Jean. "Jelly Roll." Recipe. Desserts, Edmonton Alberta: Company's Coming Publishing Limited, 1989. 22
Jelly Roll Cake
4 eggs, room temperature
1 cup granulated sugar
1/4 cup water
1 tsp. vanilla
1 cup all-purpoise flour
2 tsp. baking powder
1/4 tsp. salt
icing sugar
Grease 10x15-inch jelly roll pan. Line with waxed paper.
Beat eggs in mixing bowl until frothy. Add sugar and beat until light colored and thick. Mix in water and vanilla.
Sift flour, baking powder and salt over egg mixture and fold in.
Turn into prepared pan. Bake in 400◦F oven for 12-15 minutes until an inserted toothpick comes out clean. Sift icing sugar over tea towel. Turn cake out onto sugar. Peel off waxed paper. Trim crisp edges if any. Roll from narrow end, towel and cake together. Cool. Unroll. Fill with filling. Reroll.
Here is a picture of my cake roll cooling.
Paré, Jean. "Jelly Roll." Recipe. Desserts, Edmonton Alberta: Company's Coming Publishing Limited, 1989. 22
Tuesday, October 04, 2011
Risotto
A common misconception about risotto is that it is quite difficult, labour-intensive, and time-consuming to make. Well, this is not true. It is an easy art to master once you get the hang of it, it just requires a little practice. It does not take too long to make, 30 - 60 minutes, but it does require a close eye and quite a bit of stirring. It does not need to be stirred constantly, but quite often to prevent the rice from sticking and to allow it to absorb the liquid evenly.
Plain risotto is a convenient dish to make, because it uses only common shelf staples. One year for Christmas I gave a mushroom risotto mix as a present. It would keep for three months and, along with a carton of chicken broth, contained pretty much everything you need to make the dish. It is a wonderful gift to accompany with a good quality wooden spoon (an essential tool for making risotto), some oven mitts, and an imported extra-virgin olive oil. This is a gift sure to delight any home cook!
Monday, October 03, 2011
Pumpkin
Well, squash season is here, Halloween is approaching, and pumpkins are beginning to appear all around! I love pumpkin!
Here are some recipe and cooking ideas featuring pumpkins.
- Pumpkins are great fun to carve, stencil, decorate, or paint for Halloween. The big pumpkins that are sold for decorating purposes are not great for eating. The flesh is much too tough and stringy, but the seeds are perfectly fine for roasting and eating.
- The tiny pumpkins sold under names such as "pie pumpkins" and "sugar pumpkins" are good for eating. The flesh is much softer and smoother, and can be prepared just like any other squash. Fresh, cooked pumpkin can be used in both savoury and sweet dishes.
- Pumpkin can be microwaved, baked, boiled, broiled, grilled, steamed, fried, or sauteed. It can be chopped and incorporated into a variety of casseroles, soups, and stir-fries. It can also be used in sauces, gnocchi, risottos, and quiches.
- Cooked and pureed pumpkin is equivalent to canned pumpkin puree (pure canned pumpkin that is, some canned pumpkin contains other squashes or spices as well). It is a bit more work to use fresh pumpkin rather than just opening a can, but for some recipes the fresh taste is completely worth it.
- Pumpkin puree is excellent in a variety of baked goods. It adds nutrients and keeps things moist without lending a strong flavour. Pumpkin puree can be used in breads, muffins, cookies, cakes, biscuits, squares, pies, and loaves.
- Fresh pumpkins may be stored in a cool, dry place for a month or two. Cooked, pureed pumpkin can be frozen in airtight containers for future use.
- Pumpkin goes extremely well with raisins, chocolate chips, nuts, herbs, and spices.
- My favourite ways to use pumpkin are: pumpkin chocolate chip loaf, pumpkin pie squares, pumpkin chocolate chip cookies, and pumpkin with pasta.
PHOTO CREDIT: "untitled." http://mommygoesgreen.com/2009/10/pumpkin-recycling/. Pumpkin Recycling, n.d. Monday, October 3, 2011
Sunday, October 02, 2011
Pan Fried Haddock, Asparagus, & Sweet Potato Fries
Saturday, October 01, 2011
Apple Cinnamon Cake
Coincidentally, a few days earlier I came across a recipe in the newspaper for a beautiful looking apple cake.
When an article takes up almost a full page and is pictured five times, you know it has got to be good! So I was eager to try it.
Apple Cinnamon Cake
6 or 7 apples
half a lemon
3/4 cup butter, room temperature
1 cup brown sugar, packed
3 large eggs
1/2 cup milk
1/2 cup plain yogurt or sour cream
1 tsp vanilla extract
2 cups all-purpose flour
1 tbsp baking powder
3 tbsp white sugar
1 tsp cinnamon
Preheat oven to 350◦F. Butter a 9x13 inch baking dish or line with parchment paper.
Wash apples well, but don't peel them (unless you really want to). Cut apples in quarters ad removes cores; thinly slice. Toss with the juice of half a lemon to keep apples from browning. Set aside.
Cream together butter and brown sugar until light and fluffy. Add eggs one at a time, beating well after each addition.
Whisk together milk, yogurt or sour cream, and vanilla in a measuring cup.
In another bowl, whisk together flour and baking powder.
Now mix half flour mixture into butter mixture, followed by half milk mixture, repeat.
Beat just until everything is incorporated; don't overmix. Now fold in half the sliced apples; spread batter into prepared pan. Arrange remaining apple slices in neat rows over the batter (or scatter them haphazardly over top).
Mix together white sugar and cinnamon, sprinkle evenly over top.
Bake 30-45 minutes, until a toothpick inserted in the center comes out clean.
The article states this is a moist cake that does not need any dressing up, although whipped cream or maple walnut ice cream are both good accompaniments. It also says the cake is best served warm, just 20 minutes after baking, but leftovers are great for breakfast and school lunches.
A few changes I made. I didn't have a lemon or lemon juice, so I just used a little apple juice to keep the apples from turning brown - more apple flavour! I didn't have any sour cream either, and the only yogurt I had was flavoured, so I just whipped up a half cup of thick, homemade buttermilk and used that instead. I just used a bit less than the 1/2 cup milk called for to compensate the liquids. Also, since I used a glass cake pan, I lowered the oven temperature to 325◦F, which resulted in a cooking time of 40 minutes.
The cake turned out very good, with a nice and tender, moist crumb. A few things I would do differently next time I make it is to chop the apples that go into the batter instead of slicing them, that way the apples will be softer and you will get a piece of apple with each bite. I would also add some cinnamon and maybe a pinch of ginger to the batter as well, to give it a little boost. Other than that, this cake was absolutely delicious!
Subscribe to:
Posts (Atom)