Friday, September 09, 2011

The Most Important Meal of the Day

We all know that breakfast is by far the most important meal of the day, and a lot of research and studies can back that up, but now that the back to school season is in full swing, it is even more important to start the day off with the proper nutrients to fuel our bodies and minds!

It has been proven that those who start their day off with a balanced breakfast:

  • Are more attentive
  • Are more productive
  • Are more focused
  • Are less fatigued
  • Are less irritable
  • Perform better
  • Have increased metabolism
  • Have better learning and memory functions
  • Have a reduced risk of heart disease
  • Have more energy
  • Prevent overeating during the rest of the day
  • Maintain a healthier weight
  • Obtain the vital amounts of essential vitamins, minerals, and foods from each food group
  • Prevent many health risks, such as obesity, diabetes, and high blood pressure
The list goes on and on with numerous studies and research to prove it. The bottom line is, there are no cons to eating breakfast, there is no reason why you shouldn't!

You can always find the time to eat even just a little something, it is better than nothing. The ideal breakfast consists of one serving from each of the four food groups, or at least three of them. Protein is a very good kickstart to the day, and remember to include some fresh fruit or vegetables.

I have four standard breakfasts that I can always rely on. I also try to rotate these breakfasts and include some other ones too for variety.

  1. A bowl of whole-grain dry cereal with fresh fruit, a piece of whole wheat toast with all-natural peanut butter, and a tall glass of milk.
  2. A piece of whole wheat toast with a hard-boiled egg cut up on top, a piece of fresh fruit, and a tall glass of milk.
  3. A bowl of oatmeal with fresh fruit, a piece of whole wheat toast with all-natural peanut butter, and a tall glass of milk.
  4. Two pieces of whole wheat toast, one with all-natural peanut butter and one with unsweetened applesauce, the remainder of the cup of applesauce on the side, and a tall glass of milk.
 As you can see, I include a serving from each of the four food groups. I also switch up which fruits and which cereals I eat often, for variety. I realize that not everyone is able to eat an all-star breakfast like this every morning, but please realize that there are plenty of other options.

The moral of the story is: EAT A HEALTHY, BALANCED BREAKFAST EVERYDAY!!!!!!!

Thursday, September 08, 2011

Dad's Birthday Cake

Today was my father's birthday, so naturally, I made him a cake. This was by far the fastest I have ever decorated a cake. I didn't have much time to spare, so I did some simple decorations and stuck a toy motorcycle on top (which represents an inside joke within the family). I completed this cake in just over a half hour, using only one piping tip, and minimal other dishes and ingredients. The result: a delicious, simple cake that made my father smile.
The cake was an eight inch round chocolate with an 8x8 inch square vanilla on top, sandwiched and iced with a yummy chocolate icing. Happy Birthday Dad!

Wednesday, September 07, 2011

Brown Batter Bread

As I have mentioned before, I am a big fan of whole wheat bread and I am still on the quest for the perfect recipe. This perfect bread must correspond with the following criteria:
  • Ease (Are there too many steps? Is there a lot of kneading involved?)
  • Time (Does it require a third rising or lengthy risings?)
  • Texture (It must be soft enough for breakfast, but firm enough for sandwiches.)
  • Taste (I like my bread moist, sweet, and hearty, but not too wheaty.)
I think this bread is the best I have made yet, and it may just be the perfect recipe. I have only baked one other bread that tasted better than this one, which required no kneading or rising times, but it could not withstand sandwiches at all. Also, this bread is a batter bread and requires no kneading, which is easier and less time consuming. The recipe is from Company's Coming "Breads".

Brown Batter Bread
2 tsp. granulated sugar
1/2 cup warm water
1 (8g) package active dry yeast
1 1/4 cups milk
1/4 cup molasses
1/4 cup granulated sugar
1/2 cup butter or hard margarine
2 tsp. salt
2 large eggs
2 1/2 cups whole wheat flour
3 cups all-purpose flour
2 tsp. butter or hard margarine, softened, for brushing tops (optional)

Stir first amount of sugar in warm water in small bowl. Sprinkle yeast over top. Let stand 10 minutes. Stir to dissolve yeast. Meanwhile, scald milk in saucepan. Remove from heat. Add next 4 ingredients. Stir until sugar is dissolved and butter is melted. Cool to lukewarm. Add yeast mixture. Pour into large bowl.

Beat in eggs. Gradually beat in both flours. Cover with greased waxed paper and tea towel. Let stand in oven with light on and door closed for about 1 1/4 hours until doubled in bulk. Stir batter down. Divide dough between 2 greased 9x5x3 inch loaf pans. Cover with greased waxed paper and tea towel. Let stand in oven with light on and door closed for about 1 hour until doubled in size. Bake in 375F oven for 30 to 35 minutes. Turn out onto racks to cool. Brush warm tops with second amount of butter. Makes 2 loaves.

My Notes: I skipped brushing the tops with extra butter, they didn't need it. I used all whole wheat flour, instead of part all-purpose flour, and the bread certainly was not too heavy or wheaty. I halved all of the ingredients, except for the first three, which worked out perfectly to make just one loaf.

ParĂ©, Jean. "Brown Batter Bread." Recipe. Breads, Edmonton Alberta: Company's Coming Publishing Limited, 1996. 14.

Tuesday, September 06, 2011

Cheese Crackers

These are quick, easy, and conveinent to prepare for a yummy addition to any meal. The majority of the prep work is completed using a food processor, and both the dough and the crackers themselves may be made in advance. These crackers are crisp, very cheesey, and flavourful. The recipe came from a Woman's Day Magazine.

Cheese Crackers
8 ounces (about 1 cup, more or less) finely shredded sharp cheddar cheese
1/2 cup butter, softened
1 1/2 cups all-purpose flour
1 Tbsp. granulated (white) sugar
1/2 tsp. salt
1/4 tsp. cayenne, if desired (paprika and ground black peper are also good)
1 Tbsp. water

In a large food processor, combine the cheese and the butter until well blended. Add the flour, sugar, salt, and cayenne, pulse several times until well blended. Add water, pulse just until mixture comes together and forms a dough. Knead breifly, just until smooth. Divide dough in half, form each half into an 8 inch log, wrap in plastic wrap and refrigerate. (Dough must be refrigerated for at least two hours and up to three days.)

Heat oven to 375F. Grease or line baking sheets. With a sharp knife, slice dough logs into 1/4 inch thick slices, arange on baking sheets. Poke a few holes in each cracker using a wooden skewer, to resemble buttons. Bake for 12-14 minutes, or until edges are just golden. (Crackers can be baked up to a week in advance, stored in an airtight container, and reheated at 350F for 3-5 minutes to crisp, if desired.)

NOTE: I only have a very small mini-chop food processor, and a five-cup blender, so I had to make a few adaptations to the recipe instructions. I combined the cheese and butter in my blender, to form a kind of smooth paste. Then I dumped it into a large bowl and mixed in the dry ingredients by hand, sprinkled it with water, and mixed in again. Even when using the food processor, the mixture must still be kneaded breifly at this point, so I then continued with the recipe.

Cheese Crackers.” http://www.womansday.com/Recipes/Cheese-Crackers-Recipe.html. Woman's Day, n.d. Tuesday, September 6, 2011

Monday, September 05, 2011

Carmelized Onion and Potato Flan

Yesterday I made this potato dish to go with our dinner. It was quick to prepare, easy to do, and quite good. We will have the leftovers today with our meal. It is sort of like Scalloped Potatoes, but a little different. I can't remember where the recipe came from because I had copied it into my own writing, and I just found the recipe in my collection.

Ingredients
2 Tbsp. butter (not oil or margarine)
2 large onions, thinly sliced
6-8 medium potatoes, peeled, washed, and thinly sliced
salt and pepper, to taste
1 cup grated cheese (I used mozzarella)

Directions
In a large frying pan, cook the onions over medium high heat in the butter just until they begin to brown. Reduce the heat to medium low and cook sowly for about 20 minutes, to carmelize and release their juices.

Arrange half of the potato slices shingle-style in the bottom of a greased 9x13 inch metal baking dish. Season, top with half of the onions and half of the cheese. Repeat layers.
Cover with foil, bake at 375F for 50-60 minutes until potatoes are tender.

Sunday, September 04, 2011

Baked Alaska

Since we had company coming, some more ice cream to use up, and a hot day, I decided to attempt Baked Alaska. For those who don't know, Baked Alaska is a dessert with a cake or brownie base, piled high with ice cream, covered in meringue, and baked at a high temperature for a few minutes, just until the meringue browns. Baked Alaska can be round, square, rectangular, or individual servings. The base layer holds everything together, the ice cream just begins to melt, and the meringue makes a crisp outer layer. This dessert feeds a large crowd and must be eaten right away, but it is quite light, so you can enjoy it even after a heavy meal. Here is how I made mine:
  1. I had a leftover 8 inch round chocolate cake with only a few pieces out of it. I cut it up and used it to line a foil lined 9x5 inch loaf pan. I froze it briefly.
  2. I took some hoofprints ice cream out of the freezer to soften for 10 minutes, then spread it on top of the frozen cake layer, all the way to the top of the pan. I froze this overnight.
  3. I beat three egg whites and 1/4 tsp. cream of tarter until soft peaks formed, then added 3/4 cup sugar gradually until stiff peaks formed. I took the cake and ice cream out of the pan, put it on foil on a cookie sheet, and spread the meringue evenly over top, covering all of it. I popped this into a freezer while we ate the meal.
  4. I baked it at 450F for about 5 minutes until the meringue browned.
  5. I cut it into thin slices with a sharp knife and served immediately.
Baked Alaska is actually quite simple and quick to make, it just requires some prep work. It is even faster if you happen to have a spare cake layer in the freezer. It is incredibly delicious and unique, and can be very versatile. Possible bases include any flavour of cake, brownie, cookie, or square; ice cream can be any flavour, a combination of complementing flavours, frozen yogurt, or sorbet; and the meringue can be thin, thick, flavoured, or sprinkled with nuts. Don't be afraid to attempt this stunning dessert!

Saturday, September 03, 2011

Blueberry & Brown Butter Squares

Blueberry & Brown Butter Squares. If this sounds familiar to you, you are probably remembering the Brown Butter Blueberry Muffins I made on August 24. Well, these recipes are quite similar, as they use the same concept and ingredients. The muffins were so delicious, when I came across this square recipe I just had to try it! I guess blueberries and brown butter are a winning combination!

I found some significant differences in the two recipes. There is less butter used in the squares, but the butter is browned a lot longer than the muffins. The muffins call for 1/2 cup of butter cooked for 2-3 minutes until nutty smelling and browned. The squares call for 1/3 cup of butter cooked for 6-7 minutes until deep, golden brown and fragrant. The squares method is definitely the way to go. I found the brown butter taste in the blueberry muffins quite weak, but in the squares it was highly detectable, yet not overwhelming.

These squares start with a soft, moist base piled high with fresh blueberies, and finished off with a cinnamon-streusel topping. They are absolutely divine!

Friday, September 02, 2011

The Results!

As promised, here are the results from the baking I entered in the fall exhibition home cooking competition.
Junior
CHOCOLATE CAKE - 1st
CHOCOLATE CHIP COOKIES - 1st
GINGERSNAP COOKIES - 3rd
BAKED SQUARES - 3rd
NO-BAKE SQUARES - 2nd
Senior
CHOCOLATE CAKE - 1st + Ribbon
CHOCOLATE CHIP COOKIES - 2nd
GINGERSNAP COOKIES - 2nd
BAKED SQUARES - 2nd
NO-BAKE SQUARES - 1st

In addition, I earned the place of the 3rd Best Exhibitor overall, which comes with a framed plaque and a large basket full of cooking goodies, in addition to the cash prizes from the winnings listed above. The gift basket contains items such as cookbooks, spices, storage containers, ingredients, produce bags, cooking utensils, etc. I am very much pleased with my winnings :)

Thursday, September 01, 2011

Exhibition Baking Competition

It's that time of year again! The annual fall exhibition is in town for the week. The exhibition includes a wide variety of activities for people of all ages to enjoy, including rides, games, horse shows, amusements, food stalls, music, barrell racing, farm animals, and much more. There are also competitions, where people can enter there own home items, such as quilts, cross-stiches, photographs, knitting, crafts, vegetables, flowers, plants, and of course my personal favourite, home cooking!
Naturally, I entered a few things into the home cooking competition. I entered five different things twice; because I qualified for both the junior and the senior categories, I entered each of the five items in both of the categories.

CHOCOLATE CAKE - Classic Chocolate Cake
CHOCOLATE CHIP COOKIES - Jumbo Soft & Chewy Chip Cookies
GINGERSNAP COOKIES - Ginger Crinkles
BAKED SQUARES - Chocolate Smacks
NO-BAKE SQUARES - Peanut Butter Ice Box Squares

I was quite busy on Tuesday, trying to bake as much as possible on the day of judging so it would be at its best quality, then cutting, selecting, bagging, labeling, and unfortunately, cleaning. All of these items have appeared on my blog at some point, three of them in the past few days. Here is a picture of all of my items lined up and ready to go to the competition.

I'll have the results for you tomorrow!

Wednesday, August 31, 2011

Jumbo Soft & Chewy Chip Cookies


This is my own recipe for Chocolate Chip Cookies. They are big, chocolatey, soft, and delicious! Aside from the usual ingredients, I have a secret ingredient in these cookies, but I can't tell you what it is! Only a few select people know the recipe for my chocolate chip cookies, and even then, it takes special technique and practice to get these cookies just right. I know because I came up with the recipe myself. I have made these cookies a few times now, and they always turn out great. I have also tried making regular-sized cookies,  mini cookies, and crisp cookies with the same dough. They all turned out good, but the jumbo cookies are still my favourite!

Tuesday, August 30, 2011

Ginger Crinkles

I know, I know, Christmas is still nearly four months away, but I decided to make gingersnaps anyway. Gingersnaps are great any time of the year! And no, I'm not trying to get a head start on my Christmas baking either - although I like to start baking early and freeze cookies, I don't start this early! These gingersnap cookies are very good, and very spicy. They have a secret ingredient. Aside from the usual spices of ginger, cinnamon, and cloves, these cookies also contain a small amount of ground black pepper. That's right, pepper. Not enough to make it taste like supper instead of dessert, but this small amount of pepper enhances the spicy ginger flavour of the cookies. The cookies are rolled into balls, lightly coated with granulated sugar, and baked at a low temperature for a long amount of time; giving them their crinkly appearance and texture. Time to get in the Christmas spirit!

Monday, August 29, 2011

Peanut Butter Ice Box Squares

Today I made creamy, rich Peanut Butter Ice Box Squares. They are as good as they look and sound - actually, better! They are extremely rich, creamy, gooey, peanut buttery, and delicious. 


The recipe is from a Kraft magazine. It only makes an 8x8 inch square pan, but they are so rich, you will get at least 36 squares out of it. They are easy, no-bake, refreshing squares; perfect for a hot summer day. I have made these before, and although I do not often make the same thing twice (I prefer to try new recipes), these are so good, I had to make them a second time (and maybe a third, and a fourth, and a fifth....). They look a bit messy, but they are in a good way, and they actually hold together pretty well.

Peanut Butter Ice Box Squares.” http://www.kraftcanada.com/en/recipes/peanut-butter-ice-box-94688.aspx. Kraft, n.d. Sunday, August 28, 2011

Sunday, August 28, 2011

40th Anniversary Cake


Here is the cake I made on the weekend for a family gathering in honour of my great aunt and uncle's fortieth wedding anniversary. It is my trusted moist chocolate cake with my signature buttercream icing. I piped a reverse shell border around the bottom of the cake, and a star border on top. I used a letter stencil for the writing, and made buttercream roses for the top of the cake, all in red - the traditional colour for the fortieth anniversary. I also made a special candy modelling clay (similar to modelling chocolate), and put this into some flower molds for the bottom of the cake. Then I used the clay to form more roses to put around the circumference of the cake. Forget fondant, gum paste, and modelling chocolate; this candy clay is by far the easiest to make, work with, mold, and shape, and it also tastes pretty good too.
I really enjoyed making this cake, and it was definitely worth it when I received comments like, "This is amazing." "You've outdone yourself." and my personal favourite, "Who are you, the next cake boss?"

Saturday, August 27, 2011

"A+" Foods

Just for fun I am going to name as many foods that begin with the letter "A" as I can. To establish a brief set of guidelines here, brand names do not count (Americano Cheese would be just cheese), flavours do not count (apple cinnamon muffins would just be muffins) and no search engines, books, or other resources may be used - answers are strictly from the head.

Apple, Apricot, Avocado, Asparagus, Artichoke, Anchovy, Arrowroot cookies
Arrowroot flour, Applesauce, Arborio rice, Atlantic salmon, Applesauce
Almonds, Amaranth, Allspice, Atlantic char, Anise, Anadama Bread, Asian Endive

All-purpose flour

Can you think of any more?

Friday, August 26, 2011

How To Beat Egg Whites

The step of beating egg whites, to soft, firm or stiff peaks, appears in many recipes, such as meringues, souffles, and cakes. Beating egg whites sounds easy enough, but sometimes problems arise. Here are a few tips to help ensure success at beating egg whites, and to help achieve the most volume from the whites.
  1. Separate the eggs. Eggs separate more easily when they are very cold, the whites should be brought to room temperature after separation to ensure maximum volume. To separate eggs, make a clean crack as close to the center of the egg as possible, hold it over a bowl and allow the white to seep out, transferring the yolk between the two shell halves. You may also crack the egg into your hand and hold the yolk in your palm, allowing the white to run off, but this is messier. Ensure there is absolutely no trace of yolk in the white (a trace of white in the yolk is usually not a problem). Separate each egg over an empty bowl, so if some yolk does leak in, only one egg white is ruined and not all of them.
  2. The best type of bowl to use is copper, followed by stainless steel then glass. Plastic does not work well, and metal and aluminum bowls may have a negative reaction with the egg whites. Ensure both the bowl and the beaters are very clean, free of any grease, fully dry, and at room temperature.
  3. Always begin beating at low speed, then gradually increase to high speed. Adding cream of tartar will help to stabilize the egg whites, add it once the whites are foamy, 1/8 teaspoon per white. Sugar also helps to stabilize and flavour the whites. Sugar should be added once soft peaks form, a tablespoon at a time, beating well after each addition.
  4. Beaten egg whites should form moist, shiny peaks. Soft peaks just begin to hold, and will deform after a few seconds. Firm peaks will hold, but the tips will deform after a few seconds. Stiff peaks will fully hold, and will not deform. They can stand straight up without collapsing at all, and the whites are thick and heavy. Beaten egg whites should never be dry or grainy, if they are, they have been over-beaten. To fix this, add one unbeaten egg white to the mixture, beat again to form peaks, and remove 1/4 cup before proceeding with the recipe.
  5. Beaten egg whites must be used immediately. When adding egg whites to a batter, always use a rubber spatula to gently fold the whites into the heavier mixture. Start with a small spoonful, then add the remaining whites all at once. Whites should be folded in very gently so they do not deflate, do not stir, beat, or overmix. A few streaks of white left are actually preferable.
“Eggs.” hhttp://www.joyofbaking.com/eggs.html. Joy of Baking, n.d. Friday, August 26, 2011

Thursday, August 25, 2011

Spritz Cookies

Spritz Cookies are made with a cookie press, which easily produces cookies with unique shapes. A cookie press is a device where cookie dough is fed through a cylindric tube and pressed through a plate containing a design. There are many different plates available containing many different designs, including hearts, stars, flowers, trees, animals, numbers, letters, shapes, characters, and much more. My set contained 24 different plates: ten numbers, two flowers, a heart, a fish, a tree, two circles, and six other concentric shapes. My set also contained six tips so the cookie press can also be filled with icing and used to decorate cupcakes. I recently received my cookie press as a gift, and decided to try it out. Pressing cookies is a bit of extra work, takes a bit of muscle, and is a little frustrating at times, but it makes very unique, professional-looking shapes very quickly. It is not my first choice when making cookies, I prefer those hand-rolled, but it is a nice change. The spritz cookies also had a very nice, crisp flavour and texture. Next time I will try chocolate spritz. Spritz, a basic sugar cookie, is the traditional dough used in cookie presses, but it is possible to use other cookie doughs as well. The dough must be fairly stiff, and it should not contain ingredeints such as chocolate chips or raisins, which may not go through the plates evenly. Other than that, feel free to experiement!

Wednesday, August 24, 2011

Brown Butter Blueberry Muffins


These are Brown Butter Blueberry Muffins from Woman's Day Magazine, and they are delicious! Brown butter is a step in the recipe where you melt the butter in a saucepan, and then cook it for a few minutes more until it is brown and smells nutty. This gives a deeper, rich aroma and taste to the finished muffins. Browning the butter sounds like an extra step, but the results are definitely worth it! It's easy, and it really doesn't take any longer; just let the butter melt in the saucepan as you whisk together the dry ingredients. I like these better than the usual blueberry muffins I make!

Brown Butter Blueberry Muffins
2 cups all-purpose flour
2 tsp. baking powder
1/2 tsp. salt
1/2 cup plus 2 Tbsp. granulated sugar
1/2 cup unsalted butter
1 cup milk
1 large egg, beaten
1 1/2 cups fresh blueberries

Heat oven to 400F. Line a 12-cup muffin tin with paper liners or coat with cooking spray.
In a large bowl, whisk together the flour, baking powder, salt and 1/2 cup of the sugar; make a well in the center.
Melt the butter in a saucepan over medium heat. Once it melts, swirl the pan until the butter begins to brown and smell nutty, 2 to 3 minutes; remove from heat.

Pour the butter, milk and egg into the well of flour and stir to combine (a few lumps are OK - don't overmix); fold in the blueberries. Divide the batter among the muffin cups; sprinkle with the remaining sugar. Bake until a toothpick inserted into the center of a muffin comes out clean, 16 to 20 minutes.

“Brown Butter Blueberry Muffins.” http://www.womansday.com/recipe-search/find/keyword-brown%20butter%20blueberry%20muffins/. Woman's Day, n.d. Wednesday, August 24, 2011.

Tuesday, August 23, 2011

Blueberry Heaven!

Well, as I mentioned yesterday, it is blueberry season and that means indulging in as many fresh blueberries as humanly possible! Due to a recent purchase of a five kilogram box of fresh blueberries from the local farmers market, there are plenty of blueberries in the house to go around! The berries were sorted through on the weekend; a bowlful of fresh berries were set aside for eating out of hand, a container of fresh berries was kept for baking, and the squishy berries were set aside and turned into jam. Here is the small jar of jam and some of the fresh blueberries being saved for tomorrow's baking.

The remaining blueberries were frozen, enabling us to add blueberries to baked goods all year round. Ahh, blueberries bring back memories to when my family and I used to go blueberry picking every summer when we visited my grandparents. Even those who didn't like blueberries (gasp) would join us. That way, at least some blueberries ended up in the baskets and not just in our stomachs. Blueberry picking was fun, peaceful, and enjoyable. I didn't even mind coming home and having to pick through them and clean them. That was quite therapeutical too!

Yesterday my mother and I made blueberry yogurt cake. Tomorrow, we will be making another baked blueberry delight, blueberry muffins. We have decided to step away from our standard blueberry muffin recipe to try something new. We came across a recipe for brown butter blueberry muffins in a magazine. This recipe not only looked mouthwatering, the concept also very much intrigued us. So, we are trying something different this blueberry season, and who knows, maybe it will become a blueberry traditon too! I'll let you know tomorrow in my post.

Monday, August 22, 2011

Blueberry Yogurt Cake

Ahh, blueberry season! You gotta love it. Here is the perfect recipe to use up some fresh blueberries. My mother and I made it together this morning before it got too hot. The recipe was featured in a local newspaper years ago, and we have been making it every year at blueberry season ever since. It is delicious piping hot from the oven, slightly warm, room temperature, slightly chilled, cold, or reheated in the microwave; I have tried it every way, and I still cannot pick a favourite! It also freezes very well and will keep for several months in an airtight container in the freezer. It can be covered and stored at room temperature for a day or two, but since blueberry season tends to be very hot, we like to keep it in the refrigerator; it will last for a few days longer.

Blueberry Yogurt Cake
1/2 cup light brown sugar, packed
1 tsp. ground cinnamon
1/2 cup butter or hard margarine, softened
1 cup granulated (white) sugar
3 large eggs
1 cup plain (not vanilla) yogurt (not fat free)
1 tsp. vanilla extract
2 cups all-purpose flour
1 tsp. baking soda
1/2 tsp. salt
2 cups fresh blueberries

Preheat oven to 325F. Grease a 9x13 inch pan (we use glass).
In a small bowl, mix the brown sugar and cinnamon, set aside.

In a large bowl, cream the butter and sugar until light and fluffy. Add eggs, one at a time, bating well after each addition. Add yogurt and vanilla, beat. Sift in flour, baking soda, and salt, beat until smooth. Gently fold in the blueberries.

Spread half of the batter into the prepared pan. Sprinkle the brown sugar-cinnamon mixture evenly over top of batter in pan. Carefully and evenly spread with the remaining batter. Bake for 40-45 minutes or until cake is a light golden brown, a toothpick inserted into the center comes out clean, and cake springs back when pressed.

The recipe also reccommends to dust with icing sugar before serving, but we don't bother with that, it really doesn't need it. It also includes 1/2 cup chopped almonds in with the brown sugar-cinnamon filling. We don't do that either, but you can try it if you like. Enjoy!

Sunday, August 21, 2011

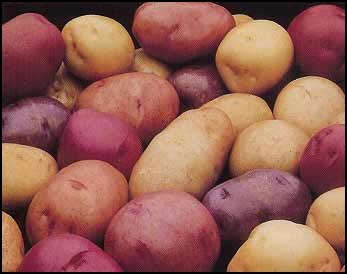
Potatoes

I'm on a potato kick today, and I don't know why. Maybe I am going through withdrawl; after all, I haven't had potatoes for a few days now. 

I love potatoes, I particularly love sweet potatoes, but they are difficult to get year-round. Potatoes are so versatile, there are just countless ways to prepare them and dress them up! 

Here are some ideas.


Preparations
  • Baked, Boiled, Broiled, Fried, Deep-fried, Mashed, Whipped
  • Grilled, Microwaved, Roasted, Poached, Stir-fried

Dishes
  • Soups, Stews, Casseroles, Salads, Stir-frys, Breads/Rolls
  • Pasta, Side dishes, Alone

Common Go-Withs
  • Cheese, Sour Cream, Ketchup, Chives, Dill, Garlic, Onion
  • Butter, Oil, Salt, Pepper, Carrots, Steak, Fish

Popular Potato Dishes
  • Fish and Chips, Shepherd's Pie, Gnocchi, Chips
  • French Fries, Potato Skins, Hashbrowns, Potato Bread
  • Potato Salad, Baked Potatoes

There are so many different varieties of potatoes: new, sweet, red, white, fingerling, baby, russet, Yukon, gold, Idaho, even blue potatoes! Well, that's enough about potatoes for today!

“Potatoes.”
http://www.kraftcanada.com/en/cookingtips/Ingredients101/Vegetables/Potatoes.aspx. Kraft Canada, n.d. Sunday, August 21, 2011.
PHOTO CREDIT:Potatoes. Hillsdale Potato Inc. Adams Seed Farms, New Denmark, New Brunswickhttp://www.hilldalepotato.com/sitebuildercontent/sitebuilderpictures/potatoes.jpg. Sunday, August 21, 2011.