Here is a quick and appealing alternative to regular pancakes: a German Pancake, also called a Dutch Baby Pancake. It is not completely clear as to whether this dish first originated in Germany, Holland, or somewhere else entirely. It is a large, puffy cross between a pancake and a souffle. Usually the miniature versions of these baked in individual-sized pans are referred to as "Dutch Babies" and the larger-size designed to serve many became known as "German Pancakes". Whatever you want to call it, this dish is good! It is also very simple and quick to make, and is a great alternative to pancakes, which require cooking carefully in batches and paying close attention to ensure they do not overcook. This pancake is poured into a preheated skillet, then put into the oven at a high temperature for a short time to create a puffy, golden pancake. This large pancake forms high sides on the edges, leaving an open center that may be filled with a variety of fillings. Fresh fruit, chutneys, preserves, maple syrup, or simply powdered sugar are all great fillings. I found this recipe in a magazine.
German Pancake
4 large eggs
1/2 cup whole milk
1/2 cup flour
1 Tbsp granulated sugar
1/2 tsp pure vanilla extract
1/2 tsp grated lemon zest
1/4 tsp kosher salt
2 Tbsp unsalted butter
Heat oven to 425◦F. In a blender, puree the eggs, milk, flour, sugar, vanilla, lemon zest and salt until well combined.
Heat a medium or large (9 to 10 inch) cast-iron skillet over medium heat. Add the butter and melt. Add the batter, transfer the skillet to the oven and bake until the pancake is puffed and golden, 12 to 15 minutes.
I served my pancake with a simple apple compote. I melted a tablespoon of butter and added 3 large apples, peeled and coarsely chopped, with 1/2 cup apple juice, 1 tablespoon granulated sugar and 1 teaspoon ground cinnamon. I boiled this mixture until it was thickened and the apples were soft, but still held their shape. Delicious!
"German Pancake.” http://www.womansday.com/recipefinder/german-pancake-recipe-122888?click=recipe_sr. Woman's Day, n.d. Sunday, December 18, 2011.
This is a blog of items I have baked, including recipes from the many cookbooks I own, my own created recipes, and recipes from other sources. I will write about what I have made and post a picture along with it! During stretches when I go without baking, I will write a brief article about some aspect of cooking, baking, ingredients, or preparation techniques.
Sunday, December 18, 2011
Saturday, December 17, 2011
Chocolate Peanut Butter Marble Brownies
These squares combine two of my favorite foods: chocolate and peanut butter. A match made in heaven! These squares are rich, sweet and decadent. They remind me of a Reese peanut butter cup. Here is the recipe, from another little baking booklet I found. This is the original, but I halved the recipe to make an 8x8 inch pan, which worked out very well. I also didn't bother with an electric mixer, I just mixed by hand. Dividing the batter in half sounds like a bit of a bother, but it is really easy to do.
Chocolate Peanut Butter Marble Brownies
1 cup butter, softened
1 1/3 cups granulated sugar
1 cup packed brown sugar
4 eggs
1/4 cup milk
1 1/3 cups all-purpose flour
1 tsp baking powder
1/2 cup creamy peanut butter
1 cup peanut butter baking chips
1/2 cup cocoa
1 cup semi-sweet chocolate chips
Cream butter, sugars, eggs and milk together on medium speed of an electric mixer until blended. Add flour and baking powder, mixing until smooth. Divide batter in half. Stir in peanut butter and peanut butter chips into one half. Stir cocoa and chocolate chips into other half. In greased 9x13 inch pan, alternate spoonfuls of batter in checkerboard pattern, using abut 8 spoonfuls of each. Swirl through batter to create a marble effect. Bake at 350◦F for 30-35 minutes or until set. Cool completely then cut into squares.
Chocolate Peanut Butter Marble Brownies
1 cup butter, softened
1 1/3 cups granulated sugar
1 cup packed brown sugar
4 eggs
1/4 cup milk
1 1/3 cups all-purpose flour
1 tsp baking powder
1/2 cup creamy peanut butter
1 cup peanut butter baking chips
1/2 cup cocoa
1 cup semi-sweet chocolate chips
Cream butter, sugars, eggs and milk together on medium speed of an electric mixer until blended. Add flour and baking powder, mixing until smooth. Divide batter in half. Stir in peanut butter and peanut butter chips into one half. Stir cocoa and chocolate chips into other half. In greased 9x13 inch pan, alternate spoonfuls of batter in checkerboard pattern, using abut 8 spoonfuls of each. Swirl through batter to create a marble effect. Bake at 350◦F for 30-35 minutes or until set. Cool completely then cut into squares.
Friday, December 16, 2011
Cookies For Santa
The most challenging question of the holiday season: What kind of cookies should I leave out for Santa? Should they be healthy, since he will have to toss back so many other cookies? Does he have a peanut allergy? Maybe he hates chocolate?
Some people say chocolate chip, the old classic, are Santa's favorite. Others swear he prefers oatmeal raisin. And others still, claim Santa cannot resist a good gingerbread cookie. So, what on earth should I leave for Santa, and how much should I leave him?
There is also the matter of milk as well, does Santa want fat-free, or 2%, or would he really rather eggnog? And who knows how long the milk sits out before Santa arrives. At our house, we always just leave out a clean glass, and a note telling Santa to help himself to the milk in the fridge. Although sometimes he is a little careless and forgets to put the milk back into the fridge.
So, what type of cookie would Santa enjoy best? I think the best answer, is to just choose a cookie that you really like and are really good at making, and I am sure Santa will enjoy them! Here are some ideas:
Some people say chocolate chip, the old classic, are Santa's favorite. Others swear he prefers oatmeal raisin. And others still, claim Santa cannot resist a good gingerbread cookie. So, what on earth should I leave for Santa, and how much should I leave him?
There is also the matter of milk as well, does Santa want fat-free, or 2%, or would he really rather eggnog? And who knows how long the milk sits out before Santa arrives. At our house, we always just leave out a clean glass, and a note telling Santa to help himself to the milk in the fridge. Although sometimes he is a little careless and forgets to put the milk back into the fridge.
So, what type of cookie would Santa enjoy best? I think the best answer, is to just choose a cookie that you really like and are really good at making, and I am sure Santa will enjoy them! Here are some ideas:
- Christmas Cookies: Shortbread, sugar, cherry winks, gingerbread, gingersnaps, fruitcake cookies.
- Classic Cookies: Chocolate chip, oatmeal raisin, double chocolate, peanut butter, macaroons, meringues.
- Fancy Cookies: Biscotti, whoopie pies, bar cookies, iced cookies.
PHOTO CREDIT:"images.jpg" http://www.spanishdict.com/answers/154547/a-z-christmas-la-navidad/mostvotes/15/15 . Spanish Dict, n.d. Friday, December 16, 2011
Thursday, December 15, 2011
Iced Ginger Cookies
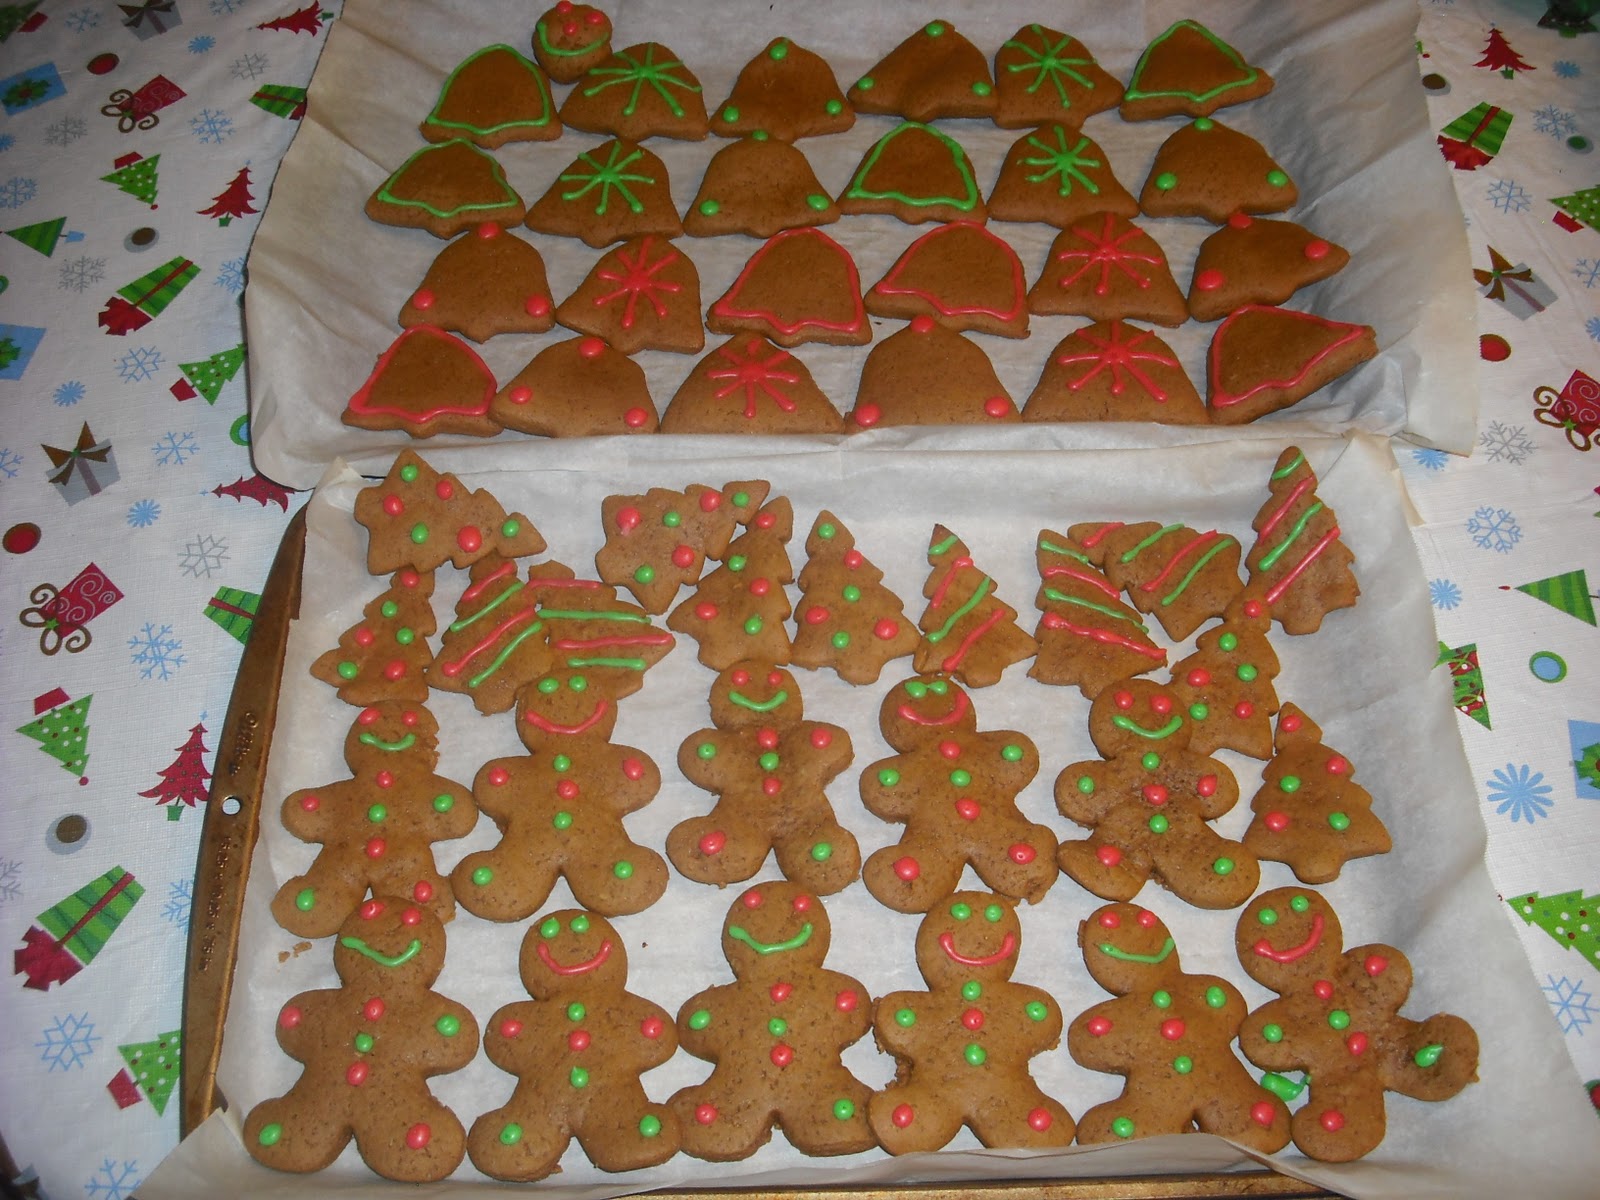
I was in the holiday mood again today, so I decided to make some ginger cookies. I made some gingerbread men, as well as some trees and some bells. I used a very basic recipe that makes quite sturdy cookies, which withstand decorations, and can even be made into hanging ornaments. The dough was firm and easy to roll out. It also did not require refrigeration time before rolling, which saved some time. I decided to decorate my cookies with red and green piping. Here is the recipe, from Company's Coming "Cookies".
Rolled Ginger Cookies
1/2 cup butter or hard margarine, softened
1/2 cup granulated sugar
1/2 cup molasses
1/3 cup water
3 1/4 cups all-purpose flour
1 tsp. baking soda
1 tsp. ginger
1/2 tsp. cinnamon
1/4 tsp. cloves
1/2 tsp. salt
decorations
In mixing bowl cream butter and sugar together. Add molasses and water. Mix in remaining ingredients.
Roll out on lightly floured board. Cut dough into shapes. For ornaments, make hole 1/2 inch from top edge using drinking straw. Arrange on greased cookie sheet. Bake in 350◦F oven for 8 to 10 minutes. Cook thicker cookies a bit longer. Makes about 2 dozen.
Decorations: The recipe recommends brushing the tops of the cooled cookies with warm corn syrup, and applying decorations. The glaze will stay sticky for about thirty minutes. Decorating the cooled cookies with icing also works.
These cookies can also be decorated before baking. Just press sprinkles, colored sugar, or candy-coated chocolates into the cookies before baking.
Paré, Jean. "Rolled Ginger Cookies." Recipe. Cookies, Edmonton Alberta: Company's Coming Publishing Limited, 1989. 92-93.
Rolled Ginger Cookies
1/2 cup butter or hard margarine, softened
1/2 cup granulated sugar
1/2 cup molasses
1/3 cup water
3 1/4 cups all-purpose flour
1 tsp. baking soda
1 tsp. ginger
1/2 tsp. cinnamon
1/4 tsp. cloves
1/2 tsp. salt
decorations
In mixing bowl cream butter and sugar together. Add molasses and water. Mix in remaining ingredients.
Roll out on lightly floured board. Cut dough into shapes. For ornaments, make hole 1/2 inch from top edge using drinking straw. Arrange on greased cookie sheet. Bake in 350◦F oven for 8 to 10 minutes. Cook thicker cookies a bit longer. Makes about 2 dozen.
Decorations: The recipe recommends brushing the tops of the cooled cookies with warm corn syrup, and applying decorations. The glaze will stay sticky for about thirty minutes. Decorating the cooled cookies with icing also works.
These cookies can also be decorated before baking. Just press sprinkles, colored sugar, or candy-coated chocolates into the cookies before baking.
Paré, Jean. "Rolled Ginger Cookies." Recipe. Cookies, Edmonton Alberta: Company's Coming Publishing Limited, 1989. 92-93.
Wednesday, December 14, 2011
Scrumptious Squares
Scrumptious Squares, I cannot think of a more accurate description or a better name for these squares, they truly are scrumptious. They begin with a shortbread base, followed by a layer of caramel and a cream cheese filling, with a milk chocolate topping. I found the recipe in a Company's Coming cookbook "Chocolate Squared". The recipe calls for 3/4 cup of caramel ice cream topping, but I didn't have any, so I whipped up my own homemade caramel sauce. I also decided to leave out the 1/2 cup chopped nuts called for. If you don't happen to have milk chocolate on hand, semi-sweet chocolate chips would also work for the topping, but I think the more mellow flavor of the milk chocolate creates a better balance with the cream cheese and the caramel. The method for topping these squares is the easiest and most convenient ever: just sprinkle the squares with the chocolate chips immediately after removing them from the oven. Allow to stand for a few minutes to soften, then spread with a knife until smooth. A quick and easy icing! This is another square recipe that is fairly quick and easy to make.
Scrumptious Squares
1 1/4 cups all-purpose flour
1/2 cup hard margarine (or butter), softened
1/3 cup brown sugar, packed
1 large egg
4 ounces (125 grams) light cream cheese, softened
3/4 cup caramel ice cream topping
1/2 cup chopped walnuts (or pecans)
1 cup milk chocolate chips
Mix first 3 ingredients in small bowl until mixture resembles coarse crumbs. Reserve 2/3 cup flour mixture. Press remaining flour mixture firmly in ungreased 9x9 inch pan.
Beat egg and cream cheese in medium bowl. Add ice cream topping and vanilla. Beat until smooth. Add reserved flour mixture. Mix well.
Add walnuts. Stir. Spread evenly over flour mixture in pan. Bake in 375◦F oven for about 30 minutes until set and edges are golden.
Sprinkle with chocolate chips. Let stand until very soft. Spread evenly. Let stand until cool. Cuts into 36 squares (or a lot less if I cut them). Cut them when they are thoroughly cooled, but don't refrigerate them before cutting. The chocolate topping will become too brittle and will crack when cutting.
Paré, Jean. "Scrumptious Squares." Recipe. Chocolate Squared, Edmonton Alberta: Company's Coming Publishing Limited, 2009. 20.
Scrumptious Squares
1 1/4 cups all-purpose flour
1/2 cup hard margarine (or butter), softened
1/3 cup brown sugar, packed
1 large egg
4 ounces (125 grams) light cream cheese, softened
3/4 cup caramel ice cream topping
1/2 cup chopped walnuts (or pecans)
1 cup milk chocolate chips
Mix first 3 ingredients in small bowl until mixture resembles coarse crumbs. Reserve 2/3 cup flour mixture. Press remaining flour mixture firmly in ungreased 9x9 inch pan.
Beat egg and cream cheese in medium bowl. Add ice cream topping and vanilla. Beat until smooth. Add reserved flour mixture. Mix well.
Add walnuts. Stir. Spread evenly over flour mixture in pan. Bake in 375◦F oven for about 30 minutes until set and edges are golden.
Sprinkle with chocolate chips. Let stand until very soft. Spread evenly. Let stand until cool. Cuts into 36 squares (or a lot less if I cut them). Cut them when they are thoroughly cooled, but don't refrigerate them before cutting. The chocolate topping will become too brittle and will crack when cutting.
Paré, Jean. "Scrumptious Squares." Recipe. Chocolate Squared, Edmonton Alberta: Company's Coming Publishing Limited, 2009. 20.
Labels:
bars,
caramel,
chocolate,
chocolate chips,
cream cheese,
crust,
easy,
quick,
shortbread,
squares
Tuesday, December 13, 2011
No-Bake Chocolate Oat Drop Cookies
This recipe has been published by numerous different sources, and you can find many variations of it too. Some add coconut or nuts, and others offer butterscotch versions instead of chocolate. My earliest memories of these cookies are that they were one of the first recipes we made in cooking class in school. I remember our group added an extra spoonful of cocoa, which turned out to be a really good idea. Sometimes it pays off not to follow directions, our cookies were the best in the class! The hardest part of the entire recipe is waiting for the cookies to set in the refrigerator before eating them.
No-Bake Chocolate Oat Drop Cookies
1/2 cup (1 stick) butter or hard margarine
2 cups granulated (white) sugar
3 Tablespoons unsweetened cocoa powder
1/2 cup milk
3 cups minute oats
1 teaspoon vanilla extract
In a large saucepan over medium heat, melt the butter. Add the sugar, cocoa, and milk. Stir occasionally until mixture comes to a boil, boil and stir for three minutes. Remove from heat and stir in vanilla. Quickly mix in the oats.
Working quickly before the mixture has time to harden, drop the mixture by spoonfuls onto a cookie sheet lined with waxed paper. Refrigerate at least one hour, or until firm.
Monday, December 12, 2011
The "B"est Foods
Way back in August, I did a fun little post where I named as many foods that I could think of beginning with the letter A. Today, I will do the letter B. I'm thinking there are more foods beginning with the letter B than A, but we'll see. Okay, this will be strictly from my head, no brand names or flavors.
Here goes:
- Banana, Blueberry, Blackberry, Brownie, Beet, Broccoli, Brussels Sprout
- Bubblegum, Bean,Butter, Beef, Bread, Bran, Baking powder, Baking soda
- Borscht, Bannock, Biscuit, Bib lettuce, Boston Cream Pie, Beignets
- Brown Rice, Barley, Bark (as in chocolate bark), Buttermilk, Burger
- Breadcrumbs, Bagel, Buttercream, Barbecue Sauce, Basil
PHOTO CREDIT:"B-Autonorte.jpg" http://ilgattohanuovecode.blogspot.com/2010_10_01_archive.html. ilgattohanuovecode, n.d. Monday, December 12, 2011
Sunday, December 11, 2011
Shreddies Chocolatey Party Mix
The holiday season just would not be the same without my mother's delicious mix. It is a simple recipe composed of shreddies cereal and chopped peanuts, which is coated with a mixture of butter, brown sugar and corn syrup, that has been boiled for 5 minutes. It is then baked at a low temperature for 40 minutes, during which the enticing aroma is almost too much to handle. When cool, miniature semi-sweet chocolate chips are added. A handful of this mix is an ooey-gooey treat. It is both sweet and salty and crunchy and chewy all at the same time. This mix isn't really holiday-themed or anything, it could be made any time of the year. My mother just always happens to make it around Christmas time. It will keep well stored in an airtight container at room temperature for a few weeks. It is best to keep this mix hidden though, as it tends to disappear fairly quickly. It is a great sweeter alternative to the normal chip bowl. If this recipe does not seem to be to your liking, there are many many other cereal mix recipes. A lot of them use shreddies as well, but others use different cereals and mixtures of cereals. There are sweet, spicy, and savory mixes; some baked, some not; some complex, some simple. Check them out!
Thanks again Mom!
Thanks again Mom!
Saturday, December 10, 2011
The List
I would like to take this opportunity to tell you about the never-ending list I have going. Anytime I see a recipe that sounds appealing, and every time I come across a new recipe I want to try, I write it down on my list. My list is now composed of hundreds of recipes I would like to try from a variety of sources. I come across new recipes and tasty new ideas on a daily basis, so my list is constantly being updated. I try to keep my list as organized as possible, but that is not easy when it just keeps growing and growing. I keep this list recorded in a simple notebook, organized by sections. The sections are by recipe source (cookbook, magazine, newspaper article, online), and categorized farther by author and recipe type (meal, snack, dessert). I turn to this list every time I need to bake something, as it gives me ideas of what I should make. Beside the recipe name, I write the source, the page number (if applicable) , and how much the recipe will make. This makes it very convenient to simply flip through the notebook when I want to bake something, and easily find a recipe with a suitable yield, using ingredients already on hand. When I make an item from this list, I write the date I made it, and some comments and ratings next to it. It seems like I add ten more items for every one I cross off. Some day, probably far off in the future, I will finally get through this entire list. I don't often make the same items twice, only if they are particularly good, because I love to try new recipes.You may be wondering why I am not baking something from the list today, instead of rambling on about it. You see, it is nearly impossible for me to bake everyday. There are time constraints, and other chores that need doing. Plus, if I baked everyday, there is no way everything I baked would ever get eaten! Now, I must go add some more recipes I just found to my list...
Friday, December 09, 2011
Hershey's Kiss Surprise Cookies
Here are some excellent Christmas cookies. They all start with a classic milk chocolate Hershey's kiss. This gets encased with a decadent chocolate chip cookie dough and baked. Then, a final drizzle of melted chocolate and these cookies - a chocolate lover's dream - are ready to be devoured. Actually, I usually skip this final step, it really isn't necessary, the cookies are still divine without it. Usually the cookies aren't around long enough to withstand a chocolate drizzle anyway. It is fun to see peoples' faces light up when the bite into a cookie, thinking it is just a regular chocolate chip, and then they discover the surprise Hershey's kiss inside! My mother made this delicious batch of cookies, yum!
Hershey's Kiss Chocolate Chip Cookies
1 bag (10 ounces) Hershey's kisses milk chocolates
1 cup (two sticks) butter or hard margarine, softened
1/3 cup granulated sugar
1/3 cup packed light brown sugar
1 teaspoon vanilla extract
2 cups all-purpose flour
1 cup Hershey's miniature semi-sweet chocolate chips
Chocolate Drizzle (optional)
1/4 cup Hershey's miniature semi-sweet chocolate chips
1 teaspoon shortening
Remove wrappers from Hershey's kisses. Set aside. Preheat oven to 375◦F. Line cookie sheets with parchment paper.
In a large bowl, beat butter, sugars, and vanilla. Add flour, blend until smooth. Stir in chocolate chips.
Roll scant tablespoons of dough around each chocolate kiss, covering completely. Shape into balls, place on prepared cookie sheets. Bake for 10 to 12 minutes, or until set. remove from cookie sheets and cool, then drizzle with chocolate drizzle, if desired.
In a small microwaveable-safe bowl, melt the chocolate chips and shortening together on high (100%) for 30 seconds, stir until smooth. If necessary, reheat for an additional 20 seconds at a time, until chocolate is smooth. Drizzle over cooled cookies. Makes approximately four dozen (48) cookies.
Hershey's Kiss Chocolate Chip Cookies
1 bag (10 ounces) Hershey's kisses milk chocolates
1 cup (two sticks) butter or hard margarine, softened
1/3 cup granulated sugar
1/3 cup packed light brown sugar
1 teaspoon vanilla extract
2 cups all-purpose flour
1 cup Hershey's miniature semi-sweet chocolate chips
Chocolate Drizzle (optional)
1/4 cup Hershey's miniature semi-sweet chocolate chips
1 teaspoon shortening
Remove wrappers from Hershey's kisses. Set aside. Preheat oven to 375◦F. Line cookie sheets with parchment paper.
In a large bowl, beat butter, sugars, and vanilla. Add flour, blend until smooth. Stir in chocolate chips.
Roll scant tablespoons of dough around each chocolate kiss, covering completely. Shape into balls, place on prepared cookie sheets. Bake for 10 to 12 minutes, or until set. remove from cookie sheets and cool, then drizzle with chocolate drizzle, if desired.
In a small microwaveable-safe bowl, melt the chocolate chips and shortening together on high (100%) for 30 seconds, stir until smooth. If necessary, reheat for an additional 20 seconds at a time, until chocolate is smooth. Drizzle over cooled cookies. Makes approximately four dozen (48) cookies.
Thursday, December 08, 2011
Dark Chocolate Tartlets
Well, here is the finished product: cream cheese tartlets with dark chocolate filling and vanilla buttercream topping. These were quite easy and quick to make, and look very cute. They are the perfect bite-sized treat. I simply placed a spoonful of some dark chocolate ganache in each tart, and used a star tip to pipe some of my classic buttercream icing on top. Sweet and simple. The flavors of the chocolate filling and vanilla buttercream complement each other perfectly, and the cream cheese shell provides a sturdy holder and nice balance of flavors and textures. You can see some of the chocolate filling peeking out from the buttercream covering in some of the tartlets.
Labels:
buttercream,
chocolate,
cream cheese,
simple,
tartlets,
tarts,
vanilla
Wednesday, December 07, 2011
Cream Cheese Tartlet Shells
Here is a super simple, quick, and yummy recipe for easy and versatile tartlet shells. They are a good base for many different tarts, sweet or savory. If you are using them for a slightly sweet but not decadent filling, add a little sugar to the dough. If you are using them for a savory filling, add a little salt. These tartlet shells can be filled before or after baking, depending on your filling. Keep in mind that they puff up a little during baking, so if you fill them before baking, be very modest with your amount of filling. Otherwise, you may end up with a mess on the oven floor. These are easy to make, and miniature muffin cups are the perfect size to bake them in, as long as you don't want them to deep. They are minis - so a lot of filling is not required. I am baking them today to have them ready to fill. I will display the finished product tomorrow.
Cream Cheese Tartlet Shells
3 ounces cream cheese, softened
1/2 cup unsalted butter, softened
1 cup white all-purpose flour
1-3 Tablespoons sugar, if desired
1 teaspoon salt, for savory fillings
Blend the cream cheese and the butter together until smooth. Add the flour and sugar or salt, and blend. Shape dough into a ball and press into a flattened disk. Refrigerate for at least one hour or up to 24 hours.
Preheat oven to 325◦F. Shape the dough into 24 1-inch balls, press thinly into ungreased miniature muffin cups. Bake for 20 minutes, or until lightly browned. These are very easy to remove within minutes of baking, just when cool enough to handle. Don't try to cool them in the muffin tin.
Cream Cheese Tartlet Shells
3 ounces cream cheese, softened
1/2 cup unsalted butter, softened
1 cup white all-purpose flour
1-3 Tablespoons sugar, if desired
1 teaspoon salt, for savory fillings
Blend the cream cheese and the butter together until smooth. Add the flour and sugar or salt, and blend. Shape dough into a ball and press into a flattened disk. Refrigerate for at least one hour or up to 24 hours.
Preheat oven to 325◦F. Shape the dough into 24 1-inch balls, press thinly into ungreased miniature muffin cups. Bake for 20 minutes, or until lightly browned. These are very easy to remove within minutes of baking, just when cool enough to handle. Don't try to cool them in the muffin tin.
Tuesday, December 06, 2011
Button Cookies
Another Christmas cookie to display: Button Cookies. We just started making these cookies a few years ago, but since then, they have become a tradition that is greatly adored. These button cookies are really just brown sugar shortbread cookies with holes poked in them after baking. They must be made using real butter for the best taste, and it is customary for them to be overloaded with powdered sugar, so that you inhale it when you take a bite. The holes are simply poked with a wooden skewer, we usually go with four holes, but have also tried three and five holes, which look nice too. My mother and I make these cookies together: she does most of the mixing and the baking, and I poke the holes and sprinkle with icing sugar. These cookies are quite fun to make, and they really are cute as a button.
Monday, December 05, 2011
Espresso Gingerbread Cake
Here is a new twist on an old holiday favorite: gingerbread with a coffee-flavored frosting. Not your typical gingerbread, but the flavors of ginger, molasses, and coffee compliment each other very nicely. It was surprisingly delicious. The cake was spicy and had a nice tender crumb, and the frosting suited it perfectly. The recipe came from an old booklet I found lying around the house.
Espresso Gingerbread Cake
CAKE
1/2 cup boiling water
1/2 cup softened butter
1/2 cup fancy molasses
1/2 cup brown sugar
1 large egg
3 Tbsp finely grated fresh ginger
1 1/2 cups all-purpose flour
1 tsp baking soda
1 tsp ground ginger
1 tsp ground cinnamon
1/2 tsp salt
1/4 tsp ground nutmeg
1/4 tsp cardamom
FROSTING
1 1/2 tsp boiling water
2 tsp instant coffee granules
1/3 cup 35% whipping cream
2 Tbsp softened butter
2 cups icing sugar
Butter an 8-inch round springform pan and line the bottom with parchment paper. Preheat oven to 350◦F.
CAKE In a large, heatproof bowl, pour the boiling water over the butter and stir with a wooden spoon until smooth. Whisk in the molasses and brown sugar, egg and ginger.
Stir the flour with the baking soda, ground ginger, cinnamon, salt, nutmeg, and cardamom. Add to the butter mixture in two additions, blending with a spoon until smooth.
Transfer batter to prepared pan and bake 30 to 40 minutes, or until a wooden toothpick inserted into the center of the cake comes out clean. Cool in pan for 10 minutes, then transfer to a wire rack to cool completely before frosting.
FROSTING
Place boiling water in a large bowl. Add the coffee and stir to dissolve. Add cream and butter, blend well. Gradually beat in icing sugar until smooth. Spread over just the top pf the cooled cake and allow some frosting to run down the sides.
The recipe recommends garnishing this cake with crystallized ginger strips, but I didn't have any. So I garnished with chocolate chips, because everyone loves chocolate (at least in this house).
Espresso Gingerbread Cake
CAKE
1/2 cup boiling water
1/2 cup softened butter
1/2 cup fancy molasses
1/2 cup brown sugar
1 large egg
3 Tbsp finely grated fresh ginger
1 1/2 cups all-purpose flour
1 tsp baking soda
1 tsp ground ginger
1 tsp ground cinnamon
1/2 tsp salt
1/4 tsp ground nutmeg
1/4 tsp cardamom
FROSTING
1 1/2 tsp boiling water
2 tsp instant coffee granules
1/3 cup 35% whipping cream
2 Tbsp softened butter
2 cups icing sugar
Butter an 8-inch round springform pan and line the bottom with parchment paper. Preheat oven to 350◦F.
CAKE In a large, heatproof bowl, pour the boiling water over the butter and stir with a wooden spoon until smooth. Whisk in the molasses and brown sugar, egg and ginger.
Stir the flour with the baking soda, ground ginger, cinnamon, salt, nutmeg, and cardamom. Add to the butter mixture in two additions, blending with a spoon until smooth.
Transfer batter to prepared pan and bake 30 to 40 minutes, or until a wooden toothpick inserted into the center of the cake comes out clean. Cool in pan for 10 minutes, then transfer to a wire rack to cool completely before frosting.
FROSTING
Place boiling water in a large bowl. Add the coffee and stir to dissolve. Add cream and butter, blend well. Gradually beat in icing sugar until smooth. Spread over just the top pf the cooled cake and allow some frosting to run down the sides.
The recipe recommends garnishing this cake with crystallized ginger strips, but I didn't have any. So I garnished with chocolate chips, because everyone loves chocolate (at least in this house).
Labels:
cake,
coffee cake,
frosting,
ginger,
gingerbread,
molasses,
spice
Sunday, December 04, 2011
Roast Pork Tenderloin and Mushroom Dinner
Here was tonight's supper: a roasted pork tenderloin cooked with mushrooms, potatoes, and sweet potatoes, and cooked in a creamy mushroom sauce. It was very easy and efficient to make, since the entire meal cooks together in one dish. The various aspects cooked beautifully together, and cleanup was a breeze. I found the recipe in a 2011 calender. The only big changes I made was to use two small pork tenderloin "quick roasts" because that is what I found at the grocery store, and to add an extra sweet potato.
Roast Pork Tenderloin and Mushroom Dinner
1 large pork tenderloin, trimmed (about 1 lb/500g)
2 medium white potatoes, cut in 3/4 inch chunks
2 medium sweet potatoes, cut in 3/4 inch chunks
salt and pepper
1 tbsp butter
8 oz (250g) mushrooms, thinly sliced
3 cloves garlic, minced
1 onion, chopped
1 1/2 tsp paprika
1/4 cup all-purpose flour
2 cups milk
1 cup reduced-sodium chicken broth
1 tbsp Dijon mustard
Preheat oven to 375◦F. Butter a 9x13 inch baking dish. Place pork in center, tucking thin end underneath. Arrange potatoes around pork, sprinkle with salt and pepper. Bake for 20 minutes.
Meanwhile, in a large skillet, melt butter over medium heat. Add mushrooms, garlic, onion, paprika, and 1/4 tsp each salt and pepper. Saute until mushrooms are browned, about 8 minutes. Stir in broth and mustard. Whisk flour into milk, stir into pan and bring to a boil. Boil, stirring for 1 minute.
Pour sauce over pork in pan, roast 10 to 15 minutes longer, or until a meat thermometer inserted into the thickest part of the pork registers 160◦F. Let rest 5 minutes, before cutting pork crosswise into thin slices. Serve with a scoop of mushrooms and potatoes and a drizzle of sauce.
"Roast Pork Tenderloin and Mushroom Dinner.” http://www.dairygoodness.ca/recipes/roast-pork-tenderloin-and-mushroom-dinner. Dairy Goodness, n.d. Sunday, December 4, 2011.
Roast Pork Tenderloin and Mushroom Dinner
1 large pork tenderloin, trimmed (about 1 lb/500g)
2 medium white potatoes, cut in 3/4 inch chunks
2 medium sweet potatoes, cut in 3/4 inch chunks
salt and pepper
1 tbsp butter
8 oz (250g) mushrooms, thinly sliced
3 cloves garlic, minced
1 onion, chopped
1 1/2 tsp paprika
1/4 cup all-purpose flour
2 cups milk
1 cup reduced-sodium chicken broth
1 tbsp Dijon mustard
Preheat oven to 375◦F. Butter a 9x13 inch baking dish. Place pork in center, tucking thin end underneath. Arrange potatoes around pork, sprinkle with salt and pepper. Bake for 20 minutes.
Meanwhile, in a large skillet, melt butter over medium heat. Add mushrooms, garlic, onion, paprika, and 1/4 tsp each salt and pepper. Saute until mushrooms are browned, about 8 minutes. Stir in broth and mustard. Whisk flour into milk, stir into pan and bring to a boil. Boil, stirring for 1 minute.
Pour sauce over pork in pan, roast 10 to 15 minutes longer, or until a meat thermometer inserted into the thickest part of the pork registers 160◦F. Let rest 5 minutes, before cutting pork crosswise into thin slices. Serve with a scoop of mushrooms and potatoes and a drizzle of sauce.
"Roast Pork Tenderloin and Mushroom Dinner.” http://www.dairygoodness.ca/recipes/roast-pork-tenderloin-and-mushroom-dinner. Dairy Goodness, n.d. Sunday, December 4, 2011.
Labels:
mushrooms,
pork,
potatoes,
roasted,
sauce,
sweet potato,
tenderloin
Saturday, December 03, 2011
Country Seed Bread
I attempted to make another homemade whole wheat bread today. I think it turned out pretty well. It was hearty and filling, with plenty of flavor. This bread is enriched with some different types of seeds for added crunch. The exterior crust is also especially crunchy, most likely due to the initial baking at 400◦F. It is very easy to slice, and holds together well, making for an excellent sandwich bread. I found the recipe in a book compiling the so-called best bread and pizza recipes, but of course I made some variations.
Country Seed Bread
2 cups all-purpose flour
1 cup whole wheat flour
1/4 cup flax seeds
2 tbsp sesame seeds
1 tbsp poppy seeds
2 tsp quick-rising (instant) dry yeast
1 1/4 cups warm water
2 tbsp liquid honey
2 tbsp vegetable oil
1 1/2 tsp salt
In large bowl, stir together flours, seeds and yeast. In small bowl, whisk water, honey, oil and salt; stir into flour mixture until sticky dough forms. Turn out onto lightly floured surface and knead for about 8 minutes or until dough is still slightly sticky and springs back when pressed in center. Place in greased bowl, turning to grease all over. Cover with plastic wrap and let rise in warm draft-free place until doubled in bulk, about 1 1/4 hours.
Punch dough down, gently pull into a rectangle. Place in greased 9x5 inch loaf pan. Cover and let rise until doubled in bulk, about 1 hour.
Using a serrated knife, make a 1-inch deep cut lengthwise along top of loaf. Bake at 400◦F for 15 minutes, reduce heat to 350◦F and bake 30-35 minutes longer, until browned.
Baird, Elizabeth. "Country Seed Bread." Recipe. Canadian Living's Best Breads & Pizzas, Mississauga, Ontario: Telemedia Communications Inc. 1998. 22.
Country Seed Bread
2 cups all-purpose flour
1 cup whole wheat flour
1/4 cup flax seeds
2 tbsp sesame seeds
1 tbsp poppy seeds
2 tsp quick-rising (instant) dry yeast
1 1/4 cups warm water
2 tbsp liquid honey
2 tbsp vegetable oil
1 1/2 tsp salt
In large bowl, stir together flours, seeds and yeast. In small bowl, whisk water, honey, oil and salt; stir into flour mixture until sticky dough forms. Turn out onto lightly floured surface and knead for about 8 minutes or until dough is still slightly sticky and springs back when pressed in center. Place in greased bowl, turning to grease all over. Cover with plastic wrap and let rise in warm draft-free place until doubled in bulk, about 1 1/4 hours.
Punch dough down, gently pull into a rectangle. Place in greased 9x5 inch loaf pan. Cover and let rise until doubled in bulk, about 1 hour.
Using a serrated knife, make a 1-inch deep cut lengthwise along top of loaf. Bake at 400◦F for 15 minutes, reduce heat to 350◦F and bake 30-35 minutes longer, until browned.
Baird, Elizabeth. "Country Seed Bread." Recipe. Canadian Living's Best Breads & Pizzas, Mississauga, Ontario: Telemedia Communications Inc. 1998. 22.
Friday, December 02, 2011
Blow Torch
I was absolutely delighted on my last birthday when I received a mini kitchen blow torch as a birthday gift from my dear friend. Blow torches may sound dangerous, but they are actually quite safe when used properly. Many blow torches include safety features such as automatic shut-off, child-lock, and a safety trigger. They produce only a short, thin flame, and the torch itself does not get incredibly hot. They are small, not too expensive, and have various uses. They can be used for Crème Brulee, Flambee, broiled toppings, caramel sauce, brown sugar glazes, marshmallow frosting, s’mores, meringue, baked Alaska , and even pizza! Of course be careful not to confuse mini kitchen blow torches (sometimes called crème brülée torches) with industrial sized blow torches used for soldering and other such things. There is another option for most dishes if you do not happen to have a blow torch. You can put the item on the highest rack in your oven and put the broiler on high, watching carefully as it cooks fast, until carmelized to the desired colour. However, this method is not nearly as fun!
PHOTO CREDIT:"2" http://pursuitofhappieness.wordpress.com/. Pursuit of Happiness, n.d. Friday, December 2, 2011
Thursday, December 01, 2011
Peanut Butter Cookies
Peanut Butter Cookies, with their signature fork design, are a classic. They are a great, basic cookie suited for peanut butter fans. They can also be dressed up and added to for something different. There are two basic types of master peanut butter cookies recipes around" the really quick and simple three-ingredient one, and the more complex basic cookie one with peanut butter. Here are both of them.
Super Easy 3-Ingredient Peanut Butter Cookies
1 cup smooth peanut butter
1/2 cup granulated sugar
1 large egg
Preheat oven to 325◦F. Mix all of the ingredients until well blended. Roll into 24 balls. Place 4 inches apart on ungreased cookie sheets, flatten with fork. Bake for 20 minutes or until lightly browned, do not overbake. Let cool on cookie sheets 5 minutes before transferring to cool completely.
Old-Fashioned Peanut Butter Cookies
1/2 cup butter or hard margarine, softened
1/2 cup packed brown sugar
1/2 cup granulated sugar
1 egg
1 cup smooth peanut butter
1 1/2 cups all-purpose flour
1 tsp. baking soda
1/8 tsp. salt
Preheat oven to 375◦F. In a large bowl, cream the butter and bot sugars. Add the egg, mix in the peanut butter. Stir in remaining ingredients, shape into 36 balls. Place far apart on ungreased cookie sheets. Press with fork, dipped in flour periodically. Bake 12 to 15 minutes.
VARIATIONS
Chocolate Chip Peanut Butter Cookies: Add 1/2 to 1 cup chocolate chips.
PB&J Cookies: Indent each cookie with thumb instead of pressing with fork. Fill with jam before or after baking.
Double Peanut Butter Cookies: Add 1/2 cup chopped peanuts.
Oatmeal Peanut Butter Cookies: Replace half of the flour with rolled oats.
Chocolate Peanut Butter Cookies: Replace 1/2 cup flour with 1/2 cup unsweetened cocoa powder.
Here are some peanut butter cookies that I made. I drizzled some with melted chocolate to resemble smiley faces :)
Super Easy 3-Ingredient Peanut Butter Cookies
1 cup smooth peanut butter
1/2 cup granulated sugar
1 large egg
Preheat oven to 325◦F. Mix all of the ingredients until well blended. Roll into 24 balls. Place 4 inches apart on ungreased cookie sheets, flatten with fork. Bake for 20 minutes or until lightly browned, do not overbake. Let cool on cookie sheets 5 minutes before transferring to cool completely.
Old-Fashioned Peanut Butter Cookies
1/2 cup butter or hard margarine, softened
1/2 cup packed brown sugar
1/2 cup granulated sugar
1 egg
1 cup smooth peanut butter
1 1/2 cups all-purpose flour
1 tsp. baking soda
1/8 tsp. salt
Preheat oven to 375◦F. In a large bowl, cream the butter and bot sugars. Add the egg, mix in the peanut butter. Stir in remaining ingredients, shape into 36 balls. Place far apart on ungreased cookie sheets. Press with fork, dipped in flour periodically. Bake 12 to 15 minutes.
VARIATIONS
Chocolate Chip Peanut Butter Cookies: Add 1/2 to 1 cup chocolate chips.
PB&J Cookies: Indent each cookie with thumb instead of pressing with fork. Fill with jam before or after baking.
Double Peanut Butter Cookies: Add 1/2 cup chopped peanuts.
Oatmeal Peanut Butter Cookies: Replace half of the flour with rolled oats.
Chocolate Peanut Butter Cookies: Replace 1/2 cup flour with 1/2 cup unsweetened cocoa powder.
Here are some peanut butter cookies that I made. I drizzled some with melted chocolate to resemble smiley faces :)
Wednesday, November 30, 2011
Shortbread Cookies
Here is another addition to the growing stock of Christmas cookies in the freezer: Shortbread Cookies. Shortbread cookies are one of my very favorite types of cookies, if they are done right. I love how they are so rich and buttery and melt-in-your-mouth. However, some shortbread recipes can turn out dry and bland. I have never tried to make the traditional Scottish shortbread that is pricked all over and baked in a fluted tart pan, but I have tasted it, and it is good! I have also made brown sugar shortbread, which has a subtle caramel flavor and is also delicious.
This shortbread recipe came from my great grandmother, and is a family secret, so unfortunately I cannot share it. I like to make these shortbread cookies fairly thick, and cut them into Christmas shapes such as bells, stars, and trees. A small dash of sprinkles is all these cookies need, a sweet icing would overpower their delicate flavor too much. They are always a popular choice among our Christmas guests.
Tuesday, November 29, 2011
Cheese-Crusted Meatball Pie
This delicious recipe came from one of my many cookbooks, Betty Crocker's "Baking For Today". This book includes recipes for everything from breads, to cookies, to main courses, to cakes, to appetizers, to perfect pies. I have made several recipes from this book before, and they all turned out nicely. So for supper, I decided to try Cheese-Crusted Meatball Pie. This dish consists of meatballs, sauce, and a flaky crust made with cheddar cheese on top. It was very good, and fairly easy to make. The secret to the flaky crust is to heat the sauce first, which also allows the pie to heat through on the inside before the crust overbrowns. The crust is a little crumbly and hard to roll out perfectly, so my pie has a very rustic look to it. But that's okay, it still tasted very good. I also had a little bit of crust leftover, so I just slid it on a baking sheet and baked it along side the pie.
Cheese-Crusted Meatball Pie
MEATBALLS
1 pound lean (at least 80%) ground beef
1/4 cup dry bread crumbs
1/2 cup chopped onion
1/4 teaspoon salt
1/2 cup milk
1 jar (1 pound 10 ounces) tomato pasta sauce (any variety)
CHEESE PASTRY
1 cup white all-purpose flour
1/2 teaspoon salt
1/2 cup shredded cheddar cheese (2 ounces)
1/3 cup plus 1 tablespoon butter or shortening
2 to 3 tablespoons cold water
Heat oven to 425◦F. In medium bowl, mix beef, bread crumbs, onion, salt and milk. Shape mixture into 18 meatballs (I made smaller meatballs and got a lot more). Place meatballs in 15x10x1-inch pan. Bake 15 to 18 minutes or until meat thermometer inserted in center of meatballs reads at least 160◦F and meatballs are no longer pink in center.
Meanwhile: In one quart saucepan, heat pasta sauce to boiling, stirring occasionally. Reduce heat to medium-low; keep warm.
Make cheese pastry: In medium bowl, mix flour, salt and cheese. Cut in butter, using pastry blender (or pulling 2 table knives through ingredients in opposite directions), until crumbly. Sprinkle with cold water, 1 tablespoon at a time, mixing with fork until all flour is moistened and dough almost leaves side of bowl (1 to 2 teaspoons more water can be added if necessary). On lightly floured surface, gather dough into a ball; shape into flattened round. Roll into 10-inch square.
Place meatballs in 8-inch square glass baking dish. Top with hot pasta sauce. Cut slits in pastry; place over meatball mixture and tuck under edges. Bake 25 to 30 minutes or until pastry is golden brown.
Crocker, Betty. "Cheese-Crusted Meatball Pie." Recipe. Baking For Today, Hoboken, New Jersey: Wiley Publishing, 2005. 122.
Cheese-Crusted Meatball Pie
MEATBALLS
1 pound lean (at least 80%) ground beef
1/4 cup dry bread crumbs
1/2 cup chopped onion
1/4 teaspoon salt
1/2 cup milk
1 jar (1 pound 10 ounces) tomato pasta sauce (any variety)
CHEESE PASTRY
1 cup white all-purpose flour
1/2 teaspoon salt
1/2 cup shredded cheddar cheese (2 ounces)
1/3 cup plus 1 tablespoon butter or shortening
2 to 3 tablespoons cold water
Heat oven to 425◦F. In medium bowl, mix beef, bread crumbs, onion, salt and milk. Shape mixture into 18 meatballs (I made smaller meatballs and got a lot more). Place meatballs in 15x10x1-inch pan. Bake 15 to 18 minutes or until meat thermometer inserted in center of meatballs reads at least 160◦F and meatballs are no longer pink in center.
Meanwhile: In one quart saucepan, heat pasta sauce to boiling, stirring occasionally. Reduce heat to medium-low; keep warm.
Make cheese pastry: In medium bowl, mix flour, salt and cheese. Cut in butter, using pastry blender (or pulling 2 table knives through ingredients in opposite directions), until crumbly. Sprinkle with cold water, 1 tablespoon at a time, mixing with fork until all flour is moistened and dough almost leaves side of bowl (1 to 2 teaspoons more water can be added if necessary). On lightly floured surface, gather dough into a ball; shape into flattened round. Roll into 10-inch square.
Place meatballs in 8-inch square glass baking dish. Top with hot pasta sauce. Cut slits in pastry; place over meatball mixture and tuck under edges. Bake 25 to 30 minutes or until pastry is golden brown.
Crocker, Betty. "Cheese-Crusted Meatball Pie." Recipe. Baking For Today, Hoboken, New Jersey: Wiley Publishing, 2005. 122.
Labels:
cheddar cheese,
cheese,
ground meat,
meat,
meatballs,
pie,
supper
Monday, November 28, 2011
Gingerbread Cookies
As I mentioned yesterday, along with our gingerbread house, it is also tradition to decorate and bake homemade gingerbread cookies. Each family member gets to decorate one person for themselves. Then we decorate some extra people to give to friends, and the rest we make into other shapes, such as stars, bells, and trees. We like to decorate them with candy-coated chocolates, especially the jumbo red and green ones that come out specifically for Christmas. We also like to use some sprinkles too. Of course, it is also tradition for one specific family member (I won't mention any names) to overload his gingerbread man with as much candy as the cookie can possibly hold. But that's all just part of the fun. Above is a picture of some of our gingerbread cookies being packaged for the freezer. I love continuing family traditions, especially those involving baked goodies!
Sunday, November 27, 2011
Gingerbread House
Every year, as a family tradition, we put together a gingerbread house. We buy a kit from the grocery store (they are very easy to come by), open it up, and let our imaginations do the rest! It is so simple, but so fun and creative. You can make it look however you please! We have been doing this for years, and every time, the house turns out looking completely different.
The standard kit comes with pre-baked gingerbread pieces in the shape of a house: front, back, two sides, two roof halves, and a chimney; as well as a little snowman, boy, and tree figure. The kit comes with a bag of royal icing, and bags of peppermints, gumdrops, gumballs, and other little candies in a rainbow of colors. We assign a family member to decorate a different part of the house each. Then we put the pieces together and put the house on display. The house is purely for decoration, we never it eat. We build it in late November and leave it on display until long after Christmas, sometimes until it's nearly Easter time! The kit is not high quality or great tasting; the gingerbread is full of preservatives, and the candies are pure sugar, and not to our liking. I have considered baking the gingerbread pieces myself, but decided it simply was not worth it, since we just end leaving the house out in the open before finally throwing it out. It would be such a waste of homemade, and it is cheaper to buy the kit anyway. However, on the same day we build the house, we also decorate homemade gingerbread cookies. These taste great, and we can decorate them to suit our personal tastes! Here is the house we built today.
Saturday, November 26, 2011
It's Beginning To Look A Lot Like Christmas....
Countdown until Christmas: 29 days! What other sentence could bring so much excitement, worry, anxiety, and nerves? Shopping days are crawling to an end, Christmas cards need to be mailed soon, and goodies need to be baked. Everywhere you shop, you can find candy canes, chocolates, gumdrops, peppermints, fudge, bark, cookies, toffee, truffles, brittles, marzipan, fruitcakes, and gingerbread. There are just so many different Christmas goodies to name, where do I even start?
There are cookies: shortbread, sugar, gingerbread, cherry, Santa's whiskers, gingersnaps, butterballs, and melting moments.
There are cakes: fruit cakes, yule logs, buches de noel, and figgy puddings.
There are breads: Christmas tree bread, panettone, and stollen.
Then there is dinner: turkey, stuffing, mashed potatoes, carrots, turnips, peas, brussels sprouts, sweet potatoes, ham, cranberry sauce, fresh bread, green beans, and gravy.
There is also: mincemeat pie, eggnog, bread pudding, and ciders.
Mmm, mmm! The holidays are here, enjoy!
PHOTO CREDIT:"PPN2-3x_christmas_candy_party_plate" http://www.bonbonsconnexion.com/en/home.html.Bonbons Connexion Candy, n.d. Saturday, November 26, 2011
There are cookies: shortbread, sugar, gingerbread, cherry, Santa's whiskers, gingersnaps, butterballs, and melting moments.
There are cakes: fruit cakes, yule logs, buches de noel, and figgy puddings.
There are breads: Christmas tree bread, panettone, and stollen.
Then there is dinner: turkey, stuffing, mashed potatoes, carrots, turnips, peas, brussels sprouts, sweet potatoes, ham, cranberry sauce, fresh bread, green beans, and gravy.
There is also: mincemeat pie, eggnog, bread pudding, and ciders.
Mmm, mmm! The holidays are here, enjoy!
PHOTO CREDIT:"PPN2-3x_christmas_candy_party_plate" http://www.bonbonsconnexion.com/en/home.html.Bonbons Connexion Candy, n.d. Saturday, November 26, 2011
Friday, November 25, 2011
Chocolate-Vanilla Pinwheels
Here are some hypnotizing cookies! This recipe came from Company's Coming "Cookies". There are several pinwheel cookie recipes featured in this book, including shortbread pinwheels, date filled pinwheels, raspberry filled pinwheels, and these chocolate-vanilla sugar cookie pinwheels; as well as variations on these recipes for cloverleaf and checkerboard designs, which can be any colors of your choice! Along with having a very attractive appearance, these cookies are delicious and easy to make! The dough must be prepared the day before and chilled overnight, although it may also be frozen for more advanced preparation.
Chocolate-Vanilla Pinwheels
1/2 cup butter or hard margarine, softened
1/2 cup granulated sugar
1 egg
1 tsp. vanilla
3 Tbsp. milk
1 3/4 cups all-purpose flour
1/2 tsp. baking powder
1/8 tsp. salt
2 Tbsp. cocoa
1 Tbsp. butter or hard margarine, softened
Cream first amount of butter and sugar together. Beat in egg, vanilla and milk.
Stir flour, baking powder and salt together and add. Mix into a ball. Divide into 2 equal portions.
To 1 portion add cocoa and remaining butter. Mix well. Roll out each portion between sheets of waxed paper to 1/8 inch thick. Make them the same size in a rectangular shape. Remove top papers. Invert white layer over chocolate. Remove top paper. Roll as for jelly roll, removing bottom paper as you roll. Wrap and chill overnight. To bake slice thinly. Place on ungreased cookie sheet. Bake in 375◦F oven for about 6 minutes. Makes 4 dozen.
TIPS: The rectangular dough shapes should be approximately 7x12 inches. Roll dough from the short end. Slice about 1/3 inch thick, although you may not get 4 dozen out of it. Dough should not stick to waxed paper too much, but you may want to sprinkle the waxed paper with a light coating of flour as a precaution. I baked mine for 8 minutes, which was the perfect amount of time.
Paré, Jean. "Pinwheels." Recipe. Cookies, Edmonton Alberta: Company's Coming Publishing Limited, 1989. 64.
Chocolate-Vanilla Pinwheels
1/2 cup butter or hard margarine, softened
1/2 cup granulated sugar
1 egg
1 tsp. vanilla
3 Tbsp. milk
1 3/4 cups all-purpose flour
1/2 tsp. baking powder
1/8 tsp. salt
2 Tbsp. cocoa
1 Tbsp. butter or hard margarine, softened
Cream first amount of butter and sugar together. Beat in egg, vanilla and milk.
Stir flour, baking powder and salt together and add. Mix into a ball. Divide into 2 equal portions.
To 1 portion add cocoa and remaining butter. Mix well. Roll out each portion between sheets of waxed paper to 1/8 inch thick. Make them the same size in a rectangular shape. Remove top papers. Invert white layer over chocolate. Remove top paper. Roll as for jelly roll, removing bottom paper as you roll. Wrap and chill overnight. To bake slice thinly. Place on ungreased cookie sheet. Bake in 375◦F oven for about 6 minutes. Makes 4 dozen.
TIPS: The rectangular dough shapes should be approximately 7x12 inches. Roll dough from the short end. Slice about 1/3 inch thick, although you may not get 4 dozen out of it. Dough should not stick to waxed paper too much, but you may want to sprinkle the waxed paper with a light coating of flour as a precaution. I baked mine for 8 minutes, which was the perfect amount of time.
Paré, Jean. "Pinwheels." Recipe. Cookies, Edmonton Alberta: Company's Coming Publishing Limited, 1989. 64.
Thursday, November 24, 2011
Hot Cocoa
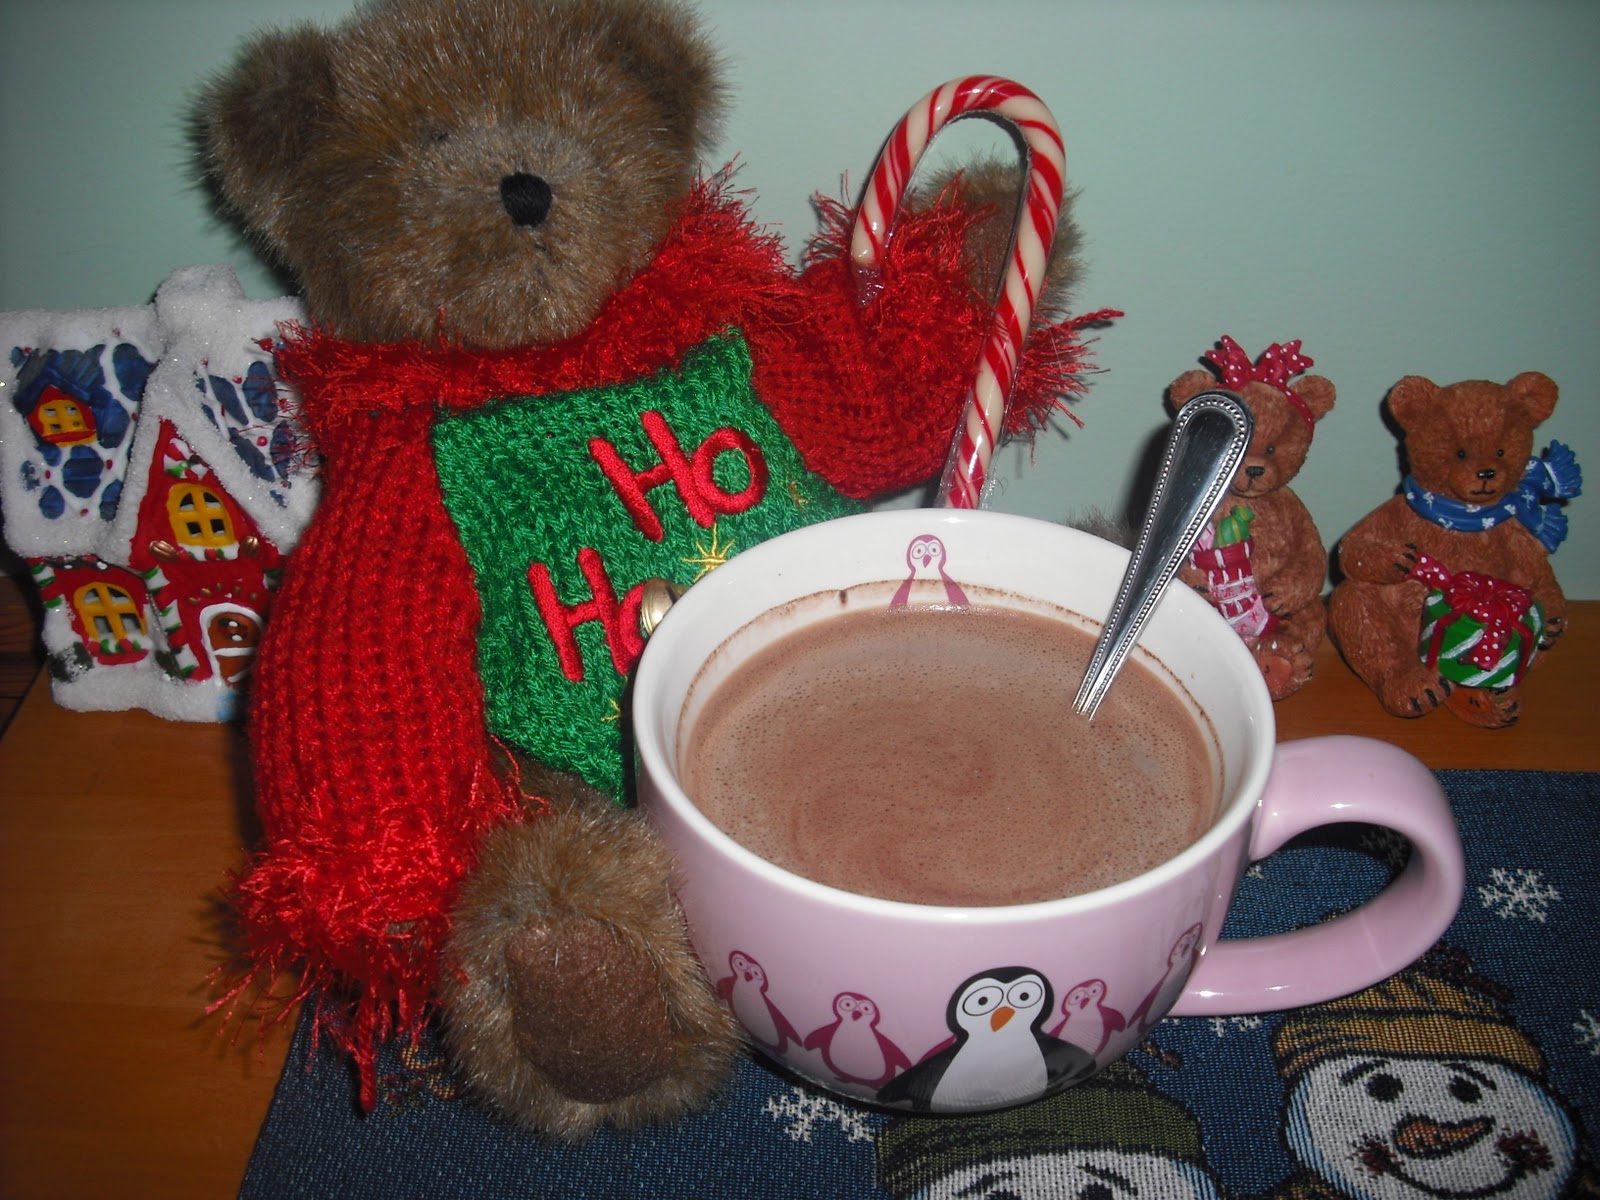
Well, the snow has begun to come, making it the perfect time to enjoy some homemade hot cocoa. Sure, you could just tear open a package or scoop some mix out of a canister and add boiling water, but it won't be anywhere near as delicious as hot cocoa from scratch. There are many different recipes for hot cocoa or hot chocolate, all varying in taste, serving size, preparation technique, and simplicity. Some recipes serve one, others serve twenty-one. Some use the microwave, some use the stovetop. Whatever recipe you choose is up to you! Hot chocolate originated from drinking chocolate, which was the first form of chocolate that gained popularity for consumption. Before then, chocolate existed only as cocoa beans, which were much too bitter to eat on their own. Drinking chocolate is basically melted chocolate, often with additions such as sugar, milk, and vanilla, and is very rich and luxurious. It became increasingly popular in Europe served warm as an indulgent alternative to tea or coffee. This drink eventually transformed into hot chocolate or hot cocoa, which became very commercialized and readily-available. Drinking chocolate isn't very popular today, but you if you get the chance, you should try it; it's divine!
Basic Microwave Hot Cocoa For One
2 teaspoons granulated sugar
1 teaspoon unsweetened cocoa powder
pinch salt
2 teaspoons cold milk
additional milk
In a mug, mix the sugar, cocoa, and salt. Stir in the two teaspoons of cold milk until smooth. Add more milk to fill the cup. Microwave on HIGH (100%) for 1 to 1 1/2 minutes, until hot. Stir to blend.
Rich and Indulgent Microwave Hot Cocoa For One
Follow the same procedure as above, using 2 tablespoons each of cocoa and sugar. Add 1/4 teaspoon of vanilla extract.
Slimmed Down Microwave Hot Cocoa For One
Follow the same procedure as above, replacing sugar with the equivalent of a no-calorie sweetener. Use fat-free milk.
GREAT ADDITIONS AND TOPPINGS: Of course, hot cocoa is very popular served with marshmallows and candy canes. Adding little chocolate bars or chocolate chips is also very good. Hot cocoa is delicious garnished with whipped cream, chocolate or caramel sauce, sprinkles, a dusting of icing sugar or cocoa, or a maraschino cherry.
Additional flavorings for hot cocoa include vanilla extract, instant coffee, ground cinnamon, mint extract, orange extract, maple extract, or a splash or liquor.
Hot chocolate is great for dipping Christmas cookies!
Basic Microwave Hot Cocoa For One
2 teaspoons granulated sugar
1 teaspoon unsweetened cocoa powder
pinch salt
2 teaspoons cold milk
additional milk
In a mug, mix the sugar, cocoa, and salt. Stir in the two teaspoons of cold milk until smooth. Add more milk to fill the cup. Microwave on HIGH (100%) for 1 to 1 1/2 minutes, until hot. Stir to blend.
Rich and Indulgent Microwave Hot Cocoa For One
Follow the same procedure as above, using 2 tablespoons each of cocoa and sugar. Add 1/4 teaspoon of vanilla extract.
Slimmed Down Microwave Hot Cocoa For One
Follow the same procedure as above, replacing sugar with the equivalent of a no-calorie sweetener. Use fat-free milk.
GREAT ADDITIONS AND TOPPINGS: Of course, hot cocoa is very popular served with marshmallows and candy canes. Adding little chocolate bars or chocolate chips is also very good. Hot cocoa is delicious garnished with whipped cream, chocolate or caramel sauce, sprinkles, a dusting of icing sugar or cocoa, or a maraschino cherry.
Additional flavorings for hot cocoa include vanilla extract, instant coffee, ground cinnamon, mint extract, orange extract, maple extract, or a splash or liquor.
Hot chocolate is great for dipping Christmas cookies!
Subscribe to:
Posts (Atom)