Step #1: Leftover chocolate granola + chocolate hazelnut spread (from the bottom of the jar) + oil
 Combine until it is somewhat sticky and press into a pizza pan lined with plastic wrap. Chill until firm.
Step #2: Frozen mixed berries + bittersweet chocolate
Defrost a bowlful of frozen mixed berries (strawberries, raspberries, blackberries, blueberries) until they are soft and have released liquid. Stir in a few chunks of bittersweet chocolate and stir until melted, smooth, and mixture is slightly thickened. Spread over base, leave an edge, is desired.
Step #3: Leftover brittle
Combine until it is somewhat sticky and press into a pizza pan lined with plastic wrap. Chill until firm.
Step #2: Frozen mixed berries + bittersweet chocolate
Defrost a bowlful of frozen mixed berries (strawberries, raspberries, blackberries, blueberries) until they are soft and have released liquid. Stir in a few chunks of bittersweet chocolate and stir until melted, smooth, and mixture is slightly thickened. Spread over base, leave an edge, is desired.
Step #3: Leftover brittle
 Find some leftover nut brittle (pistachio and candied ginger), crush it, and sprinkle it on top.
Serve now or chill until firm!
Here is how to make a really easy, yet really tasty and chocolaty dessert using only leftovers scrounged up from around the house and only one bowl! No expensive ingredients, and no big kitchen clean-ups required!!
Find some leftover nut brittle (pistachio and candied ginger), crush it, and sprinkle it on top.
Serve now or chill until firm!
Here is how to make a really easy, yet really tasty and chocolaty dessert using only leftovers scrounged up from around the house and only one bowl! No expensive ingredients, and no big kitchen clean-ups required!!
Quick Golden Cake Layer
1 cup all-purpose (plain) flour
1 1/2 teaspoons baking powder
1/4 teaspoon salt
1/2 cup granulated sugar
1/2 cup butter or hard margarine, softened
2 large eggs, at room temperature
1/4 cup milk
Preheat oven to 350◦F. Grease and flour an 8 or 9 inch round cake pan.
Put all ingredients in a large bowl. Mix to moisten, then beat 2 minutes until smooth. Pour into prepared pan.Bake for 25-30 minutes, until toothpick inserted in center comes out clean.
This easy layer cake recipe is super simple, super quick, and makes a nice white cake layer to build on, that is firm for ease in decorating. It also comes in handy when you only want one layer and not two.
Paré, Jean. "Fruit Flan." Recipe. Cakes, Edmonton Alberta: Company's Coming Publishing Limited, 1990. 104.
This is a super easy, basic, but delicious biscuit recipe. The directions seem lengthy, but only because I added hints and comments to it. If you are an experienced baker, you won't even need the instructions. The key to awesome biscuits here is to handle them as little as humanly possible to produce the most tender and flaky product. That's right, no kneading!
No-Touch Biscuits
5 cups all-purpose (plain) flour
1/3 cup granulated (white) sugar
5 heaping teaspoons baking powder (HEAPING, don't worry, it won't be too much)
1 teaspoon salt
1 cup margarine (soft tub margarine works fine and is lower in calories & fat)
1 cup milk
1 cup water
Preheat oven to 425◦F. Line a baking sheet with parchment paper.
In a large mixing bowl, stir together the first four dry ingredients Cut in the margarine until blended in, using a pastry blender, fork, two knives, or your hands. Add the milk and water and gently stir in until dough is just moistened, but still dry in spots.
Dump the mixture onto a clean counter or board. Mix together with your hands, adding a little more water if necessary. Dough should be sticky. Pat into a rough rectangle, about 1/2 inch thick. Do not use a rolling pin. Dough will look scrappy, and not smooth, but it's meant to. Do not knead this dough.
Cut the dough with a biscuit cutter, glass, or just into squares using a knife. Place on prepared baking sheet. They may touch, but place them far apart (bake in two batches) if you want crispy sides. If you cut them into squares, placing the biscuits close together will result in almost a "pan biscuit". The biscuits will form together and need to be pulled apart gently. These are delicious!
Bake for 15-20 minutes until risen and golden. Enjoy warm with any spread you like, or reheated later.
Large square biscuits are good for sandwich building.
This bread recipe is quick and easy. The most work is kneading the bread, which I found relaxing and easy, since the dough is soft and smooth. The result is a tasty, healthy bread with a nice crisp crust. It slices well and works well for sandwiches.
Easy Flax Bread
1 3/4 cups warm water
2 Tablespoons granulated (white) sugar, divided
1 package instant yeast
1 Tablespoon oil
1 cup ground flaxseeds
1 teaspoon salt
3 cups whole wheat flour, divided
In a large bowl, dissolve the sugar in the water. Sprinkle the yeast over top, let stand for about ten minutes, until frothy. Stir to dissolve yeast, then stir in oil. Stir in flax, salt, and half of the flour. Gradually stir in the remaining flour, forming a soft dough. Knead for at least ten minutes, until dough is smooth and elastic. The dough will be slightly sticky and moist, but it should not completely stick to your hands. Resist the urge to add extra flour, unless absolutely necessary.
Place the dough in a greased bowl, cover and let rise until doubled in bulk. Depending on the temperature, this could take anywhere from one to two hours. Don't judge by time, judge by bulk.
Punch dough down and place in a greased 9x5 inch loaf pan. Let rise again until doubled in bulk.
Bake at 350◦F for 40-45 minutes.
This is a quick soup my mother whipped up today for lunch tomorrow using ingredients she had on hand. It is certainly nothing special or difficult to make, but it sure is tasty. She simply took the vegetables she had on hand and made them into soup with some pasta - no meat, because there was no leftover meat on hand. The vegetables featured in this soup are: onion, carrots, peas, and potatoes There are some fettuccine noodles boiled in chicken broth - and there you have some tasty soup! Quick, easy, nutritious, and something good to warm you up on a chilly Fall day. My grandmother is a big fan of soup, she could eat it everyday. My mother enjoys soup on occasion, but not everyday. I also really like most soups, but I would not want it everyday. I guess you know who the real soup fans are when they eat hot soup on a hot summer day, which my grandmother is known to do, and I have also done on occasion. Soups are an easy, quick, tasty, and hearty meal to have anytime really!
Coffee Squares
1/2 cup butter or hard margarine, softened
1 1/2 cups packed brown sugar
1 large egg
1 1/2 cups all-purpose (plain) flour
1/2 teaspoon baking soda
1/2 teaspoon salt
1 teaspoon vanilla extract
1/2 cup strong warm coffee
1/2 cup semi-sweet chocolate chips
Preheat oven to 350◦F. Line a 9x13 inch rectangular baking pan with parchment paper.
In a large bowl, cream the butter and sugar. Beat in the egg. Add remaining ingredients except the chocolate chips. Spread evenly in prepared pan. Sprinkle with chocolate chips. Bake for 30 - 35 minutes. Cool and cut into squares.
This is a quick and easy recipe I found online. I was looking for a squares recipe that was a bit different, but one made with common ingredients that anyone would love. Of course, the addition of a bit of chocolate makes these squares extra good. The smell of these baking is irresistible! They come out, soft, moist, and tasty They are a not-too-sweet square that you can just gobble up. They certainly turned out much better than the last squares I made...
This is the completed product from the base I made yesterday. When I read this recipe first, I thought it sounded really good and easy, and actually I had been wanting to make it for awhile now. However, while I was making these squares, I was beginning to doubt this recipe even though it came from a very reliable source. Things were not working out the greatest. This story does have a happy ending, as the squares turned out very yummy! My only complaint is the recipe is too small, there are not enough squares. Here is how the squares were finished:
Cut the base in half vertically, spread with vanilla filling, and place other half on top. The recipe just stated to cut the bars in half, so I assumed they meant horizontally otherwise you would end up with a very small batch of bars. However, the base was so thin there was no way it could be cut in half horizontally.
Vanilla Filling
1 Tablespoon margarine, melted
3/4 cup icing sugar
1 1/2 teaspoons milk
1/2 teaspoon vanilla extract
In a small bowl, mix all ingredients together until smooth, adding more sugar of milk if necessary to achieve a thick but spreadable consistency.
Spread the top of the bars with chocolate glaze. Place in the refrigerator and chill briefly (an hour or more) before cutting. Store in the fridge.
Chocolate Glaze
2 Tablespoons granulated (white) sugar
1 Tablespoon water
1/4 cup semi-sweet chocolate chips
In a small saucepan, heat the sugar and water to a boil. Remove from heat and quickly stir in chocolate chips until smooth. Use immediately.
Next time, I would double the base recipe and bake it in a 9x13 inch rectangular pan. That way, when I cut the base in half, I would still have a pan of squares the size of an 8x8 inch square pan. I would double the vanilla filling recipe as well, but not the chocolate glaze, because I had plenty leftover. The chocolate glaze is a different concept than most, very quick to make and does not crack when you cut the squares as plain melted chocolate would, as long as you do not chill the squares too long before cutting. These seem like a lot of work for a small batch, because it takes three steps, but each step is fairly quick. And the bars are worth the effort. Overall, a very scrumptious square!
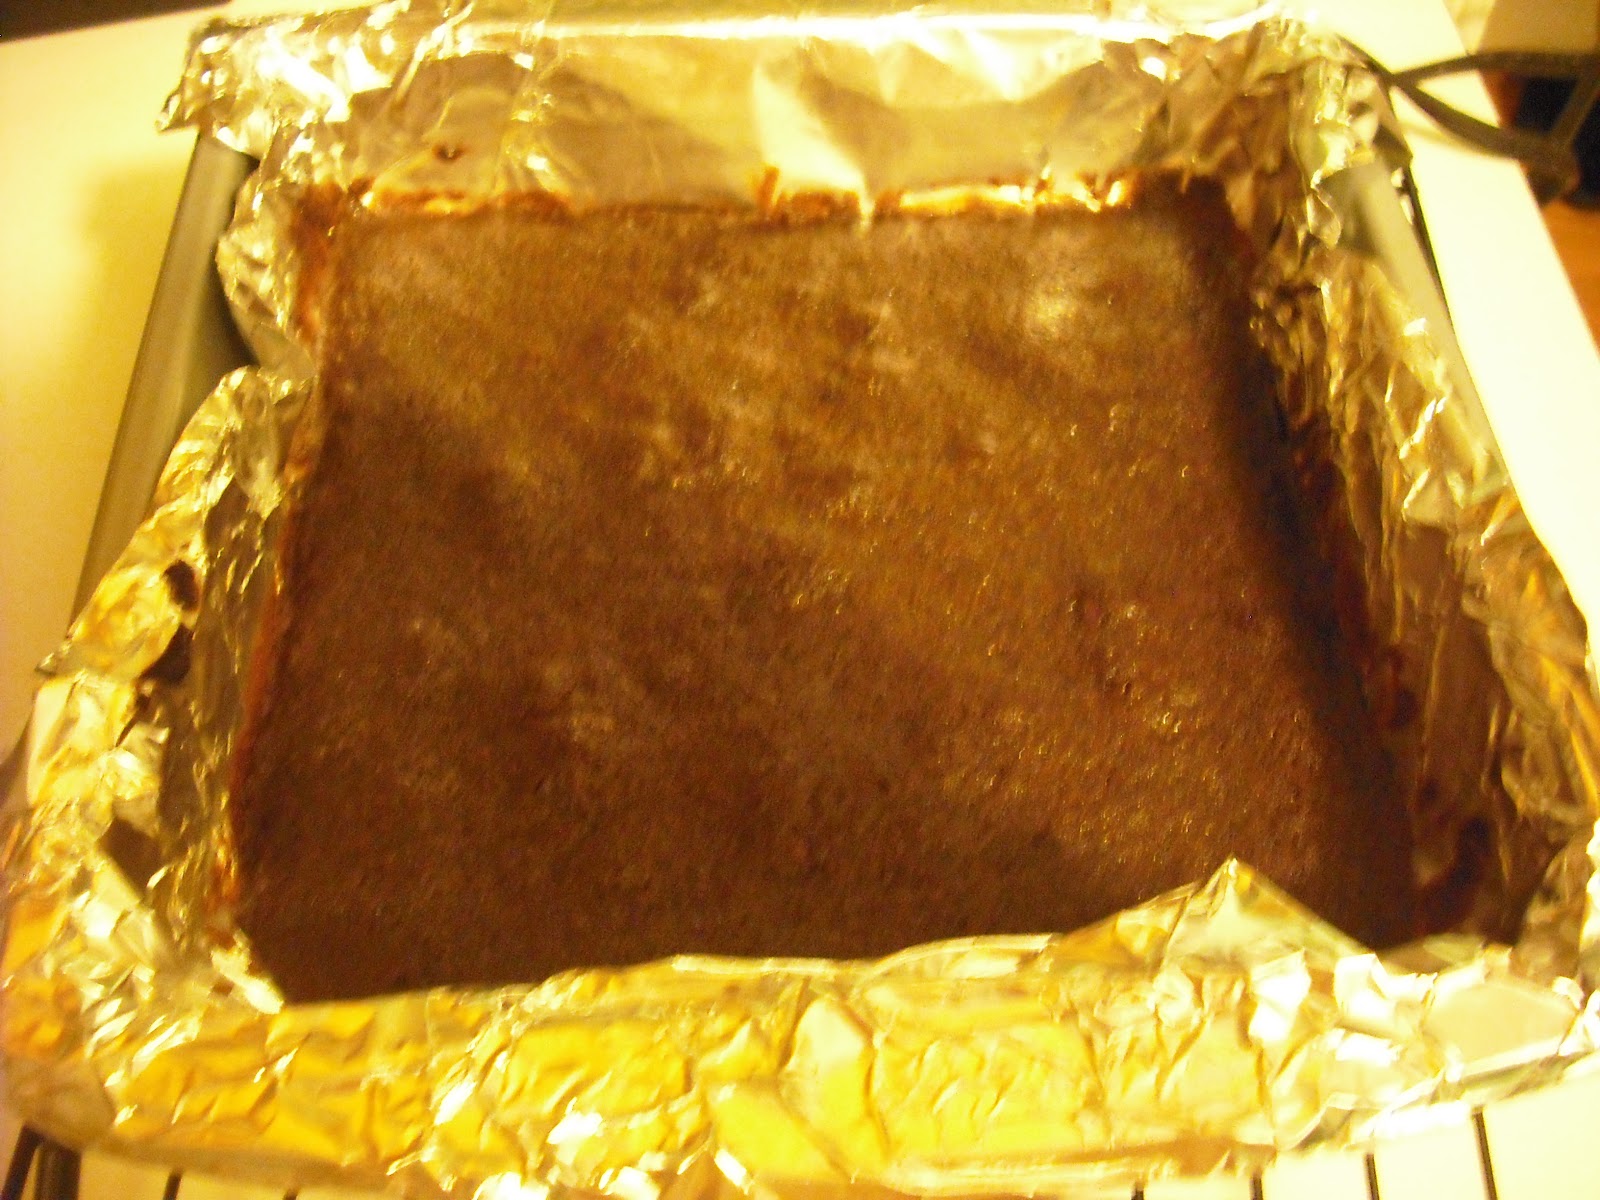
Tonight I made a quick chocolate bar base for bars I will finish making tomorrow. This is just a simple, easy brownie-type base for some chocolate squares that will be filled and iced. The base for these bars takes about fifteen minutes to make, twenty max. They are so easy, and if you want, you can use this base for brownies, ice cream sundaes, strawberry shortcakes or just eat it plain! It is so easy and simple to remember. Once this base cools, it will be cut in half horizontally, filled with a vanilla filling, and topped with a chocolate icing. Here is the recipe for the base:
Chocolate Bar Base
1/4 cup + 1 Tablespoon hard margarine or butter, melted
3 Tablespoons unsweetened cocoa powder
1 large egg
1 teaspoon vanilla extract
1/2 cup granulated (white) sugar
1/3 cup all-purpose (plain) flour
pinch salt
Preheat oven to 400◦F. Line an 8x8 inch square baking pan with foil and lightly grease foil.
In a medium mixing bowl, mix the butter and cocoa until smooth. Add remaining ingredients, mix well. Spread evenly in prepared pan. Bake for ten minutes.
Peanut Butter Bars
1/2 cup butter or hard margarine, cut up
1/2 cup packed brown sugar
1/2 cup all-purpose (plain) flour
1 1/2 cups quick-cooking rolled oats
1/4 cup corn syrup
3/4 cup semi-sweet chocolate chips
1/2 cup smooth peanut butter
A handful of finely chopped peanuts for the top, optional
Preheat oven to 350◦F. Grease or line an 8x8 or 9x9 inch square baking pan.
In a medium saucepan over medium heat, stir the first five ingredients until melted and smooth. Press into prepared pan. Bake for 15 minutes until set and edges are golden. Cool.
In a small saucepan over medium heat, melt the chocolate chips with the peanut butter. Spread evenly over base. Sprinkle with peanuts, if desired.
These are some quick and easy bars I whipped up. Anyone who likes the classic combination of chocolate and peanut butter will love these. They are so quick and easy and keep well. Do not refrigerate them before cutting, or they will be too hard. Actually, don't bother refrigerating them at all, they are better at room temperature. This recipe may easily be doubled to fit a 9x13 inch pan. I didn't have any peanuts for the top, so I was trying to think of something else that might look nice, just to add a little more jazz to the bars. I thought of both toffee bits and shredded coconut, but I did not want to open either package just for a handful, and these flavors didn't really go with the chocolate and peanut butter. I settled on a simple dusting of icing sugar.
Chocolate Syrup Brownies
1/4 cup butter or hard margarine, softened
1/2 cup granulated (white) sugar
2 large eggs
1/2 cup chocolate syrup or thick chocolate sauce (or hot fudge)
1/2 cup all-purpose (plain) flour
Preheat oven to 350◦F. Line an 8x8 inch square pan with foil, lightly grease the foil. In a medium bowl, cream the butter and sugar. Add the eggs, then the chocolate syrup, then the flour. Mix well. Pour into prepared pan. Bake for 30 minutes.

I thought the classic brownie recipe I usually used was as simple and quick as possible, but these brownies are even faster and easier! Of course, that is only after the chocolate sauce is already made, or if you happen to have chocolate syrup on hand. There are only five ingredients to this recipe, and one bowl. Anytime you want brownies, these are very quick to whip up, and they can even be frosted as soon as they come out of the oven. Any chocolate frosting will do, or just sprinkle the hot pan with chocolate chips as soon as they are done baking, let stand for a few minutes, then spread smooth. I made these brownies a few days ago to use up the leftover chocolate sauce and chocolate frosting, both of which will keep for at least a week refrigerated, from the chocolate cake (not like there was enough chocolate around). They aren't as fudgey and rich as my usual brownie recipe, but they are still pretty good.

I found this quick, easy recipe for cinnamon rolls in Company's Coming "Muffins And More". I made some with raisins, and some without. The ones without look more neatly formed, but they are both good.These cinnamon rolls are made from a very simple dough that is soft and fluffy and very easy to work with. It is spread with an easy filling, rolled up, cut, and then placed into muffin tins to bake. This gives the cinnamon rolls a nice shape and even baking. Even though I thought I had used plenty of grease in the pan, I still found my cinnamon rolls stuck a bit. The recipe states to place a teaspoon of filling into the bottom of each muffin cup, but after trying this, I would not recommend it. I found that most of this filling just stuck to the bottom of the pan, and did not end up on the cinnamon rolls at all, which both gypped the cinnamon rolls and wasted filling. I would recommend either spreading all of the filling onto the rolled out dough, or using a teaspoon of filling on TOP of each cinnamon roll. Dumping the cinnamon rolls did not work either, they stuck too much, and too much of the filling began to come off. Also, if they are dumped, they end up upside down, because the top does look better than the bottom facing into the cup. I used a spoon to carefully scoop the rolls out. If you do this while the rolls are too warm, the dough will tear apart, so at least cool them slightly if not completely. If you grease the pan very well, not only will the rolls stick less, they will also have a richer, more buttery topping. After you get past the problems of the rolls sticking, they are quite tasty, with or without raisins. There are not quite as good as the cinnamon roll recipe I usually use, but they are quicker, and more of a muffin-like cinnamon roll that is good for breakfast rather than me sweet dessert cinnamon rolls.
Jiffy Cinnamon Rolls
1/3 cup butter or hard margarine, melted
1 cup packed brown sugar
1 Tablespoon ground cinnamon
2 cups all-purpose (plain) flour
2 Tablespoons granulated (white) sugar
4 teaspoons baking powder
1 teaspoon salt
1/4 cup cold butter or hard margarine, cut-up
1 cup cold milk
1/3 currants or raisins (optional)
Preheat oven to 400◦F. Grease a 12 cup muffin tin.
In a small bowl, combine the first amount of butter, brown sugar, and cinnamon. Place one measured teaspoon of filling into the bottom of each muffin cup. Set remaining mixture aside.
In a separate large bowl, mix the flour, sugar, baking powder, and salt. Cut in the butter until crumbly. Make a well in the center and stir in the milk. Knead the dough, adding a little additional flour as necessary, for 6 to 8 minutes until dough is smooth and elastic. Roll dough out on a lightly floured surface to a twelve inch long rectangle, approximately one centimetre thick.
Spread dough with remaining cinnamon mixture, leaving a small border all around. Sprinkle with currants or raisins, if desired. Roll up dough from a long end, jelly roll style. Pinch seams to seal. Cut into twelve slices. Place each slice, cut side down, into a muffin cup. Bake for 20 to 25 minutes. Turn out onto a tray. Ice with a simple vanilla glaze or a cream cheese icing, if desired.
Paré, Jean. "Jiffy Cinnamon Rolls." Recipe. Muffins & More, Edmonton Alberta: Company's Coming Publishing Limited, 1983. 87.
Who doesn't love the classic, simple, and delicious Rice Krispie squares (or crisp rice cereal squares, if you don't want to use brand names)? Whether they came directly from a box, or were homemade from cereal in a box, they are quite tasty squares. Slightly surprising, considering they take about five minutes to make, and contain only three to four ingredients (crisp rice cereal, marshmallows, butter or hard margarine, and sometimes vanilla extract). They are so simple to make, I even have the recipe memorized; six cups of cereal to one bag of marshmallows, and two tablespoons butter plus a splash of vanilla). Although the classic version is such a favorite, I have also made chocolate, fudge, chocolate caramel, and chocolate butterscotch versions of these squares. I have also used this cereal in countless other recipes, mostly cookies and other squares. There are now also different flavors of crisp rice cereal you can buy to make different kinds of squares, including vanilla, cocoa, and whole grain. Crisp rice cereal and marshmallows seem to go very well together, just maybe not for breakfast. I prefer to make homemade crisp rice cereal squares, because I like everything homemade, they taste better, have less preservatives, and you can control exactly what goes in them. Plus these squares are so quick and simple to make, there really is no excuse to buy them instead of make them. I will include the recipe in case you don't know it, but it is featured on many crisp rice cereal boxes, as well as in cookbooks and online.
Crisp Rice Cereal Squares
1/4 cup butter or hard margarine
1 bag (250 grams) miniature marshmallows (or about 40 large)
6 cups crisp rice cereal
a splash of vanilla extract (optional)
In a large pot over medium heat, melt the butter and marshmallows together. Stir in the cereal, and vanilla if desired, until well coated. Spread into a lightly buttered 9x13 inch rectangular pan. Set aside to cool and set before cutting.
We always seem to buy more bananas than we can eat, even though we are big banana eaters. Bananas tend to ripen even faster in the summer heat, so we always have some speckly ones to use up before they go to waste. We have some go-to recipes for banana cakes and muffins, which are delicious, but I am always looking for new ones to try something different. Here is a really quick, easy, and chocolatey one I found.
Double Chocolate Banana Cake
2 cups all-purpose (plain) flour
1 cup granulated (white) sugar
2 Tablespoons unsweetened cocoa powder
1 teaspoon baking powder
1/2 teaspoon salt
3/4 cup milk
1/2 cup banana, mashed (1 large or 2 small)
1/3 cup butter or hard margarine, melted
1 Tablespoon lemon juice*
1 teaspoon vanilla extract
3/4 cup miniature semi-sweet chocolate chips
Preheat oven to 350◦F. Grease or line a 9x9 inch or 8x8 inch square baking pan.
In a large bowl, combine the first five dry ingredients. Make a well in the center. Pour remaining ingredients except for chocolate chips into the well. Beat well with a fork for two minutes, or until well combined. Stir in chocolate chips. Pour into prepared pan. Bake for 45-50 minutes or until a toothpick inserted into the center comes out clean (an 8x8 inch cake may take a bit longer to bake). Dust with confectioner's sugar before serving, if desired.
*NOTE* I didn't have lemon juice, so I left it out and added a bit more vanilla extract and a splash more milk. This worked out fine.
“Easy Double Chocolate Banana Snack Cake.” http://www.dairygoodness.ca/recipes/easy-double-chocolate-banana-snack-cake. Dairy Goodness, n.d. Thursday, July 5, 2012.
Using a simple white cake recipe I found in Company's Coming "Cakes" cookbook, I made two cake layers for a cake I will decorate for Mother's Day tomorrow. The cake recipe was super quick and easy - and only required placing all of the ingredients together in one bowl and mixing them up. I hope the cake is as great tasting as it is easy to make. I also hope it is moist, as no one likes a dry cake. It's basically a simple butter cake with a subtle vanilla flavor. It could be used for celebration cakes, shortcakes, Boston cream cakes, and more.
One Bowl White Cake
2 cups all-purpose (plain) flour
2 teaspoons baking powder
1/2 teaspoon salt
1 cup granulated sugar
1/2 cup butter or hard margarine, softened
2 large eggs
1 teaspoon vanilla extract
1 cup milk
Preheat oven to 350◦F. Grease two 8-inch round cake pans. Put all ingredients into a large mixing bowl (order of ingredients doesn't really matter). Using an electric mixer, beat on slow speed until ingredients are moistened, then beat at medium speed for about two minutes or until batter is smooth. Divide batter evenly among prepared pans. Bake for about 30 minutes, or until a toothpick inserted into the center of a cake comes out clean. Cool in pans on a wire rack for ten minutes, then remove from pans to cool completely.
Paré, Jean. "One Bowl White Cake." Recipe. Cakes, Edmonton Alberta: Company's Coming Publishing Limited, 1990. 111.
It is always a bit of a challenge to cook in a kitchen you aren't totally familiar with. I was faced with that challenge today. A lot of milk and yogurt needed to be used up so it would not go to waste, so a group of us were given two recipes, biscuits which use milk, and muffins which use yogurt, and we were set to bake. The final products of both the biscuits and the muffins were very good, considering the instructions were not very specific and we didn't know where anything was. That's how I discovered a potato masher works almost as well as a pastry blender to cut margarine into biscuit dough. Both recipes are very simple, quick, and tasty. Unfortunately, I don't have any pictures of these delicious creations.
Biscuits
5 cups flour
1/3 cup sugar (granulated/white)
2 Tablespoons baking powder
1 teaspoon salt
1 cup margarine (soft tub works just fine, but hard margarine or butter will work too)
2 cups milk (or use 1 cup milk and 1 cup water)
Preheat oven to 400◦F (personally, I think 425◦F would have made for better browning of the biscuits). In a large bowl, mix the flour, sugar, baking powder, and salt. Cut in the margarine using a pastry blender, two butter knives, or a fork (a potato masher works as well). Stir in the milk until dough begins to come together. Turn out onto a lightly floured surface and knead until smooth, about five minutes, adding a little more flour if necessary. Roll out dough about 1/2 inch thick, and cut with cookie cutters or just cut into squares or rectangles with a knife. Arrange them on an ungreased baking sheet, touching if you want softer sides, or far apart if you want them crispy. Bake for 15-20 minutes or until light golden. Makes about 20 biscuits, depending on size. It seems to be a lot of flour for only 20 biscuits, but it's not. It also seem to be a lot of baking powder, but the muffins rise beautifully.
Yogurt Muffins
I managed to memorize the biscuit recipe, but I cannot remember the muffin recipe, nor can I find it online. All I remember was flavored yogurt (we used strawberry and banana, but feel free to experiment) was used in place of oil and milk. I believe the muffins also contained sugar, egg, melted butter, flour, baking powder, salt, and chocolate chip. Chocolate chip and strawberry yogurt may sound a little strange, but the muffins were very moist and delicious!
Here is a really easy and quick recipe to use when you need just a small batch of cupcakes. The recipe calls for a yield of 14 cupcakes, although I only got 11, and I thought they were small at that. Keep in mind though, that these cupcakes do rise quite high. Also take note that this recipe is egg-free and dairy-free, so it is good for allergies.
Quickest Chocolate Cupcakes
1 1/2 cups all-purpose (plain) flour
3/4 cup granulated sugar
1/4 cup unsweetened cocoa powder
1 teaspoon baking soda
1/2 teaspoon salt
1 cup water
1/4 cup oil
1 Tablespoon white vinegar
1 teaspoon vanilla extract
Preheat oven to 375◦F. Line a muffin tin with paper liners.
In a large bowl, mix the first five ingredients. Add remaining ingredients, mix just until combined and batter is smooth. Fill muffin cups 2/3 full. Bake for 16 to 18 minutes or until a wooden toothpick inserted into the center of a muffin comes out clean.
West Side Publishing. "Quick Chocolate Cupcakes." Recipe. Hershey's Classic Recipes, Lincolnwood Illinois: Publications International, Limited, 2009. 126.
This afternoon I whipped up a small batch of cake and was enjoying it within thirty minutes. I think this is the quickest chocolate cake recipe ever, although having a helper might have helped speed things up a little. Nevertheless, this cake recipe is very fast. It's great for when you need to whip up a cake on very short notice, get the sudden craving for cake, or just want a quick and easy recipe. Typically cakes are not eaten warm, but this cake is delicious straight from the oven. It can also be dressed up any way you want. We added chocolate chips to the batter, but you could also add chopped nuts, coconut, chopped fruit, or even mashed banana. We also served our cake with warm caramel sauce, but again, you could serve it with hot fudge sauce, chocolate sauce, ice cream, whipped cream, cherry sauce, glaze, or icing. You could also use cherries, toasted nuts, chocolate pieces, or sprinkles as garnishes. The possibilities are endless, and all of them work whether you serve the cake warm or cold. If you want something really quick, just sprinkle the top of the cake with some chocolate chips before baking, and when the cake comes out of the oven, spread the chocolate chips in an even layer with a knife for an instant icing.

Chocolate Snack Cake
2 Tablespoons butter or hard margarine, softened
1/2 cup granulated sugar
1 large egg
1/3 cup milk
1/2 teaspoon vanilla extract
2/3 cup all-purpose flour
2 Tablespoons unsweetened cocoa powder
1/2 teaspoon baking powder
1/2 teaspoon baking soda
1/2 teaspoon salt
Preheat oven to 350◦F. Grease a 9x9 inch pan.
In a medium mixing bowl, beat the first five ingredients. Add remaining ingredients and beat until smooth. Pour into prepared pan and bake for about 14 minutes, or until a wooden toothpick inserted into the center of the cake comes out clean.
Notes: I used chocolate milk in the cake, which seemed to work really well. I also added 1/2 cup semi-sweet chocolate chips to the batter. I used an 8x8 inch square pan instead of a 9x9 inch, which made the cake higher, but increased the baking time by about 4 minutes or so. The cake actually cuts quite neatly, even when piping hot. The recipes comes from Company's Coming "Sweet Cravings".
Paré, Jean. "Chocolate Snack Cake." Recipe. Sweet Cravings, Edmonton Alberta: Company's Coming Publishing Limited, 2002. 22.
I made these Double Chocolate Brownie Bars yesterday and they are delicious!!! They are rich, fudgey, and have plenty of chocolate. They are also so simple and quick to make. This recipe makes a nice big pan, although it could easily be halved for a smaller batch. I got 32 brownies out of my 9x13 inch pan, but these brownies could definitely be made bigger. I wouldn't recommend cutting them any smaller than that, because then everyone will want to eat at least two of them. These brownies are so rich, they don't even need an icing, although you could always add them for more chocolate! They would also make an excellent base for ice cream and chocolate sauce, or whipped cream and chopped nuts. Whatever way you serve them, they sure won't be around for long!
Double Chocolate Brownie Bars
1/2 cup (1 stick) butter or hard margarine
2 cups (one 12-ounce package) semi-sweet chocolate chips, divided
1 1/2 cups granulated (white) sugar
1 1/4 cups all-purpose (plain) flour
3 large eggs
1 teaspoon vanilla extract
1/2 teaspoon baking powder
1/2 teaspoon salt
1 cup coarsely chopped walnuts (optional)
Preheat oven to 350◦F. Grease a 9x13 inch baking pan, or line with parchment paper for easy removal and cutting.
Place butter and 1 cup of chocolate chips into a large microwave-safe bowl. Microwave on HIGH (100% power) for 1 to 1 1/2 minutes, or until chips are melted and mixture is smooth when stirred.
Add remaining ingredients except for nuts and chocolate chips, stir until smooth. Stir in remaining 1 cup of chocolate chips. Spread batter into prepared pan, sprinkle walnuts over top, if desired.
Bake for 30 minutes, or until center is set. Cool completely in pan on wire rack. Cut into bars, and store tightly covered at room temperature.
This recipe is from my Hershey's Classic Recipes cookbook. I didn't bother putting the nuts on top, the brownies are definitely delicious without them, but if you like nuts, feel free to add them. I found these bars a lot easier to cut if they were put into the refrigerator for just a few hours after they cooled. I just lifted the entire pan of squares out by the parchment paper and placed them on a cutting board. Then when I was ready to cut them, I took the parchment paper off and cut them into bars. They were really easy to cut and not messy at all.
Publications International Limited. "Double Chocolate Brownie Bars." Recipe. Hershey's Classic Recipes, Lincolnwood Illinois: Publications International, Limited, 2000. 47.

Here is a unique twist on a popular classic: Reverse Nanaimo Bars. For those who aren't familiar with Nanaimo Bars, they are a popular Canadian confection named after their place of origin, Nanaimo, British Colombia. These are fairly easy, three-layer, no-bake squares. There are a few different recipe variations around for them, but they all have the same basic idea. They start with a chocolate base chock full of coconut, walnuts, and graham cracker crumbs. That is followed by a buttercream layer flavored with vanilla custard powder, and a smooth topping of melted semi-sweet chocolate. Custard powder was invented by a man who's wife adored custard, but she was allergic to eggs. So he came up with the powder. It can be tricky to find in some areas, but instant vanilla pudding can be used in place of it (I have even omitted it completely, the bars are still delicious!). Nanaimo bars are easy and quite visually appealing, the only drawback is that they must be prepared in three stages, and refrigerated after each one. The only lengthy part of the preparation is the chilling. It is a good recipe to make when you have several small chunks of time on your hands instead of one big one.
In this variation, instead of the usual white layer between two chocolate, there is a chocolate layer between two white. The base is pretty much the same, except in place of cocoa powder, there is melted white chocolate. The middle still contains custard powder, but also has the addition of cocoa. And the top is simply melted white chocolate, with a semi-sweet chocolate drizzle for a little extra garnish. I really like traditional Nanaimo Bars, but this twist was nice for a change, it was something different and was still very tasty.
These squares turned out nice and sweet, without being too rich. They are easy to cut and store, and surprisingly the chocolate topping did not crack. The flavors of white chocolate and semi-sweet chocolate work very well together.
Tonight for supper I cooked up a quick, easy, and quite tasty dish. First, I sauteed some pork chops in a frying pan in a little oil over high heat. The trick to a nice sear and a flavorful crust is to have the pan really hot before adding the chops. I cooked them for about 5 minutes per side, just to get some color on them. I found it best to just leave them plain - don't dredge them in egg, coat in flour, or season, as there will be enough flavor in the sauce. Then I transferred them to a lightly oiled ovenproof pot, covered it and put it in a 350◦F oven to finish cooking the pork chops. They took about 30 minutes.
For the sauce, I added a little extra oil to the pan I used to saute the pork chops. Then I added some diced onion, and cooked it, scraping up the brown bits from the pork, until the onions caramelized. I then added some fresh sliced mushrooms, and deglazed the pan. I made it into a sauce by adding some cream of mushroom soup and gently simmering until smooth and thick. This thick, creamy sauce is an excellent accompaniment to the tender, juicy pork. Serve each chop with a generous spoonful of sauce, plus a little extra on the side. Quick, easy, and delicious!
 Combine until it is somewhat sticky and press into a pizza pan lined with plastic wrap. Chill until firm.

 Find some leftover nut brittle (pistachio and candied ginger), crush it, and sprinkle it on top.