
Showing posts with label pizza. Show all posts
Showing posts with label pizza. Show all posts
Wednesday, July 13, 2016
Vegan Lunch
This is a lunch my coworkers made for me one day. We all take turns making kunch for the day. Usually the main items are not vegan but they are very good at making a tasty alternative for me. Featured here is a delicious warm bean salad, crisp pita bread, and spicy dipping sauce, and salad. The rest of them has pizza today and although vegan pizza would have been an easy possibility, I really appreciated this combination oif foods that went really well together. The 'pita' bread is really the dough from the piza crust brushed with vegan margarine.

Friday, May 08, 2015
Perfect Pizza Dough
This pizza dough recipe is really a cinch to make and makes a perfect pizza every time! There are two alternative ways to make it; you could use a food processor instead of a stand mixer, or you could do it by hand but then it won't be as much of a cinch and will require some kneading.
Perfect Pizza Dough
4 cups all-purpose (plain) flour
1 Tablespoon instant yeast
1/2 teaspoon salt
2 cups warm water
1/4 cup oil
In the bowl of a stand mixer, combine 3 cups flour, the yeast, and the salt. Attach the dough hook and mix on low, gradually streaming in the water, then the oil. Increase speed to medium, gradually add the remaining one cup of flour. Increase speed to high and mix until the dough forms into a ball.
Dough can be used immediately, but will benefit from resting. Form into a round ball and place in a greased bowl, turning once to grease top. Cover bowl with plastic wrap and place in a warm spot. This can be done for a few minutes or a few hours. This dough will make one large (12-15") or two small (8-9") pizza crusts. Alternately, it can be used for individual pizzas, calzones, and more. If you need to divide the dough, cut it, round each piece, and allow to rest for a few minutes before rolling it out.
My nine inch pizza crusts took about ten minutes to bake at 425◦F.
I would classify this neither as a thick or thin crust dough, it's somewhere in between. But to true pizza connoisseurs, I guess it would have to be a thick crust as it certainly isn't a paper-thin dough. It rises quite nicely if allowed to rest as well as in the oven. And has a pleasing chewy and crisp texture that can stand up to heavy toppings and rich sauces.

Friday, November 14, 2014
Flammkuchen
Flammkuchen or Tarte Flambée is a dish I fell in love with while travelling this past summer. It is something like pizza, but don't call it pizza, because it is so much better. It is a bread dough rolled really thinly and baked to be really crisp. Regular pizza dough recipes rolled extra thinly may be used, but this easy recipe does not even contain any yeast or leavening agent. Restaurants serving flammkuchen usually have special boards and cutting implements to bake and serve them, but a really hot oven will do the trick at home. The crust must be thinner than a cracker, and crispier to. Mine turned out a tad too thick because I made too much dough and didn't have the baking sheet, oven space, or fridge room to bake a separate batch.
 Flammkuchen
3 cups flour (all-purpose, or half all-purpose, half whole wheat)
1 teaspoon salt
1/4 cup oil
1 cup water
In a medium bowl, stir together the flour and salt. Stir in the oil and water. Knead if needed, just until dough forms a smooth ball. Set aside to rest.
Roll dough as thin as possible, almost paper thin. Flammkuchen does not have an outside crust like pizza, but mine has a bit of one to keep the toppings on and use the extra dough.
At this point the dough can be placed aside to rest again, or topped and baked, or topped and refrigerated until baking time.
Preheat oven to the highest temperature possible. Heat a baking sheet or wooden board in the oven to heat.
Place crust on the prepared tray and bake for 10-20 minutes until crisp and golden.
Toppings: traditional flammkuchen toppings are crème fraiche, onions, and ham, but there are a variety of different flavors just like pizzas, Mediterranean, artisan, Mexican, etc.
I topped mine with a homemade tahini-Greek yogurt and spice mixture to imitate crème fresh, caramelized onions and mushrooms, and parsley.
To read more about flammkuchen, look here: {Flammkuchen}.
Sunday, October 19, 2014
Grilled Pizza with Pear

Any type of pizza dough of your preference may be used, but I recommend rolling it relatively thinly - thick enough to hold up the toppings but no thicker. Grill the pizza crust; it is fine if the dough is neither a perfect circle nor a perfect rectangle - it won't matter. Then top the pizza in any fashion you wish, using rings of caramelized onion, thinly sliced pear, thinly sliced fresh mozzarella balls, some arugula leaves, and prosciutto. Then bake at 450◦F for about ten minutes until the crust is golden and the cheese is melted. Then cut into bite-sized squares and eat a bunch of them! Arranging them in a staggering pattern on the platter is easy to do but really upscales the presentation factor.
Tuesday, July 29, 2014
Flammkuchen
The traditional flammkuchen toppings are crème fraîche, onions, and diced ham. Most flammkuchens are not spread with tomato sauces like pizza, but rather a lighter topping such as crème fraîche or pesto. There is just enough sauce to coat the bread and add a little flavor. Flammkuchen isn't loaded down with globs of cheese either, but mozzarella, feta, goat cheese, or Camembert are used more sparingly. Vegetables and meats are cut into small pieces and added on. There are some signature flammkuchens such as traditional, Mediterranean, Mexican, and Artisan, but you can also usually choose your own toppings as well. There are even dessert flammkuchens which often feature fresh fruit, and a sauce of perhaps chocolate or liquor, which is then flambéed further.
I fell in love with flammkuchen on my trip, but it's not something I can purchase around here. Even frozen flammkuchen was good, but it's not sold here. Perhaps this will be another recipe I attempt? Pictured above is the best flammkuchen I tried - a Mediterranean, and pictured below is the traditional flammkuchen.

Sunday, June 29, 2014
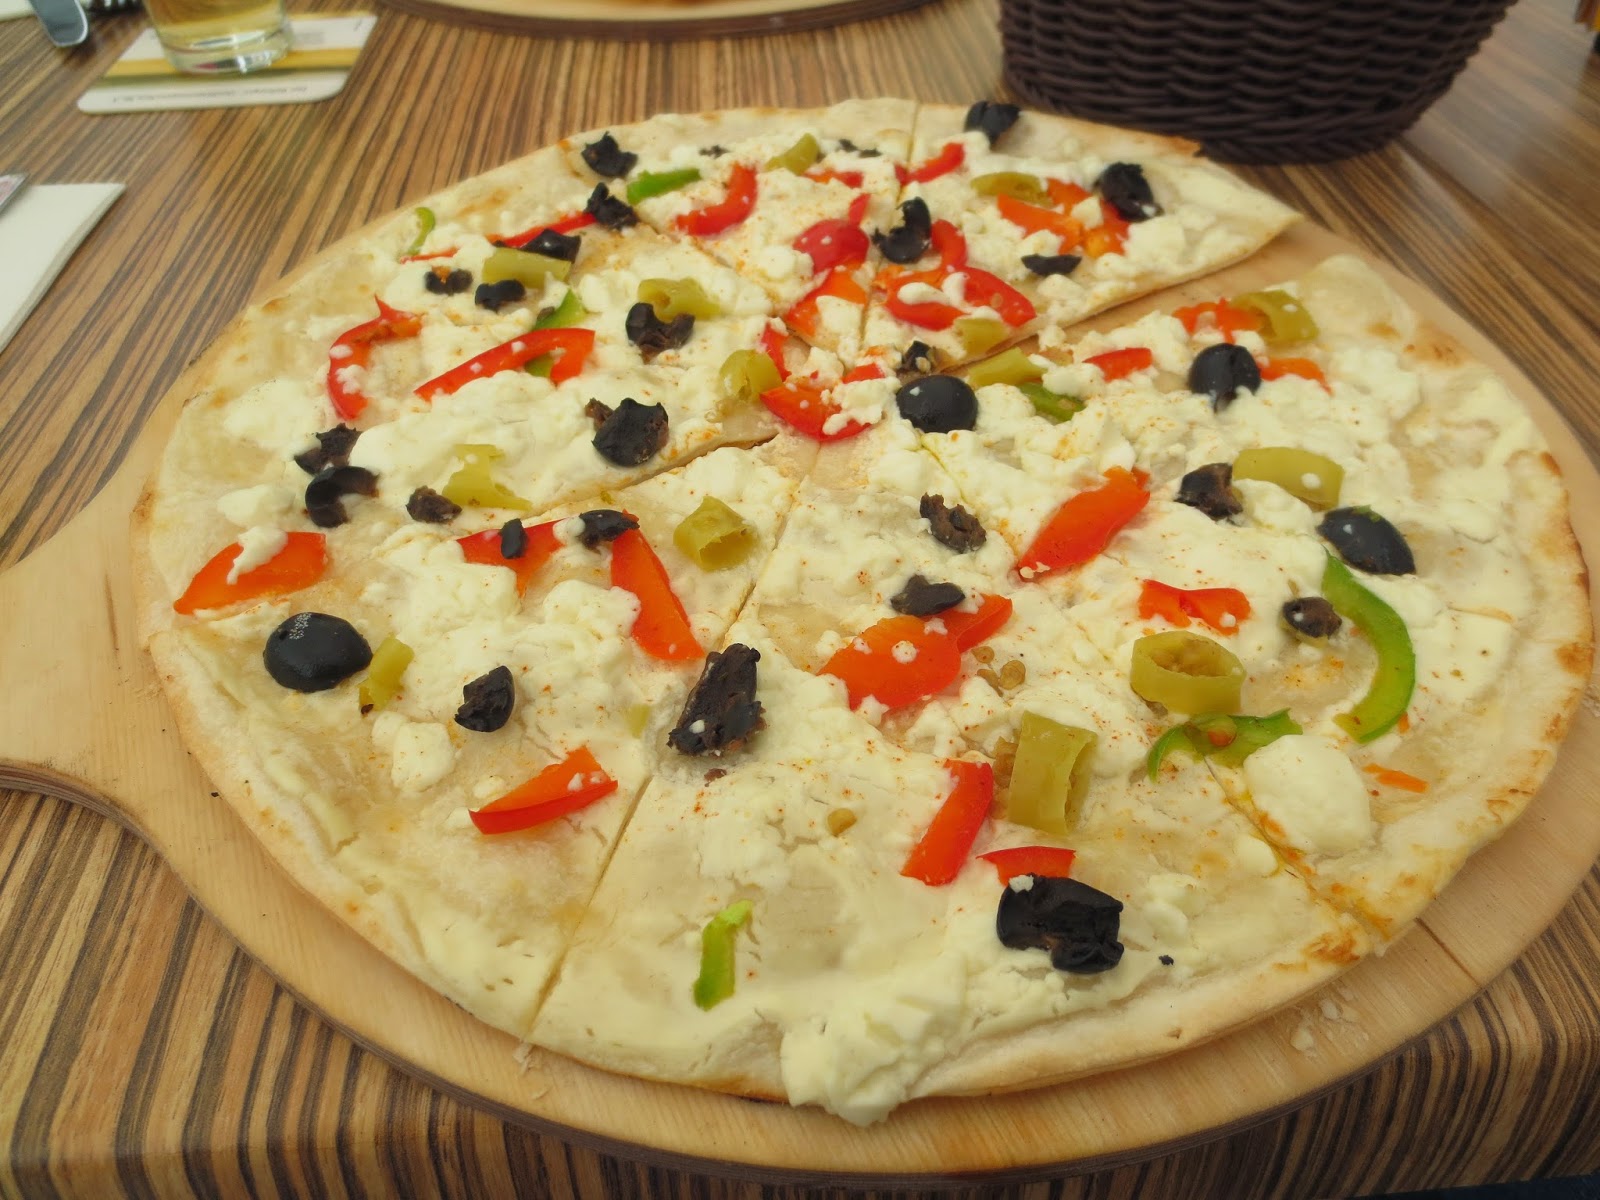
Pick A Piece Pizza
Do I feature pizza on here a lot? Maybe. But probably still not as often as I feature oatmeal. Pizza is another one of my favorite foods. It is a favorite of many, and why not? It is so versatile and can easily be tailored to please anyone. Anyway, this is a pizza from the other day. It is the pizza crust recipe we always use - the one I learned ages ago from cooking class in school and the one I have now passed on to my father. This crust recipe is so forgiving. You can make it a day ahead or five minutes ahead. It can be refrigerated or not, it can be allowed to rise or baked right away. Some techniques yield better results than others, but no matter what, it always yields a tasty, risen pizza crust. Another thing about this pizza dough recipe is that it can be made as a thin and crispy crust, a thick and doughy rising crust, or anything in between. This pictured here is a thin crust, but at the same time we also made a really thick and doughy crust, we just baked the pizzas separately. This crust can be made in either white, whole wheat, or a mixture of both, and can stand up to any toppings. Pictured here we've got ham, salami, pepperoni, sliced mushrooms, diced onions, and mozzarella cheese with tomato sauce. Yum!

Friday, October 25, 2013
Wood Fired Pizza
Today I had something a little different for lunch. Instead of preparing lunch myself at home, or going to a restaurant for lunch, I visited an outdoor food stand downtown. This stand offers only one lunch item - pizza - but the pizza has been perfected. The set-up is basically a mobile hand-crafted, wood-fired brick oven. The oven is parked outside next to a stand where the pizzas are prepared to order. The organic, whole wheat crusts are topped with just enough sauce, then your toppings of choice, which are always fresh, and cheese of course. The pizzas come in personal or family size, and gluten free crusts are also available upon request. Then the pizzas are slid into the oven via a wooden pizza board, and baked until perfection. The entire process - from ordering to eating - takes less than ten minutes. The pizzas offered today included pulled pork, Hawaiian, and the classic pepperoni and cheese, but I went with the Mediterranean. This included broccoli, tomato, onion, green peppers, and green olives. This pizza was perfect - a thin and very crispy crust, that would have been good enough even plain, but was topped with just the right amount of toppings. These pizzas are Neopolitan-style, and definitely a welcome change from the usual Americanized pizzas - with thick, doughy crusts, overloaded with sauce, cheese, and meat. These pizzas are light, but satisfying. They come in cute little boxes to go, and are given to you piping hot. I really enjoyed this pizza lunch, and I'm sure I will return to this hidden gem. Among all of the restaurants around, this stand offers pizzas that are the freshest and the quickest. They may not be the cheapest, but they certainly aren't expensive, and the quality,freshness, and attention to detail is well worth it. My only complaint - the stand is only set up at certain times and certain days.


Sunday, September 22, 2013
Pizza Muffins
Muffins are often thought of as a sweet recipe. However, there are plenty of tasty savory muffin recipes as well. These pizza muffins are a great way to use up some leftovers - chopped vegetables, cheese, and spices. You can of course vary the ingredients depending on what kind of pizza you like. If you are craving pizza, but short on time, this recipe is great to do, and is very tasty. It is also more convenient to transport. I would suggest placing some sauce and cheese not only on the top, but in the middle of the muffins as well for even more pizza flavor.
 Pizza Muffins
2 cups whole wheat or all-purpose (plain) flour
1/4 cup granulated (white) sugar
1 Tablespoon baking powder
1 teaspoon salt
1 teaspoon dried basil
1/2 teaspoon baking soda
1 cup cheddar cheese, cut into tiny cubes
1 cup plain yogurt
2 large eggs
1/4 soft margarine, melted
1/2 cup finely chopped sweet pepper
1/4 cup pizza sauce
1/2 cup shredded marble cheese
Preheat oven to 400◦F. Grease or line 12 muffin cups.
In a large bowl, stir together the first six dry ingredients. Stir in the cheese cubes.
In a separate medium bowl, whisk together the yogurt, eggs, and margarine. Stir into dry ingredients, stir in pepper.
Divide batter evenly among muffin cups. Spoon one teaspoon pizza sauce on each, then sprinkle with some cheese.
Bake for about 20 minutes, until a toothpick inserted in the center comes out clean.
Thursday, August 08, 2013
Multigrain Pizza Crust
Multigrain Pizza Crust
1 package instant yeast
1/2 cup whole wheat flour
1/3 cup oat flour
2 Tablespoons ground flaxseed
1 teaspoon salt
1/3 cup warm water
1/2 teaspoon brown sugar
In a medium bowl, mix the first five dry ingredients. Mix the sugar and water together and stir into the flour mixture. Knead for a few minutes until smooth, add a little extra flour or water if necessary. Wrap in a damp towel and let rest for at least 30 minutes.
Preheat oven to 350◦F. Grease or line a baking sheet. Roll the dough out thin, either in one big form or several smaller forms, and place on prepared sheet. Bake for 10-15 minutes until crisp.
 This can be used for a pre-made pizza crust, but I use it as a base for sandwiches, or like pita bread for breakfast. It is pretty versatile. This only makes a small batch, but may easily be doubled.
1 package instant yeast
1/2 cup whole wheat flour
1/3 cup oat flour
2 Tablespoons ground flaxseed
1 teaspoon salt
1/3 cup warm water
1/2 teaspoon brown sugar
In a medium bowl, mix the first five dry ingredients. Mix the sugar and water together and stir into the flour mixture. Knead for a few minutes until smooth, add a little extra flour or water if necessary. Wrap in a damp towel and let rest for at least 30 minutes.
Preheat oven to 350◦F. Grease or line a baking sheet. Roll the dough out thin, either in one big form or several smaller forms, and place on prepared sheet. Bake for 10-15 minutes until crisp.

Monday, October 22, 2012
Quick Lunch Pizza

As I probably said before, I tend to use the same pizza recipe every time I make pizza. However, I do have different recipes for panzerottis, pizza stromboli, and pizza rolls, all of which are excellent, trust-worthy recipes. My pizza dough recipe I actually got from cooking class in school years ago. because it is used by young students in an environment that isn't always ideal, it is quite a forgiving and no-fail recipe. I love this crust recipe, it is soft, fluffy, and tasty, and rises very high. It can be used for a thin crust pizza, but I prefer the rising thick crust. I usually use half whole wheat flour in the dough, for a more nutritious and hearty dough. This pizza I made here was a bit of a last minute decision, so I just made do with the topping ingredients I had on hand. Those were tomato sauce, chopped onion, green olives, sliced mushrooms, and mozzarella cheese. I didn't have any meat, which was fine with me since I prefer vegetarian pizzas, but it was not your typical veggie filled pizza either. Oh well, I thought it was quite good, and I had the one leftover piece for lunch today. This pizza also keeps and reheats well.
To make this pizza, I mixed up the dough early and put it in the oven, which had been preheated to 200◦F for 10 minutes to warm it. I left the dough there for two hours until I was ready to use it. By this time, the dough was nice and high, but a little sticky. This dough actually does not need any rising time, since it uses instant yeast and will rise in the oven, although it does well with some time to rest and rise. I made one round twelve inch pizza in my pizza pan, and made a small crust around the edges.
Tuesday, September 11, 2012
Chicken Pizza
Homemade pizza at our house is a popular choice for supper. We usually make two large pizzas, and often make one white and one whole wheat. We have an awesome recipe for pizza crust, that is easy and seems to never fail. It makes a nice, thick rising crust. Our toppings are often the same, we use tomato sauce, diced onion, sliced mushrooms, pizza meats such as pepperoni, salami, and ham, mozzarella cheese, and whatever other vegetables we have on hand. This time we also had some leftover cooked sliced chicken on hand. I really like chicken on pizza. Roasted chicken pieces, especially chicken breast, has a nice taste and texture that pairs really well with the tomato sauce and mozzarella cheese on the pizza soft crust. It is a great way to use up leftovers, and sliced chicken is a healthier alternative to the usual salty, fatty, processed pizza meats that are often found on pizzas. Other meats can work well too, such as pulled pork, ground beef, and even fish. You can basically use whatever toppings you like on a pizza and make it personally yours. Pictured here are three slices of the whole wheat chicken pizza we had with diced onion, sliced mushrooms, and chopped green pepper as well. The two corner pieces show off the lovely risen crust, but the middle piece gets you extra toppings. Both are great!


Monday, May 28, 2012
Parmesan Cheese Shortage
A magnitude six earthquake hit northern Italy last week. I know what you're thinking: isn't this a food blog? Well, the earthquake hit the area of Italy famous for producing the special Parmesan cheese Italians are so fond of. Some of the worst damage was done to Italy's agricultural areas where Parmesan cheese is produced. Many huge wheels of the special cheese were damaged and ruined in the shake. What does this mean? It means there is now a shortage of Parmesan cheese in Italy. Cheese that has been produced within the past little while is now ruined, and it may take a while for repairs to be made to the production sites before they are up and running again. Meanwhile, Parmesan cheese, a gourmet treat to begin with, will become even more pricey. It may even become a rare find in stores now. I am talking about the authentic Parmesan cheese imported from Italy. Imitation Parmesan just will not do (once you've had the real thing, anyway). I am not a huge fan of Parmesan cheese myself, but I do agree that it makes a nice addition to pasta dishes, soups, sauces, and pizzas. Many Italian families use Parmesan cheese as an addition to their pastas, pizzas, and salads everyday. My grandmother buys real good Parmesan cheese in bulk, and always gives a portion of it to our family. We keep it in the freezer and take it out as needed. It comes in a huge block, and we cut off pieces and finely grate it. Mostly we use it on pasta. I remember when I was younger, my grandmother always made sure we were extremely cautious around the bowl of Parmesan cheese because it was so expensive, and she did not want us to waste any of it. Because it was ingrained into our heads from a young age that the stuff was a real treat, we still use it quite gingerly. In fact, today she actually encourages us to use more. That might change now with the current situation.
 PHOTO CREDIT:"Parmesan-Cheese1.jpg"
http://howisitmade.org/how-is-parmesan-cheese-made/ . How Is It Made?, n.d. Monday, May 28, 2012.
PHOTO CREDIT:"Parmesan-Cheese1.jpg"
http://howisitmade.org/how-is-parmesan-cheese-made/ . How Is It Made?, n.d. Monday, May 28, 2012.
Tuesday, May 22, 2012
Giant Cookie On A Skillet
Yesterday I went to one of my favorite restaurants for lunch. Since that is
the restaurant I visit the most often, I am quite familiar with the menu, and
have already tried many of the items on the menu. I had a delicious panzerotti
for lunch, which is basically an enclosed pizza. This is a pizza restaurant, and
actually it is my favorite pizza aside from homemade. I wanted a little something different, so I opted for the panzerotti. Of course the
panzerotti was delicious, with a perfect sauce, a nice crust, and an excellent
filling (you can choose your filling ingredients). However, the restaurant
recently introduced a new dessert, and that is what I was looking forward to the most. For awhile now, this restaurant has always had a dessert called the "Brownie Skillet", which I thought was one of the best dessert inventions ever. Basically, you take a chocolate brownie, cook it on a skillet, then top it with vanilla ice cream, whipped cream, and chocolate sauce. It gets delivered to the table, right on the skillet, piping hot. Sounds simple, but it is so genius. Now they have come up with a new creation: a cookie skillet. It is a giant (and I mean GIANT) chocolate chip and chunk cookie, the biggest I have ever seen, cooked on a skillet, then topped with vanilla ice cream, whipped cream, and chocolate sauce. It is absolute heaven. And totally worth it (it's actually very reasonably priced in my opinion). The only complaint I have, is I would have preferred no whipped cream (not a huge fan), and double (or triple) the chocolate sauce (a huge chocolate fan). Other than that though, it was absolutely delicious, and I would definitely get it again. The menu states it as being "Delightfully Craveable" and the caption sums it all up very nicely, "Where have you been all my life?" Who knows, I might even try making it at home myself some day, and experiment with different kinds of cookies! Also: this divine dessert is waaaayy better than it looks. I don't think any picture could ever do it enough justice. You will just have to experience it for yourself!


PHOTO CREDIT:"PD2012_Web Dessert Menu (1)" http://www.pizzadelight.com/5-desserts-menu.html.Pizza Delight, n.d. Tuesday, May 22, 2012.
Thursday, May 03, 2012
Store-bought versus Homemade
On supermarket shelves today, there is an extremely wide variety of food products to choose from. Food items now come in every size, shape and flavor we could ever imagine. But it is still difficult to beat the taste of homemade baked goods. One of the reasons I have so many things to post on this blog is because I make many of the foods I eat. I am not completely opposed to store-bought goods, but there are some things that I do refuse to eat store-bought versions of, just because I think homemade tastes so much better! However, there are some store-bought items that have perfectly acceptable quality, in fact, there are even a few specific items where I think store-bought actually taste better than homemade. Of course, everyone has their own opinions, but here are some of mine.
- BREAD There is nothing like homemade bread, and there are so many different kinds to choose from. Some breads are very easy and quick to make at home, and they taste amazing still hot from the oven. I do prefer commercial bread for most sandwiches though, because it is sturdier, uniformly shaped, hold up well, and has a mellow flavor and texture. It is also more convenient to use store-bought bread for sandwiches, as we would have to make bread every day at this house to keep up. I also have yet to master the art of even bread slicing.
- COOKIES Usually I prefer homemade cookies, especially fresh and hot from the oven. There are some pretty good brand-name cookies out there that you just can't duplicate at home.
- CAKE You've got to go homemade with cakes. Stores can make good cakes, but I find homemade cakes just taste less artificial and more realistic. I don't even really like to use boxed mixes for cakes - it has to be from scratch. And I definitely do not like store-made or ready-made canned frostings.
- MUFFINS Although you can get some pretty delicious-looking, giant muffins at the grocery store, I much prefer homemade. Homemade muffins are often fresher, moister, and more tender than commercial muffins. Besides, who can eat a muffin that big anyway?
- SQUARES I find that stores don't tend to carry a wide variety of choices in bars and squares. Homemade are usually tastier and are so easy to make.
- PIZZA I like to make homemade pizzas and panzerottis with dough from scratch, but there are also some frozen pizzas, store-made pizzas, and restaurant pizzas I enjoy. There are also some that I absolutely hate. Pizza, which seems to be such a basic food, can differ in so many ways from place to place. Overall, I am not very picky when it comes to pizza, and I will eat pizza from most places, although I do prefer some kinds over others.
Tuesday, May 01, 2012
Crispy Fruit Pizza

Thursday, April 26, 2012
Pizza Roll Ups
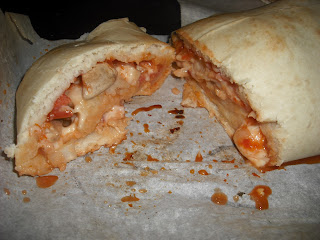
This is my new favorite supper alternative to regular pizza: Pizza Stromboli. These are faster, easier, less work, and in my opinion, tastier, than making my usual homemade pizza. Basically these pizza strombolis are simply an easier, softer, and fluffier version of pizza dough. The dough is rolled out into a thin rectangle, spread with sauce and sprinkled sparingly with toppings (so they won't fall out), and finished off with lots of shredded pizza mozzarella. Then it is rolled up, jelly roll style, sealed, and placed on a baking sheet. It is actually a lot easier and less elaborate than it sounds. The strombolis are then baked in the oven for 15-20 minutes, and they are ready to serve (although it helps to let them rest for a few minutes before cutting them, as they will be a lot neater, but this isn't necessary and is sometimes difficult).
The first time I tried out this new recipe was about mid March, and it worked out beautifully. This time I made two separate strombolis at the same time. Doubling the recipe and then dividing the dough in half would have also worked, however I wanted to try making one of the strombolis whole wheat. I really like whole wheat pizza crust, but I do find it can be a bit dry and a tad too wheaty. I did not find this at all with the whole wheat stromboli, even though I used all whole wheat flour, and not half whole wheat and half white flour. The whole wheat stromboli tasted very good and had a pleasant texture.
I will probably be making this again in place of the usual pizza, although I will turn to the trusty old pizza recipe again from time to time. This stromboli can use any of the same toppings that would normally be used for pizza, and can be varied to suit your personal taste. As you can see in the picture, the dough is quite forgiving and rises very well. If the dough tears in places, it can easily be patched up with the ends. You might also find that some of the filling may try to escape, but it's not a big deal. You can even sprinkle some extra toppings on the outside of the dough for more flavor. Be sure to line your baking sheet with parchment paper for a much easier clean up!

Wednesday, March 21, 2012
Pizza Stromboli
For supper, I decided to try something a little different than the usual pizzas we make. I found a recipe for what was called "Family-Style Stromboli". It appeared to be a pizza in jelly-roll form. It seemed interesting and tasty enough, so I decided to give it a try. I just used the dough recipe for the crust, and chose fillings to please my family. The original recipe used more vegetables in their filling and less pizza meats than I did. The result was even better than I had expected! This is a very nice dough to work with - it is soft and easy to shape, doesn't tear easily, and when baked, is soft and fluffy. The toppings baked nicely into the crust (I recommend using lots of cheese), and the roll cut well. I would definitely make this again in place of pizza any day - it is quicker and actually easier, and I might just argue that it is tastier too!
 Pizza Stromboli
2 cups all-purpose flour, divided
1 package quick-rise yeast
1 1/2 teaspoons granulated sugar
1 teaspoon salt
2/3 cup warm water
3 Tablespoons oil
Preheat oven to 400◦F. Grease a baking sheet, or line with parchment paper.
In a large bowl, mix 1 cup flour with the yeast, sugar, and salt. Add water then oil, mix until well blended. Stir in 1/4 cup of the remaining flour at a time, working the flour in to make a soft dough. Spread dough into a large rectangle (about 16x9 inches) on the prepared baking sheet.
Spread dough with a modest amount of pizza sauce, and sprinkle with your favorite toppings (sliced meats, finely chopped vegetables, grated cheese, etc.) Go easy on the toppings, too many and they will just fall out and the roll will not roll properly.
Bake for about 20 minutes, or until crust is golden. Let the roll rest for 10 minutes (if you can) before slicing, it will make much neater slices instead of just falling apart.
Sunday, March 11, 2012
Decorated Dessert Pizza

Saturday, March 10, 2012
Brownie Pizza
Ever try making a brownie in a pizza pan? It's quite fun, and makes for a lot more decorating options. It is also easier to slice into wedges and serve. Here is the recipe I used to make a twelve inch pizza. It works very well, bakes nice and evenly, and is simple and quick to whip up. I found the recipe in my big Hershey's Recipe Collection recipe binder.
Brownie Pizza
3/4 cup butter or hard margarine, melted
1 1/2 cups granulated sugar
1 1/2 teaspoons vanilla extract
3 large eggs
3/4 cup all-purpose flour
1/2 cup unsweetened cocoa powder
1/2 teaspoon baking powder
1/4 teaspoon salt
 Preheat oven to 350◦F. Line a 12-inch pizza pan with aluminum foil, grease foil.In a large bowl, mix the butter, sugar, and vanilla. Add the eggs.
In a separate medium bowl, stir together the remaining dry ingredients. add to butter mixture, mix well. Spread evenly into prepared pan.
Bake 20 to 22 minutes or until just set and center springs back when lightly touched. Decorate as desired after cooling completely.
West Side Publishing. "Jumbo Jack-O'-Lantern Brownie." Recipe. Hershey's Classic Recipes, Lincolnwood Illinois: Publications International, Limited, 2009. 265.
Brownie Pizza
3/4 cup butter or hard margarine, melted
1 1/2 cups granulated sugar
1 1/2 teaspoons vanilla extract
3 large eggs
3/4 cup all-purpose flour
1/2 cup unsweetened cocoa powder
1/2 teaspoon baking powder
1/4 teaspoon salt

In a separate medium bowl, stir together the remaining dry ingredients. add to butter mixture, mix well. Spread evenly into prepared pan.
Bake 20 to 22 minutes or until just set and center springs back when lightly touched. Decorate as desired after cooling completely.
West Side Publishing. "Jumbo Jack-O'-Lantern Brownie." Recipe. Hershey's Classic Recipes, Lincolnwood Illinois: Publications International, Limited, 2009. 265.
Thursday, February 16, 2012
Heart Pizzas
This is another dish I made for Valentine's Day: heart-shaped pizzas. I just made a batch of regular pizza dough, rolled it out, and cut it into hearts with a cookie cutter. Then I did some fine-tuned trimming with a sharp knife. You have to be careful not to stretch the dough too much, or it will just spring back and not look like a heart at all. Also, after the pizzas are baked, the dough rises a bit, and the hearts aren't quite as uniform in shape, but they are still pretty. I spread some sauce on to within approximately 2 cm of the edge, to show the heart-shaped crust, and put on some toppings. I kept the sauce to a minimum to avoid the dough becoming soggy and overladen, and I also went light on the toppings. The pizza turned out crisp on the outside, and nice and fluffy on the inside.
You could also use heart shaped pans, if you have them, or make one big heart pizza. I opted to make miniature pizzas, which are more like pizza slices.

You could also use heart shaped pans, if you have them, or make one big heart pizza. I opted to make miniature pizzas, which are more like pizza slices.

Subscribe to:
Posts (Atom)